
Spring is here and Easter is only a couple of weeks away! For hundreds of years, eggs have been a symbol of spring, birth, and new life—and colorful Easter eggs are even more special. Add a pop of color to your spring display by making these bright and vibrant Button Covered Easter Eggs.
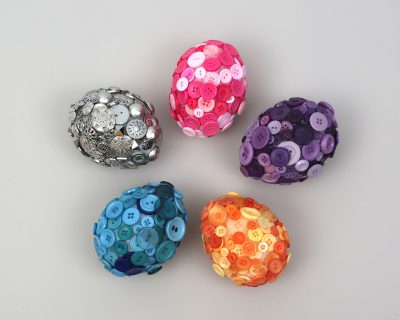
These easy Button Covered Easter Eggs are a great way to make your decorations stand out. You can arrange them in a bowl for a unique centerpiece or use them to fill a clear glass vase. The foam base makes them lightweight, so you can even hang them from ribbon or twine.
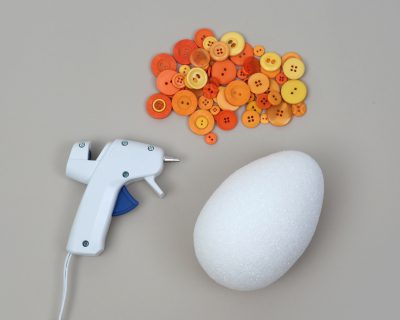
To create these Button Covered Easter Eggs, you will need the following materials:
Styrofoam eggs
Glue gun
Bamboo skewer
Variety of buttons
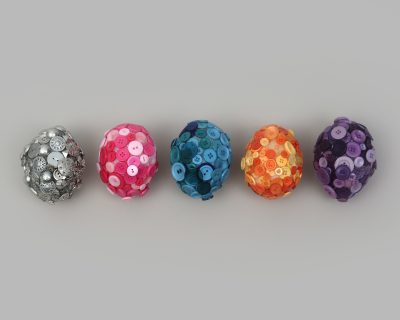
These eggs look fantastic if you pick buttons that are all the same color, or very close to it. Depending on your decoration colors, you can go with matte, glossy, metallic, pastel, or brightly colored buttons in a range of different hues. The Button Jars are great for this project.
Get ready to assemble the egg. If you’d like, you can paint the egg with acrylic paint ahead of time to help ensure a perfectly even color. You can also leave it white to help the buttons really stand out.
Insert the skewer into the bottom of the egg in order to make it easier to handle. Start gluing buttons to the egg. Keep layering until the Styrofoam is completely covered. This generally takes about half an hour to an hour per egg.
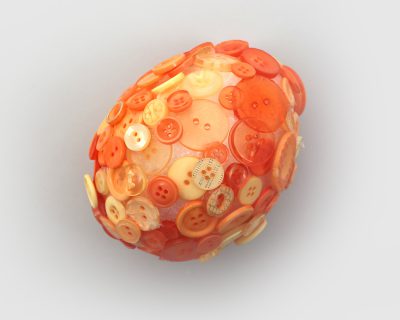
Remove the skewer and trim off any extra glue. Now you’re done!
These eggs are just one example of button craft projects you can create to celebrate springtime and related holidays. I’ll be posting more seasonal decorating ideas coming up, so come back soon and enjoy your Easter!
HAPPY CRAFTING!