
With Halloween quickly approaching and stores filled with candy, costumes and all other props for the season something tells me it’s time to get moving on getting our Halloween posts up!
Recently I created some fun whimsical button projects for Hancock Fabrics and wanted to share these with everyone. I’ve included in todays blog two quick instructions for the Black & White Button Wreath and Button Candy Corn- sometimes it’s the “INSPIRATION” that’s needed to get us motivated to light our fire!
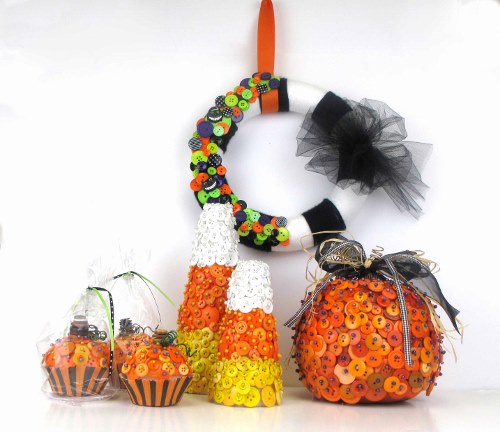
Button Candy Corn
Halloween Button Yarn Wreath
Halloween Button Cupcakes
Button Styrofoam Pumpkin
So have I inspired you to try any of the above? Here are the materials you will need for each of the projects shown:
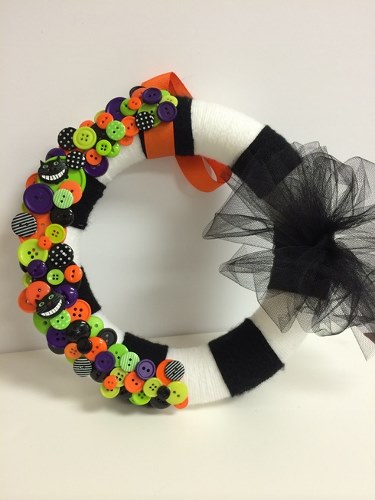
Halloween Button Yarn Wreath:
Big Bag of Buttons 5500/2002 Carnival, 5500/2005 Tuxedo & 5500/2001 Rainbow (1 bag each)
Favorite Findings 5500/450 Clean, 5500/1471 Black & 5500/1469 green (1 pack each)
JHB 28001 Cat Face (1 card)
9 inch Styrofoam wreath; black and white yarn; black tulle/head pins/hot glue
Completely wrap wreath with white yarn and secure with headpin in back. With black yarn – wrap approximate 2 inch wide sections and secure with headpin in back (you want to leave 2 1/2″ between each section. Glue buttons onto on half of wreath (refer to photo) begin with your larger buttons on bottom and layer as you go along. Add decorative buttons (cat face, stripe, dot buttons on top). Add tulle to other side of wreath and ribbon for hanging.

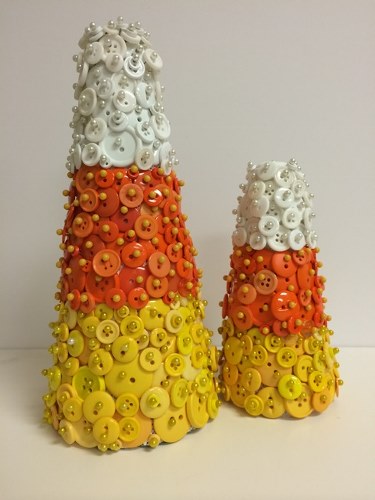
Button Candy Corn: this is truly an easy project to create and such a whimsical one too!
Crafting with Buttons 5700/9 orange 5/8″ & 5700/32 orange 7/8″ (4 packs each)
Big Bag of Buttons 5500/2001 rainbow (you just need the orange and yellow)
Button Jars 5400/1003 white & 5400/1010 marigold (2 jars each)
1 – 9″ & 6″ Styrofoam cones; yellow and white headpins; ruler and pencil.
Sort buttons into color groups; white, orange, yellow. Mark cones into 3 even sections. Starting from the bottom and work your way up. Stack buttons for the layered look (refer to photo). With the quiliting pin slide one or two buttons thru button and insert into cone. Fill in gaps where needed.
So what are you waiting for – lets get crafty! BUTTON CRAFTY!
Happy Halloween!
Happy Crafting!
We are a team of craft-obsessed, button loving people! You probably use buttons almost every day without giving it much thought – they keep our shirts closed and our pants up (hopefully!) - but buttons can be so much more! We created this blog to share all the fun, creative ways we’ve found to use buttons. Our product development team is always coming up with great new button shapes and colors, in addition to new products, so we will always have something new to share with you!