
New Button products are always exciting to work with – your creative mode clicks into motion and ideas begin spewing out and there’s no end to what you can create!
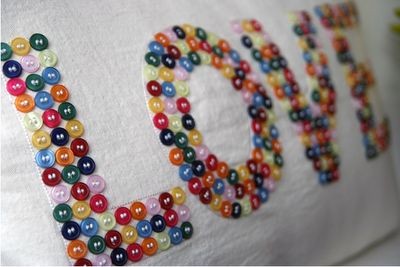
So, when 100 Buttons for sewing and crafting was introduced needless to say I knew I had to utilize ALL eleven (11) colors that were available! Not long ago I found a project on Pinterest and put it in my “can I make this” folder! If you scroll to the bottom of my blog I’ve placed the original project found on Pinterest for reference…
Well today I’m sharing that outcome…. So make yourself comfortable in that cozy chair – hmmm wish you had a pillow to lean on? Well now you will. So introducing….
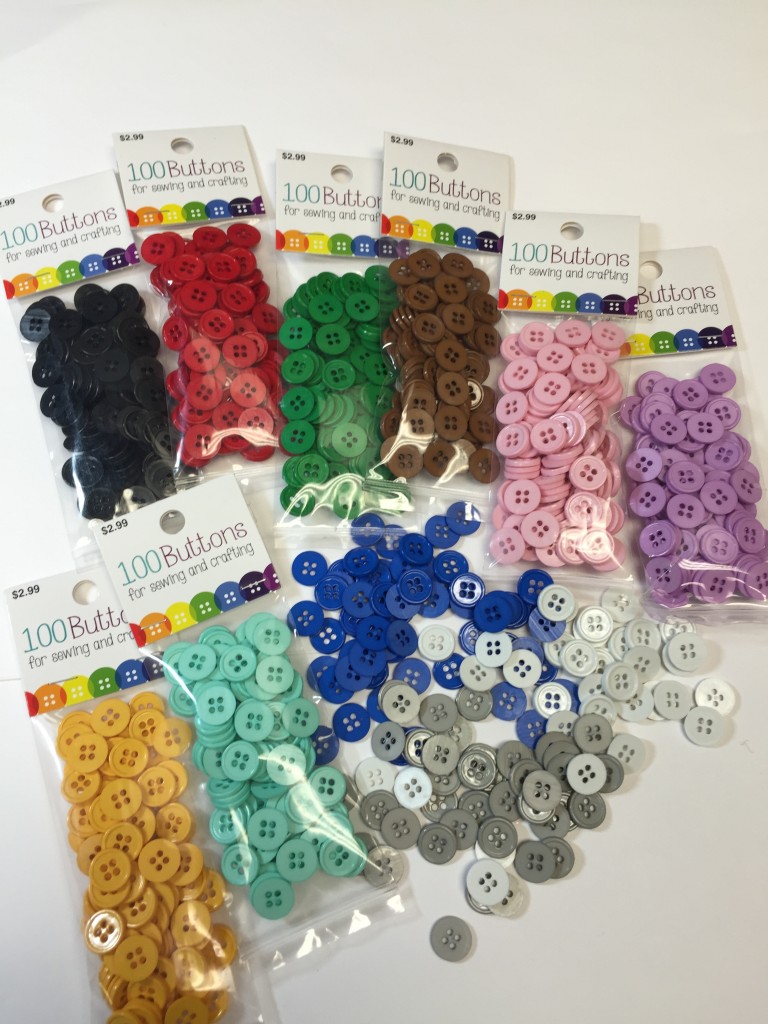
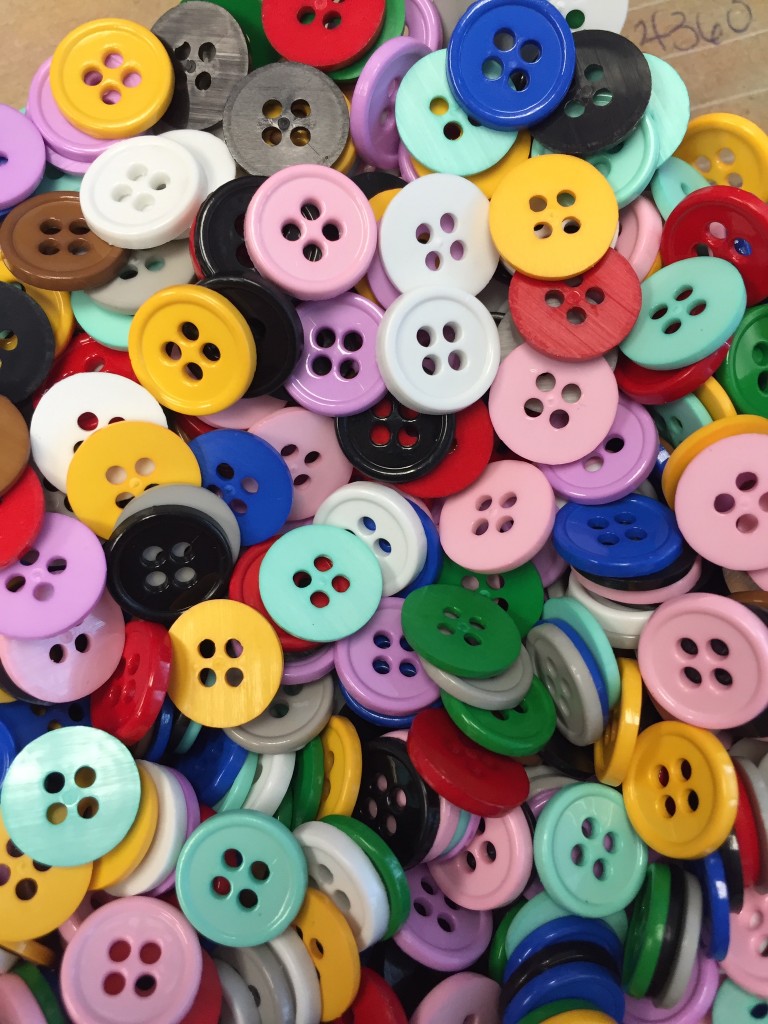
All these packs of 100 buttons are available at Joann Fabrics you can also purchase them on our website.
In Joann’s look for: 550001751 Blue; 550001752 Black; 550001753 Lilac; 550001754 Yellow; 550001755 Red; 550001756 Green; 550001757 Brown; 550001758 Grey; 550001759 Pink; 550001760 White; 550001761 Mint
I will say this is not a one-day project – that is unless you’re a quick sewer! I did do this in three days maybe four… But once you get started you do want to finish!
Materials: 100 Buttons – 1 bag each – trust me you will have leftovers for additional projects!
1 yard Linen Fabric or fabric of your choice; needle & thread; scissors; pinking shears (scissors)
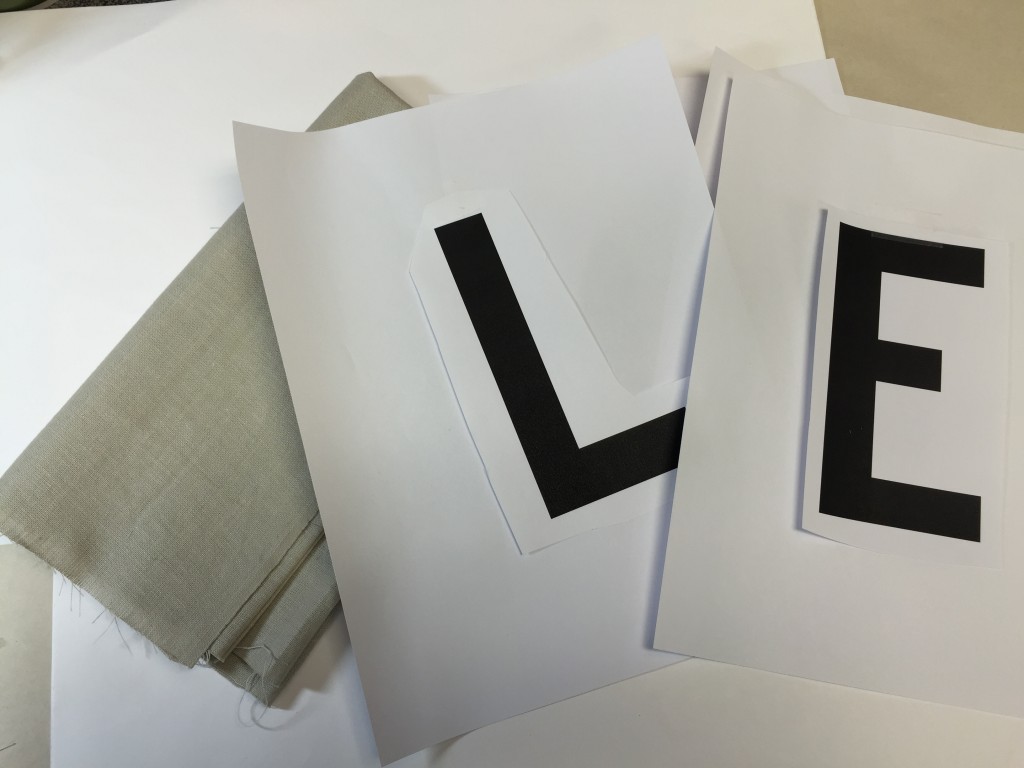
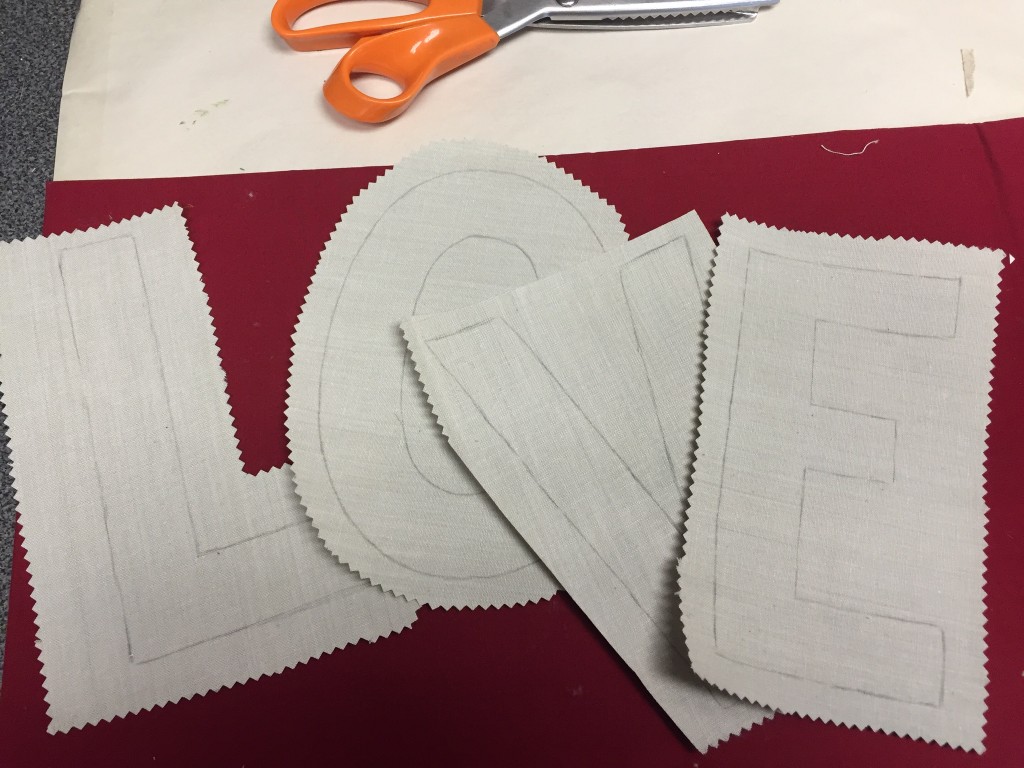
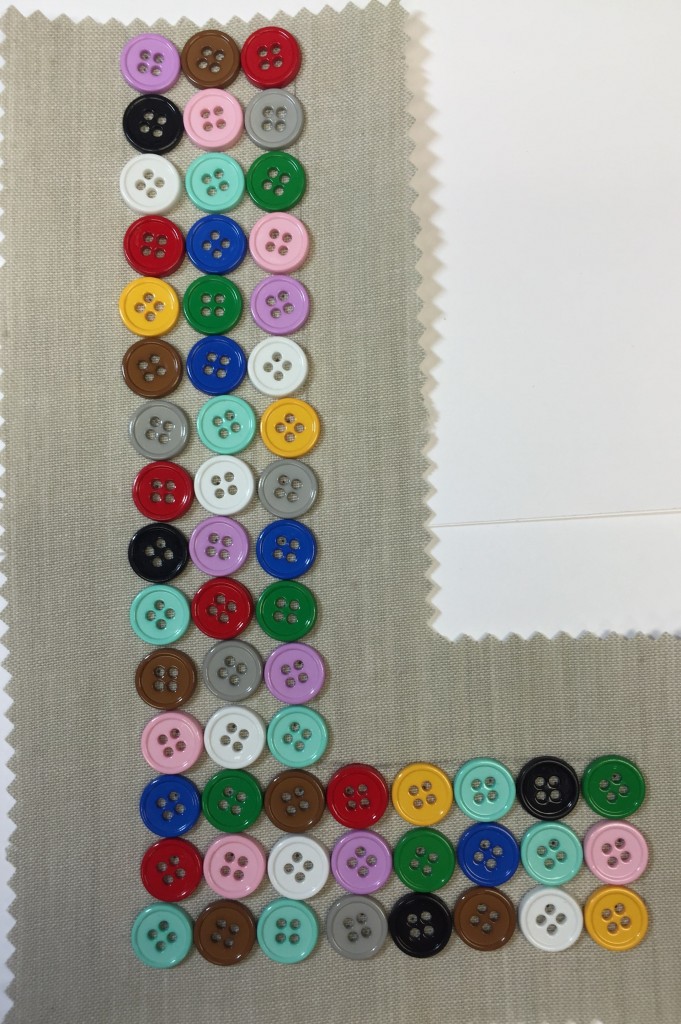
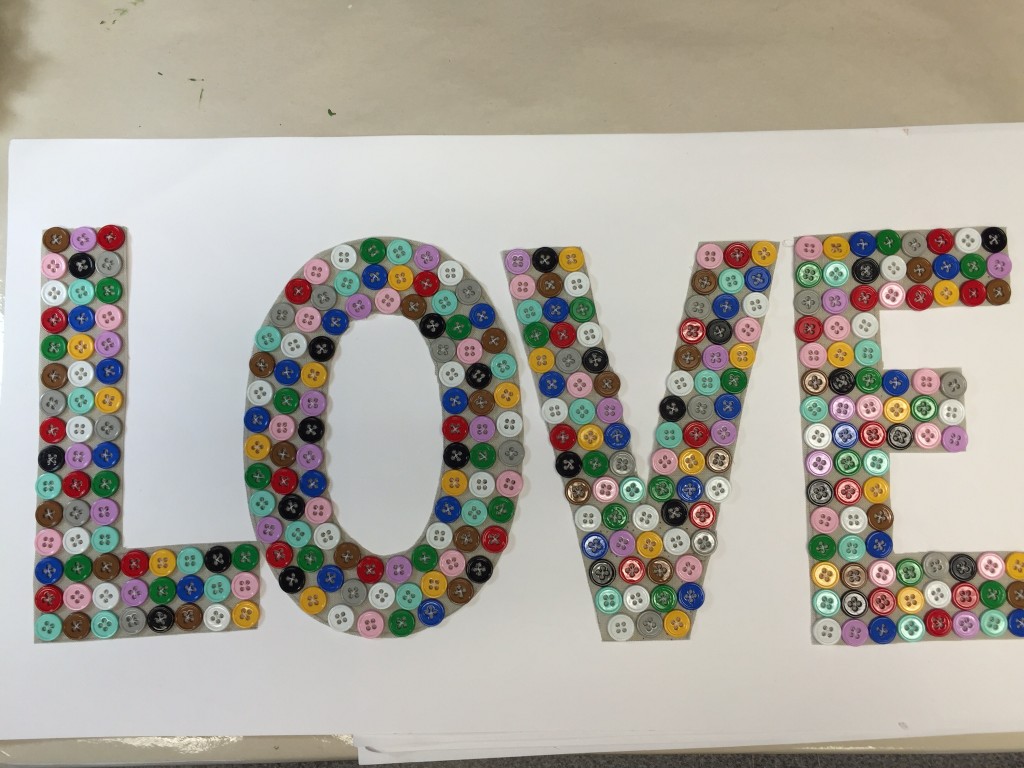
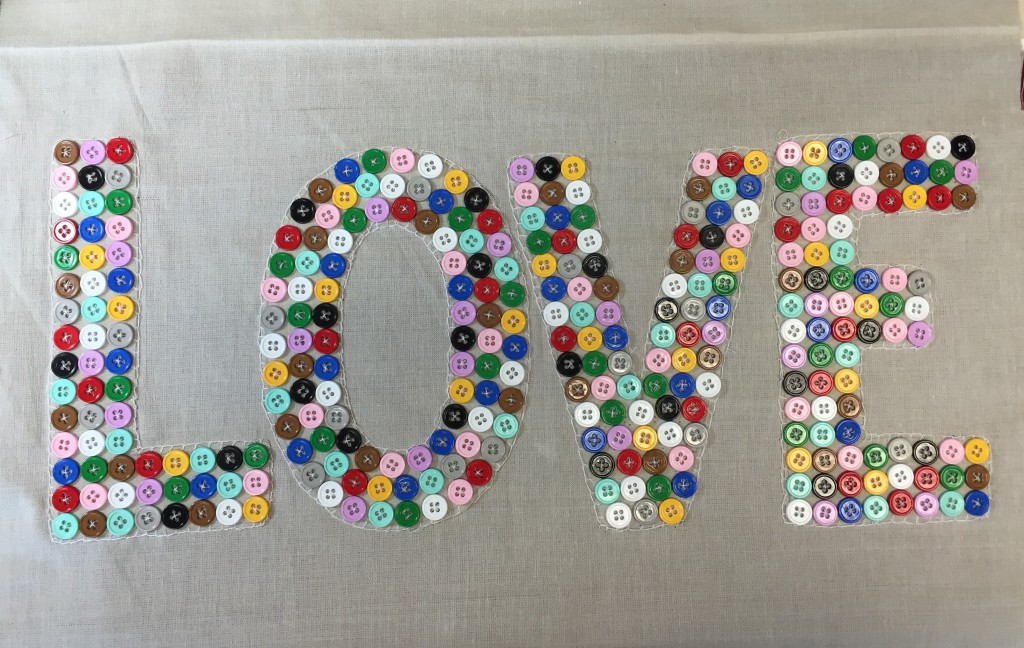
Letter template – L O V E
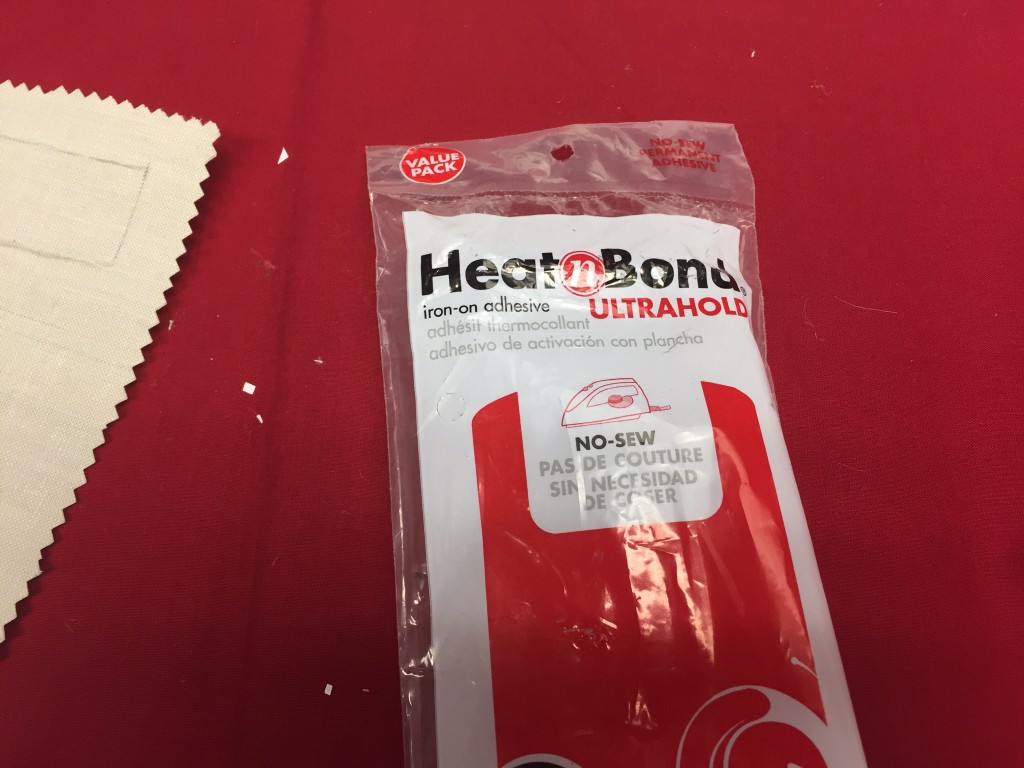
Computer/printer; Heat n Bond – iron on adhesive; pencil; pillow form or fill
fabric; letter template will depend on how large you want your pillow. For my pillow it was oblong so approximately 12 x 20. Remember to add another 2 inches on each side for seams.
Select and print out letters to spell L O V E. Layout out your letters to see if this is the right size. Make sure to measure out your fabric larger than the pillow form (remember you will have to sew and leave some seam going around. As you can see below – my pillow will have a fold over with 3 seams in addition to 2 inches on all 3 sides (as stated above).
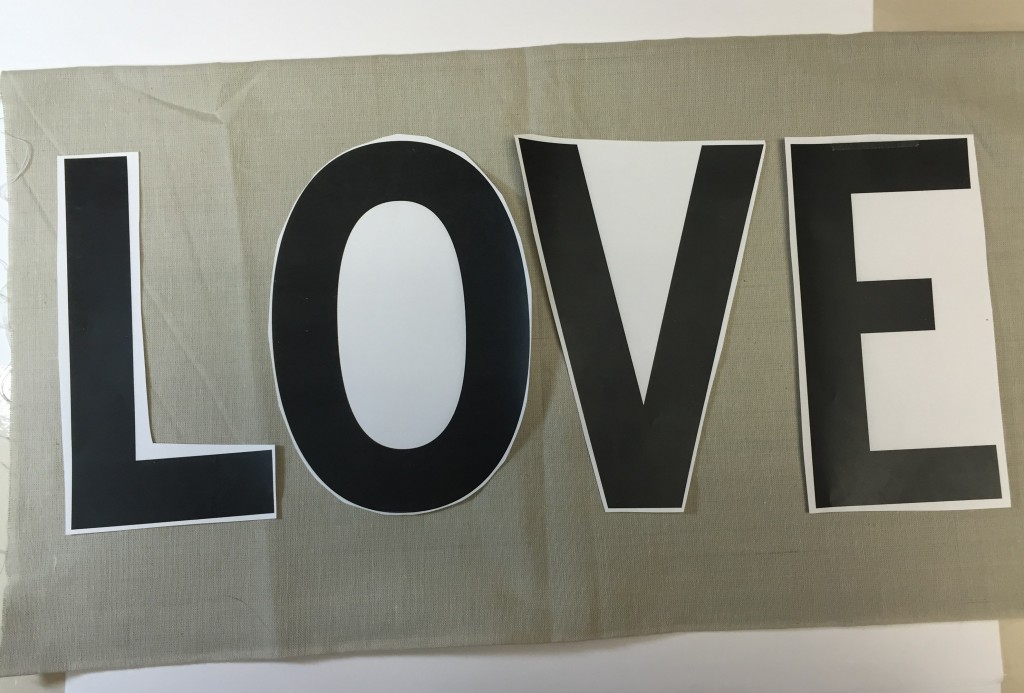
Using your iron – adhere the “iron-on adhesive” to the back of the fabric which you will be using for your letters (this is another piece of the linen fabric approximately 20″ w x 9″ h. With your pencil, lightly trace letters onto fabric. Cut out letters using your pinking shears scissors this will prevent fraying. Leave enough to work with – refer to photo for reference…
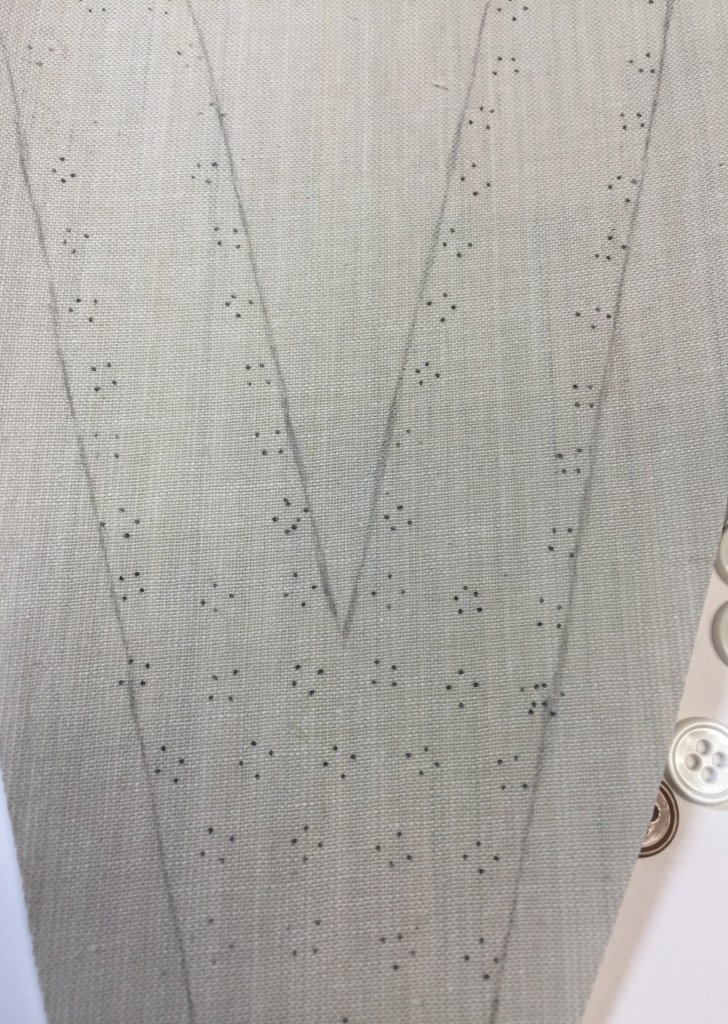
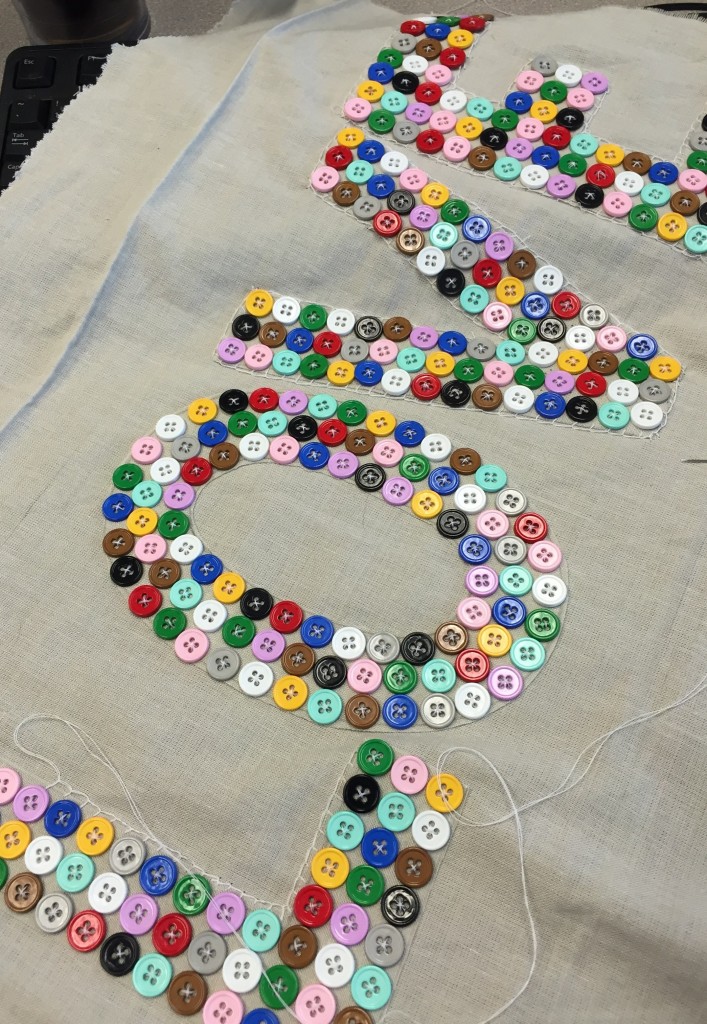
Next…open ALL your Button packages and mix in a bowl. As in any project I do, I like to layout my buttons to see what it will look like and even take a photo with my camera and refer to it as I go along. I know it’s an extra step but it helped me – I laid out my buttons on each letter and with a sharp tip pencil placed marks in the button holes to indicate where to sew
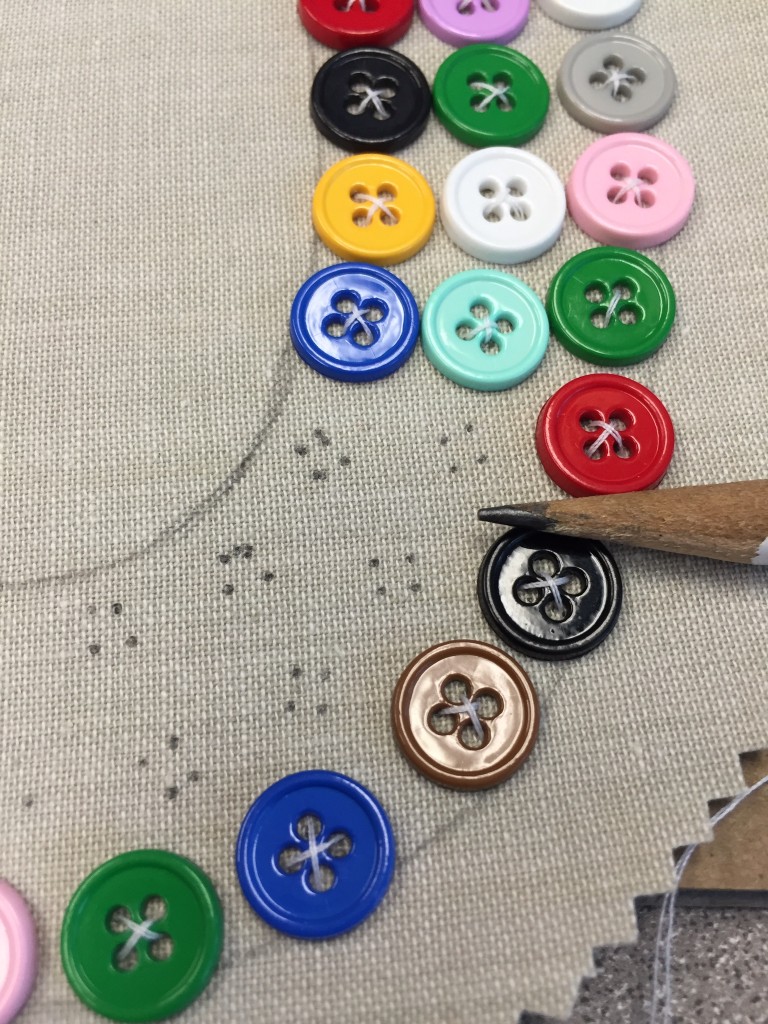
Once buttons are sewn onto your fabric, you won’t see the dots…Use needle and thread to begin sewing the buttons on – yes each button does get sewn on… Another thing to remember leave the paper backing from the iron-on adhesive this provides some stiffness to the fabric as you stitch.
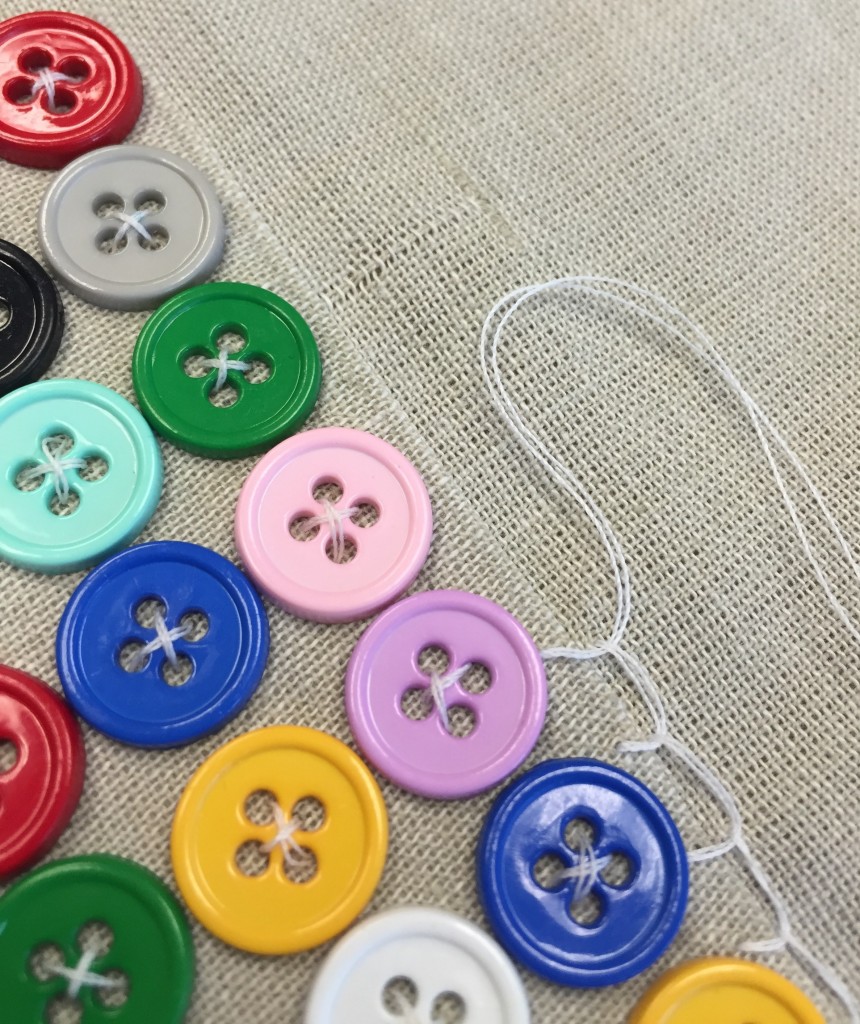
Without stitching…
With stitching…I used white thread throughout my project – you can use any color you desire.
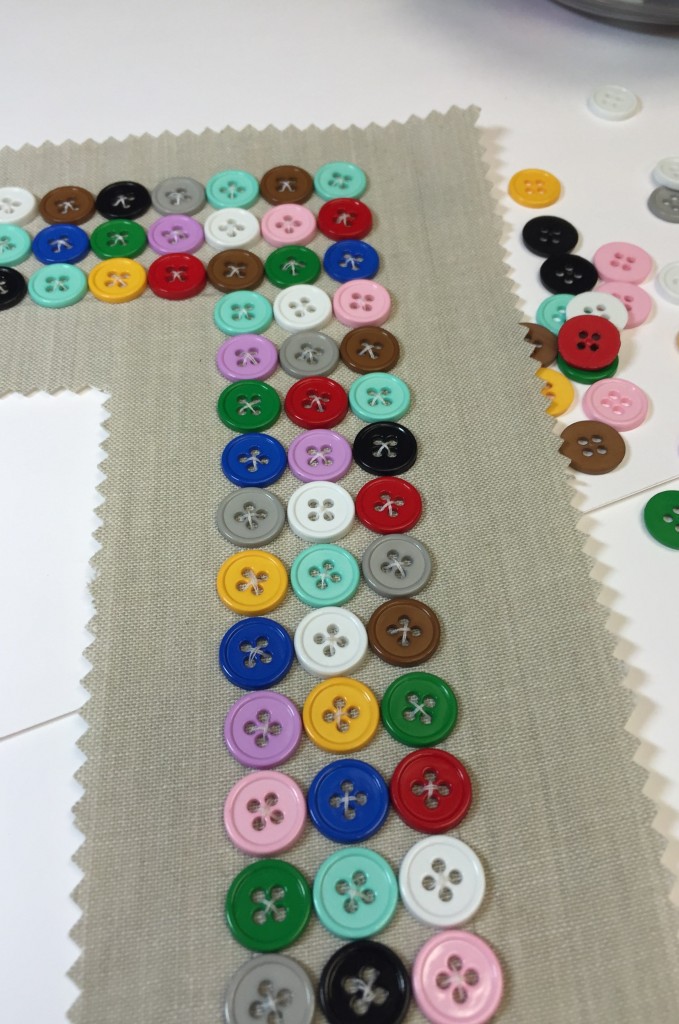
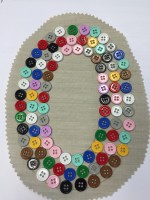
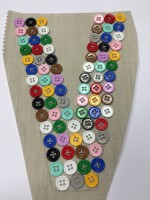
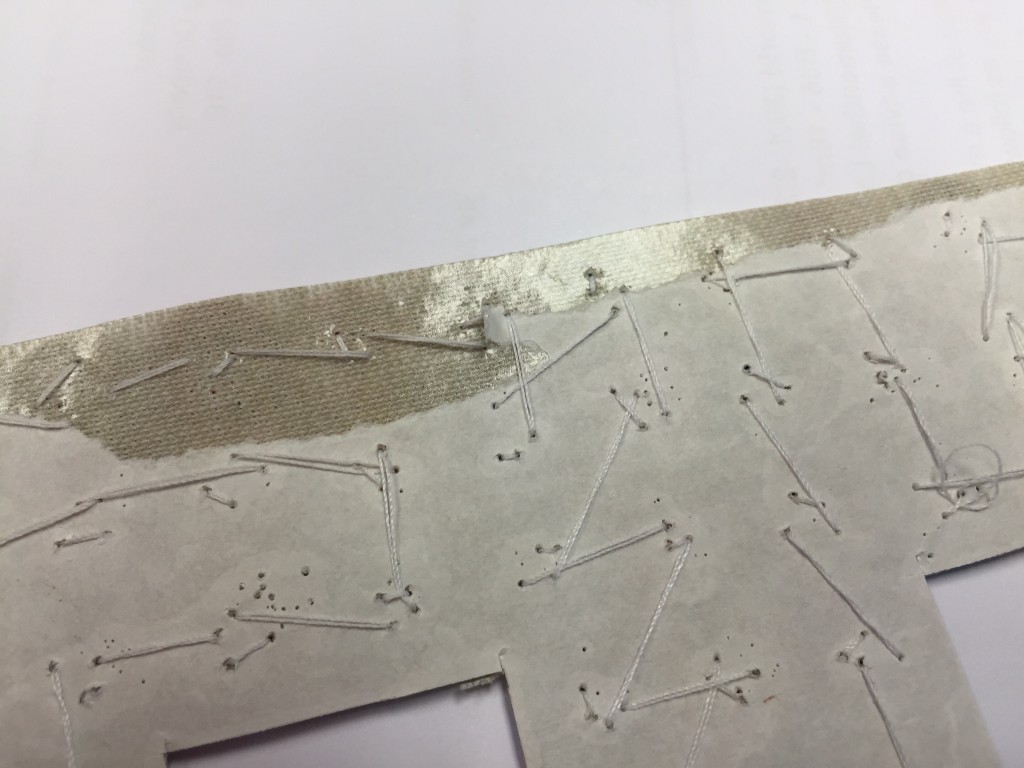
Next step is to cut away excess fabric from the letters (cut along the edge of your buttons). Refer to photo below.
Carefully and gently remove the backing by peeling away the white paper.
Working with your “pillow” fabric & letters:
Lay your buttons down on a flat and even surface (you want to lay your button letters face down) so your adhesive is facing up! Place your pillow fabric ontop carefully not moving your letters. You may have to do this several times to get it right! Place an additional fabric over that – this prevents any adhesive getting onto your iron… You will now be ironing your fabric onto your letters. Follow setting instructions on the package.
TIP: iron your pillow fabric prior to adding letters – this way your guaranteed non-wrinkled fabric under your letters.
Gently lift fabric to see if your letters adhered to your fabric – if not you may need to increase the heat settings on your iron.
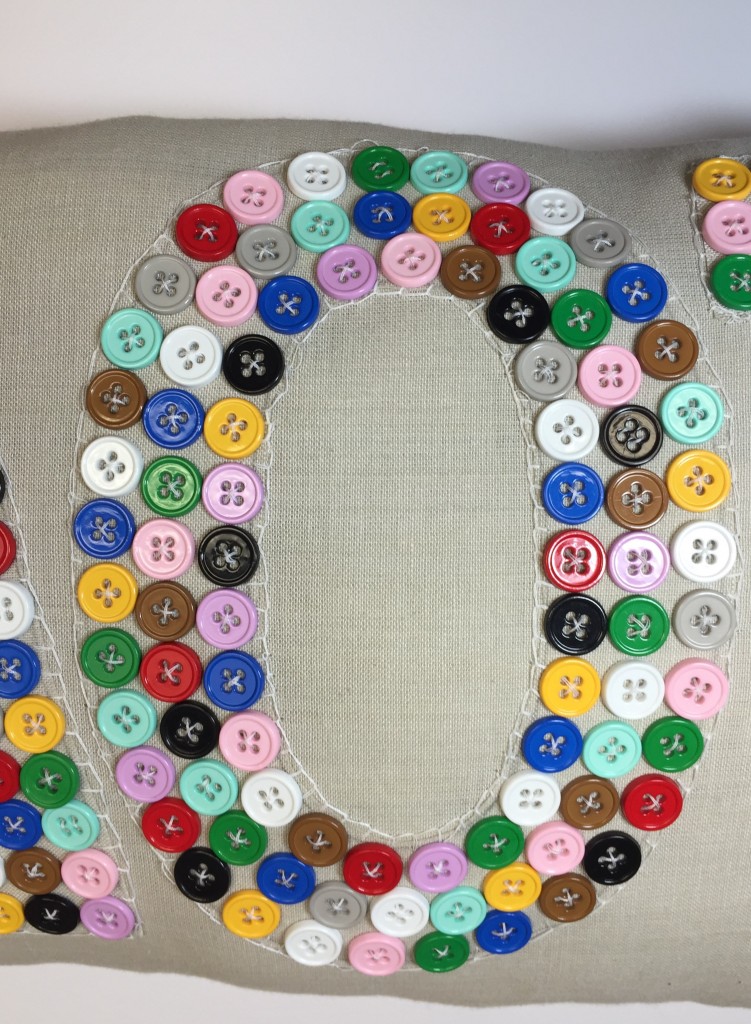
Here’s another extra step I did – I ended up doing a blanket stitch around all my letters as shown in the photo below this secures all my letters onto the fabric. You can do any stitch you desire and with any color you prefer…
So once your done it should look something like this…
before sewing up the ends – run the iron through it one more time to get those wrinkles out. Sew two sides closed and 1/2 way on the top – you need to have an opening for the filling or pillow form depending on the size you selected to work with. Tip: you can also add a zipper
For my pillow I hand stuffed/filled – make sure to get into those corners! Fluff as you go along…
It does look lumpy – but just move the filling around to even.
Hand stitch close the top.
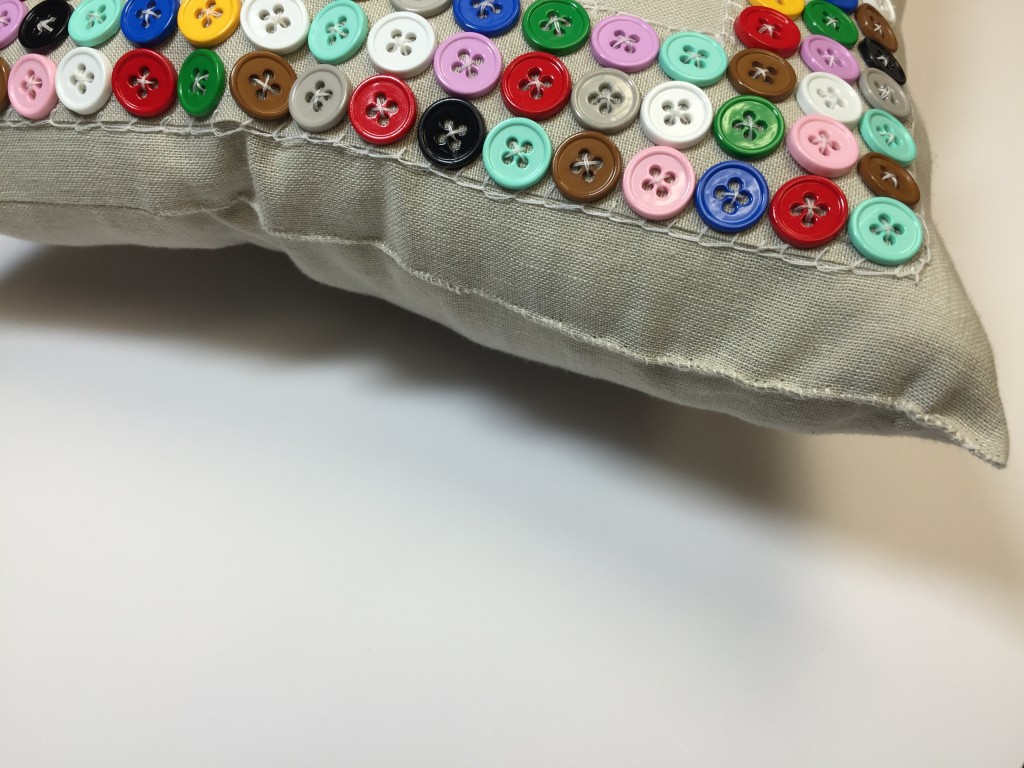
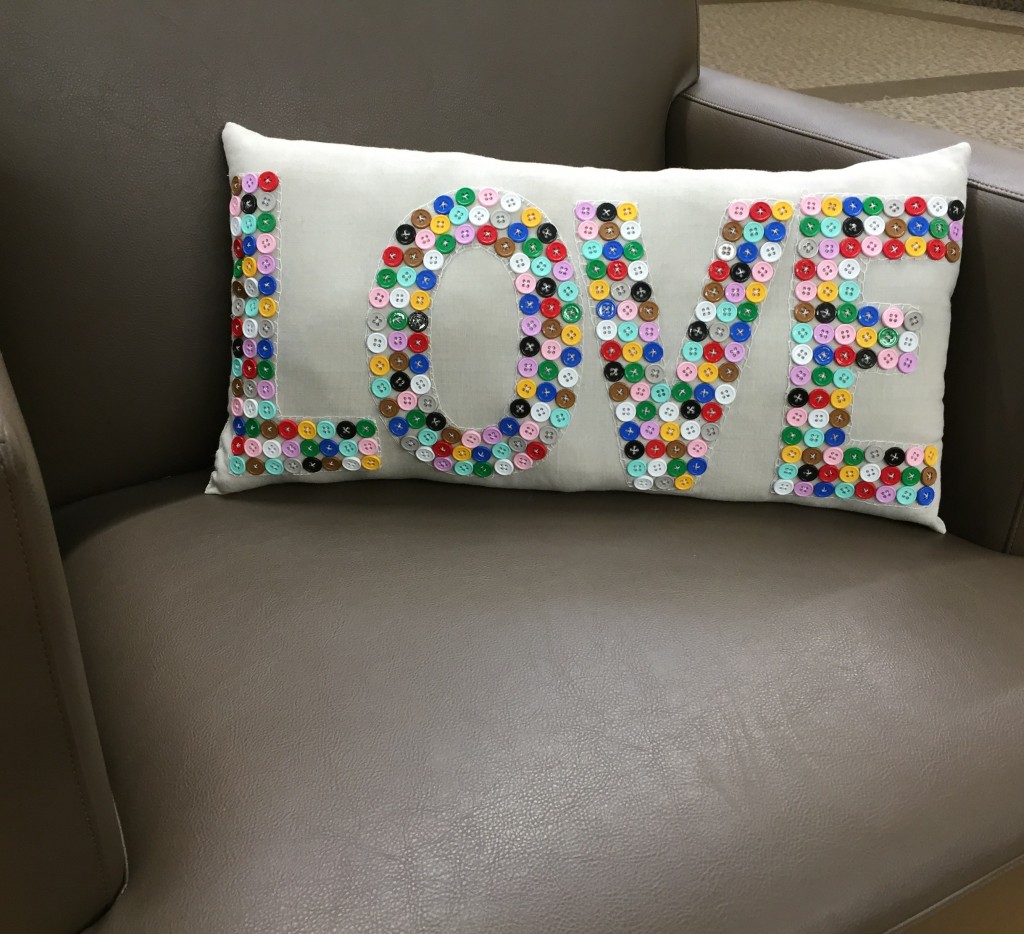
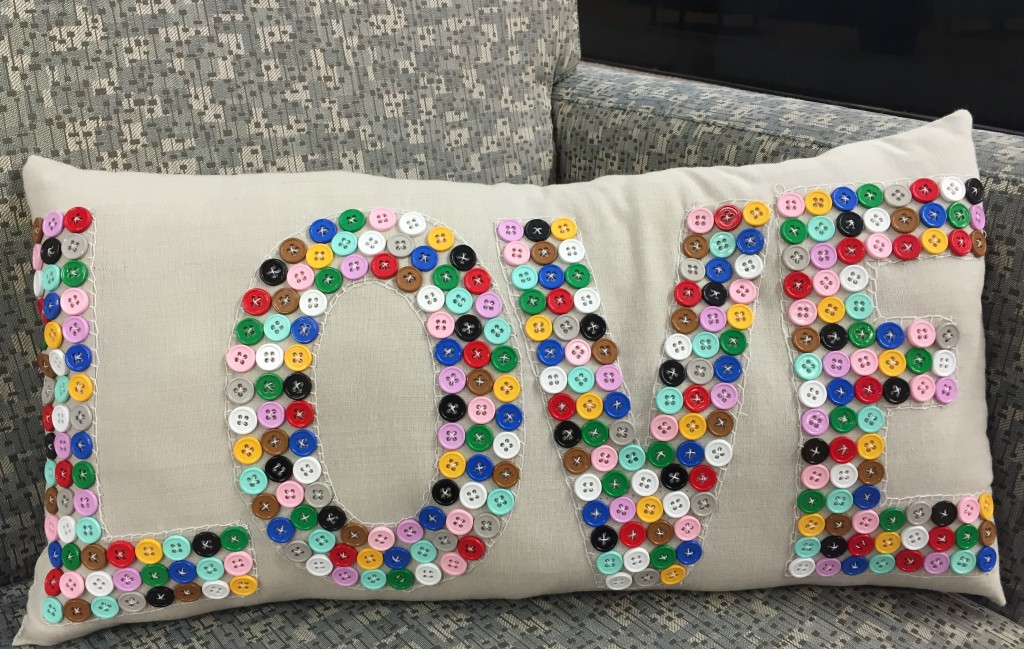
Your Button L O V E Pillow is complete!
Now place it on your favorite chair…
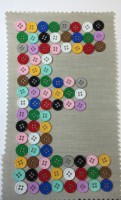
As I mentioned earlier in my blog I added the original photo I found on Pinterest below…
Onto my next BUTTON PROJECT!
HAPPY CRAFTING!