
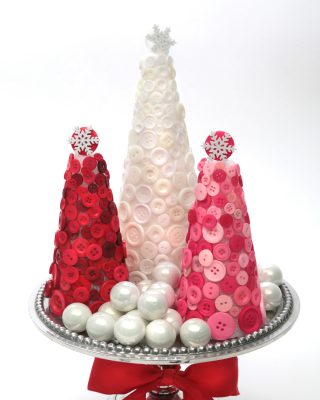
Can you believe that Christmas is less than two weeks away?! We’ve created one last Christmas project: Button Trees using foam cones, Button Jars and glue. You can use these Button Trees to decorate a mantel, window sill or add them to a cake stand or plate and use them as a centerpiece for your holiday dinner.
 To make these Button Trees, you will need the following materials:
Foam Cones in multiple sizes
Foam Glue

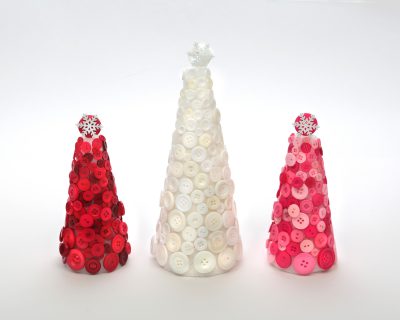
Decide which color to use on each tree. Begin at the base of the tree and glue on buttons. Start with larger buttons at the bottom. Work your way up to smaller buttons at the top. This process works best if you lay the cone on its side. Glue buttons on the top side of the cone and allow the glue to dry. The buttons may slide off if the glue is too wet. Rotate to add more buttons. You can work on multiple trees at once. You will need to prop the trees on something to keep them from rolling over.

If you have white spaces you want to cover, you can add more buttons on top to create layers. Another option is to begin the project by painting the cones the same colors as the buttons so no white shows through.
Add a large button, a shaped button, or a small ornament to top each of the trees.
We placed our three trees on a cake stand and placed miniature ornaments around them. Add a simple bow to the base of the stand and you have a lovely centerpiece!

You can also create smaller versions of these to use as place card holders for your guests.
HAPPY CRAFTING and MERRY CHRISTMAS!!