
How fitting for this project to be called just that…if you read my blog from the other day I showed you how to dye your Favorite Findings wood button hearts. So today I’m finishing up my project so that I can share it with you just in time.
So this is what I created and what you will need:
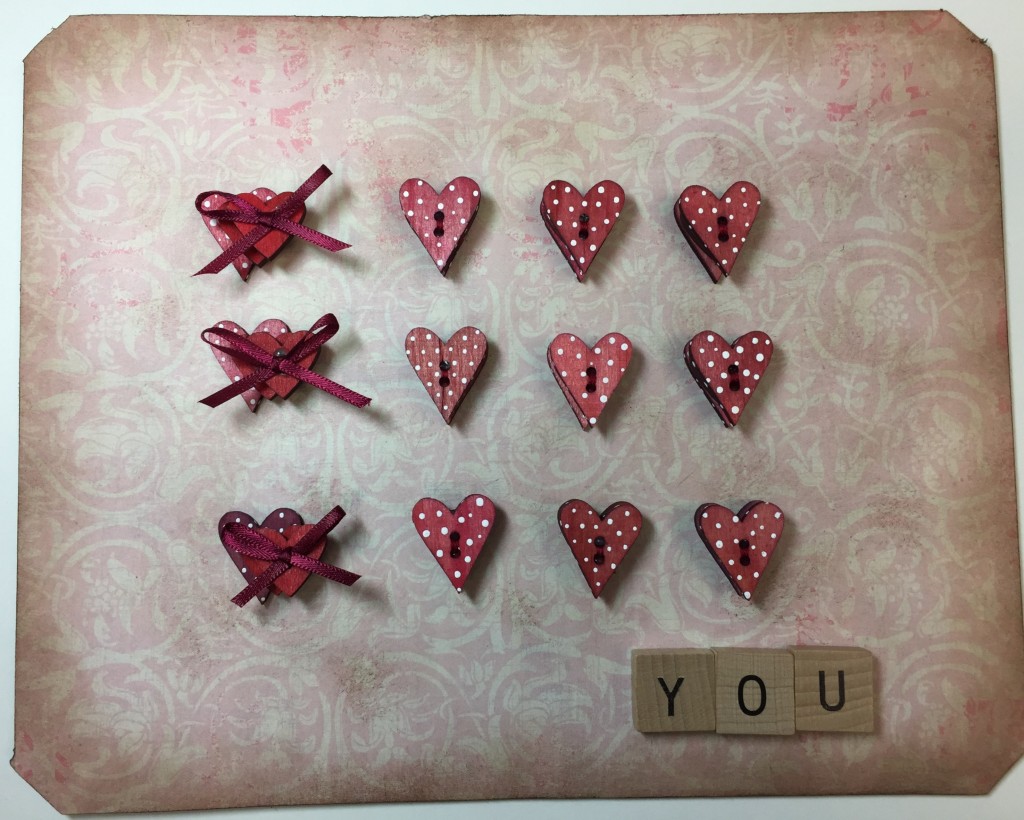
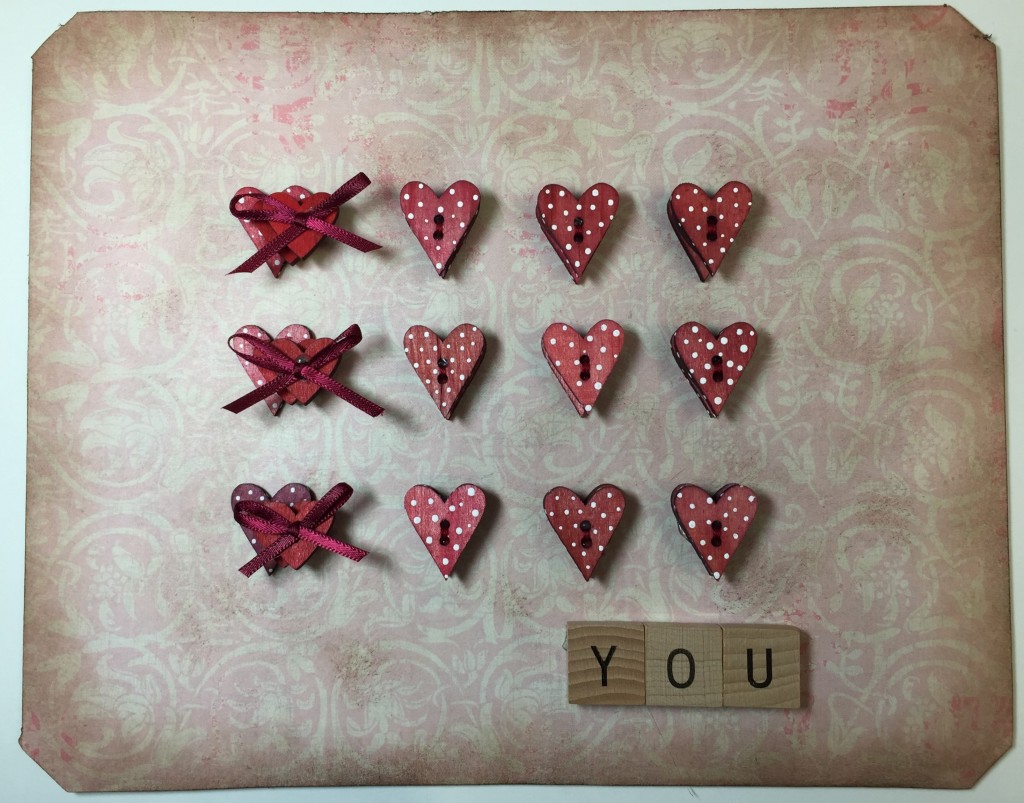
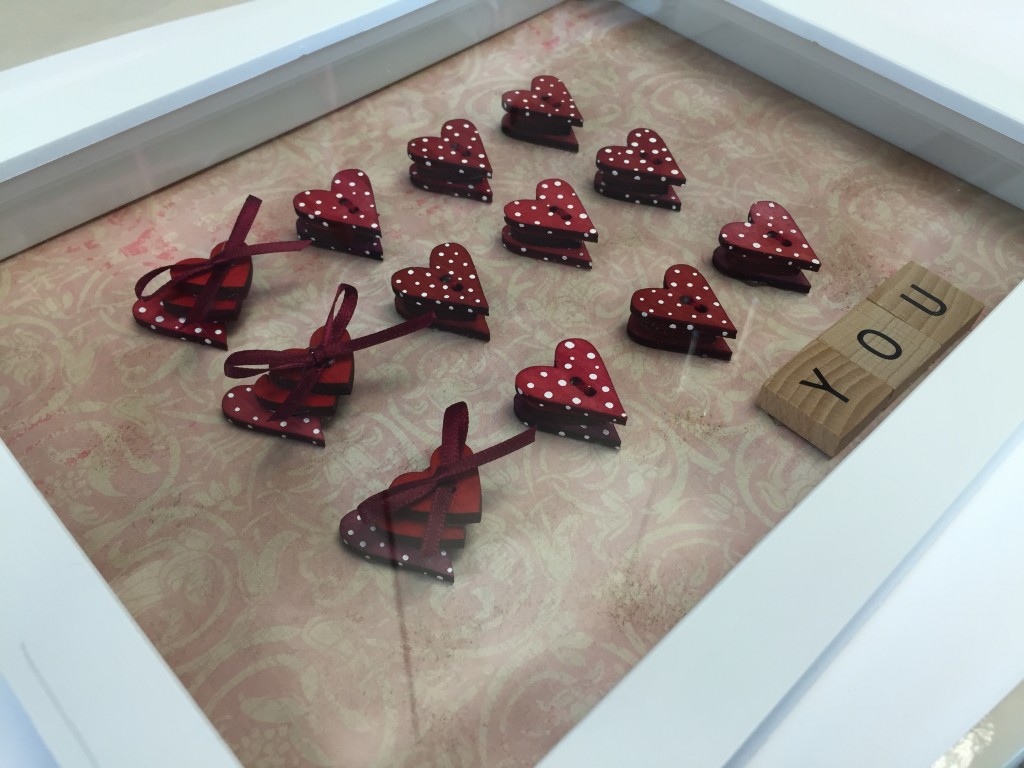
The finished project did get placed into a frame – scroll down to the bottom for the end result!
Materials: Favorite Findings #55000809 – Simple Hearts – pre-dyed – a total of 21 buttons. Visit my blog from the other day for my tutorial/instructions…
Crafting with buttons: #470002506 Pink flowers & Red hearts – you will need 15 buttons
Shadow box frame; scrapbook paper; ribbon; glue adhesive; napkin; glass cleaner
Paint – assorted colors (your preference – I chose white as my final color); wood letters; embroidery floss; needle & scissors; ink pad with brush; stylus or pin head; pencil
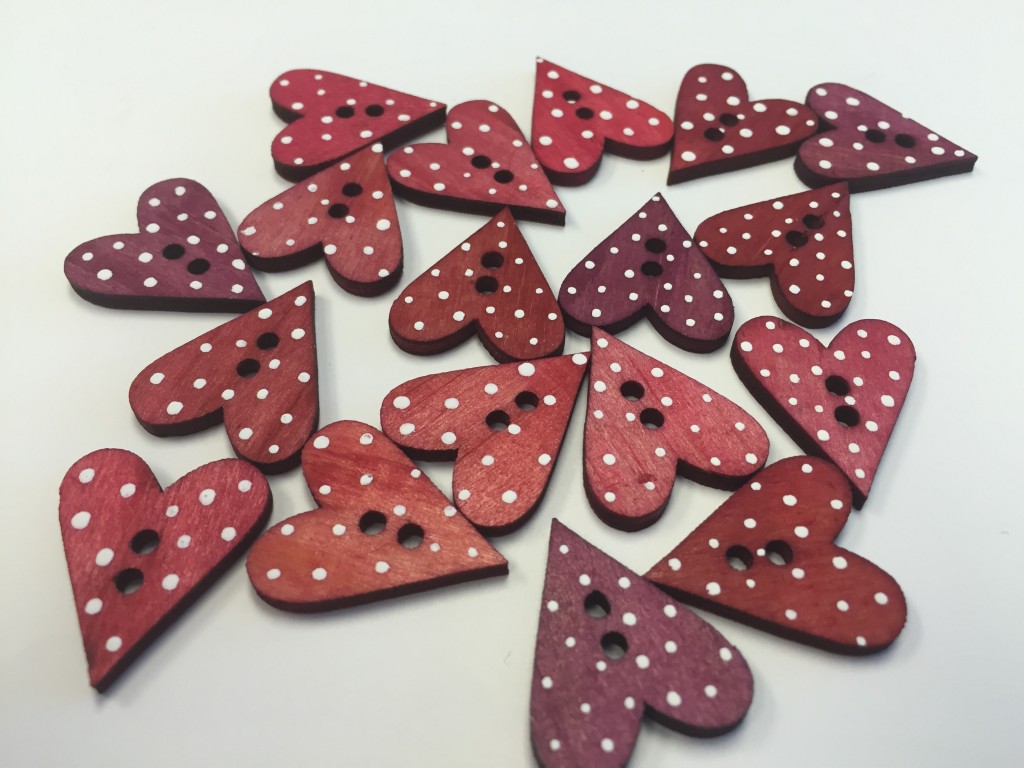
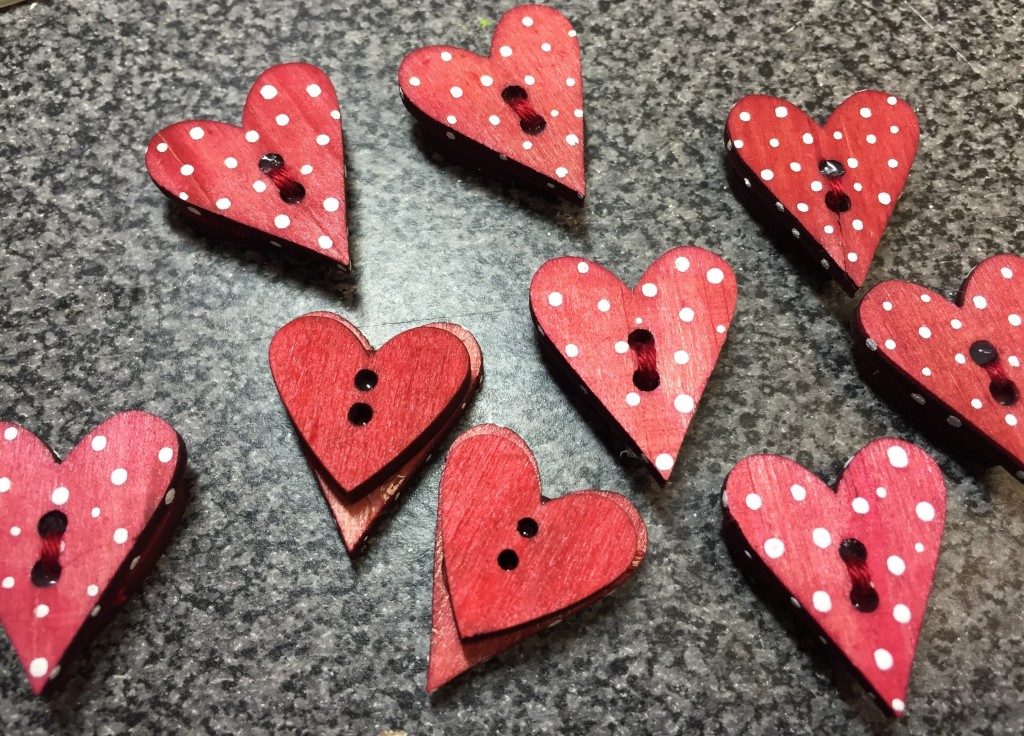
Favorite Findings #55000809 Simple Hearts
Remember these were the buttons from the other day – these have been already dyed – you will need 21 buttons.
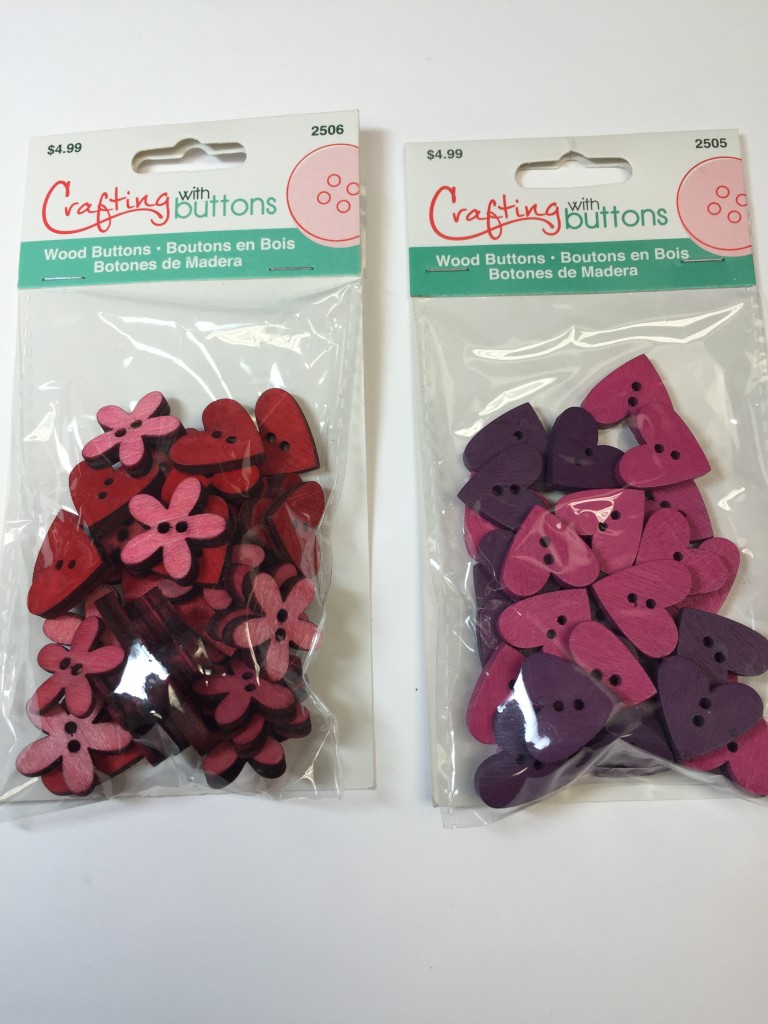
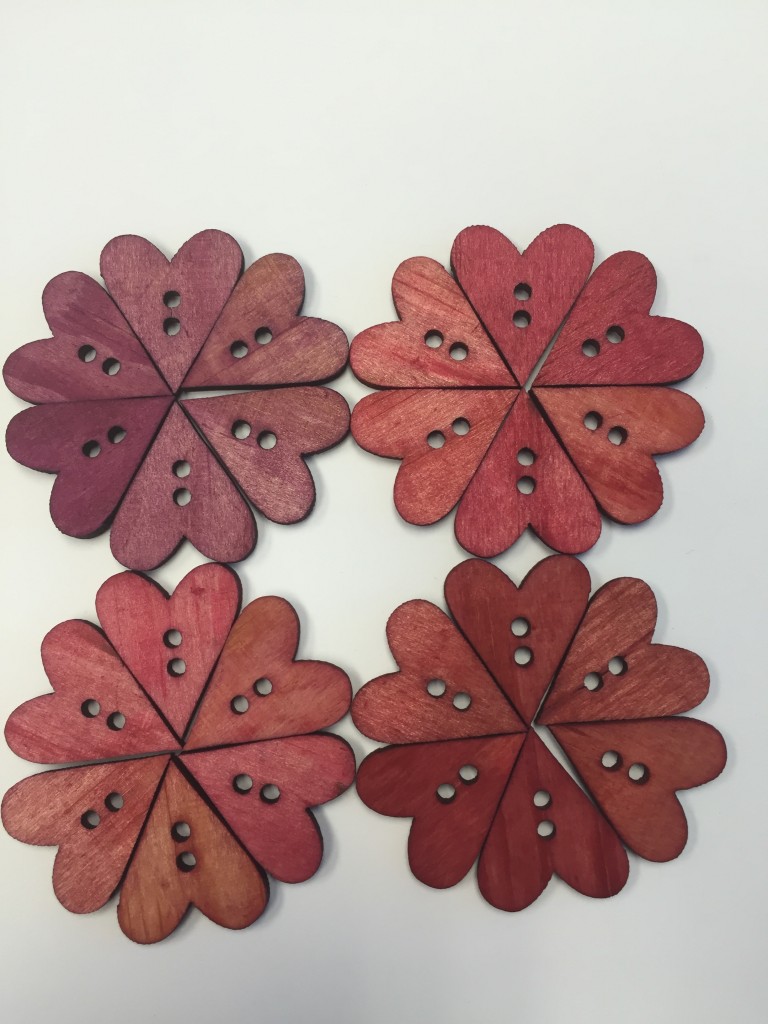
Above: Crafting with buttons #4700002506 – flowers and heart & Crafting with buttons #470002505 – hearts
Showing you two of the color ways available. I used the red buttons.
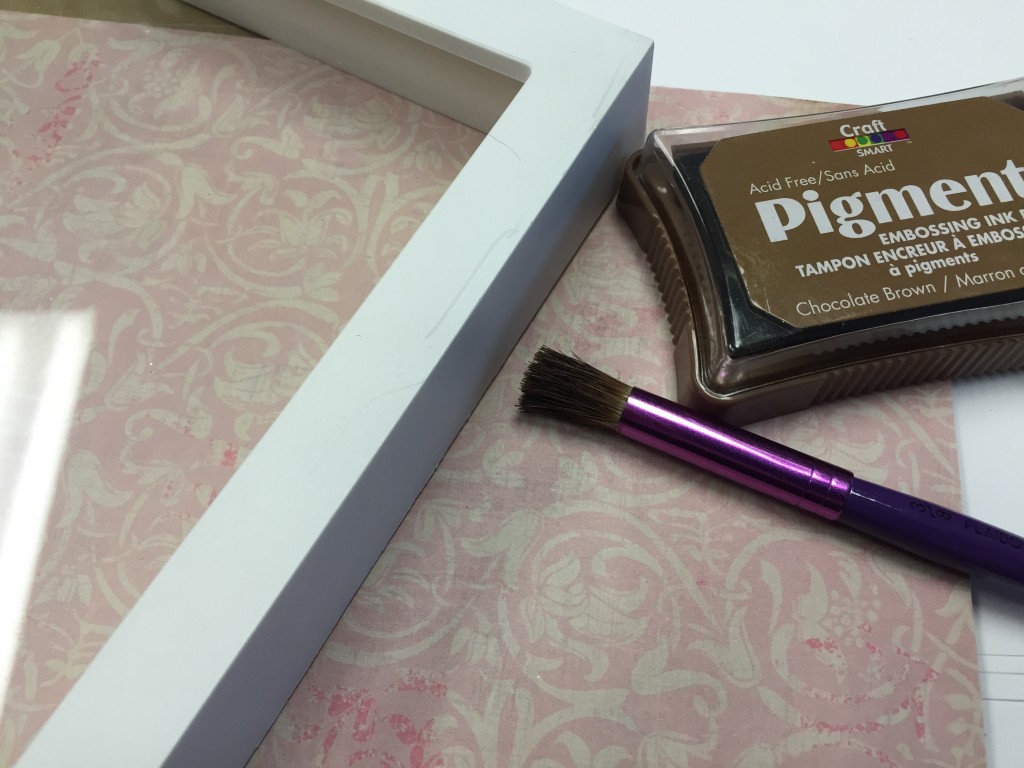
As mentioned I used a shadow box for my project – however you can use a regular frame. Remove the backing of the frame – at this point if you are using a flat frame carefully remove the glass and discard. Those using a shadow box – at this point clean the glass inside and replace.
With the back remove – place on scrapbook paper and trace outline of back. Cut. Add glue to the front of the board (this is will be facing the glass) smoothly lay paper ontop and let dry.
Once dried you will ink the edges to give it the “aged” look – use the brush for a lighter look.
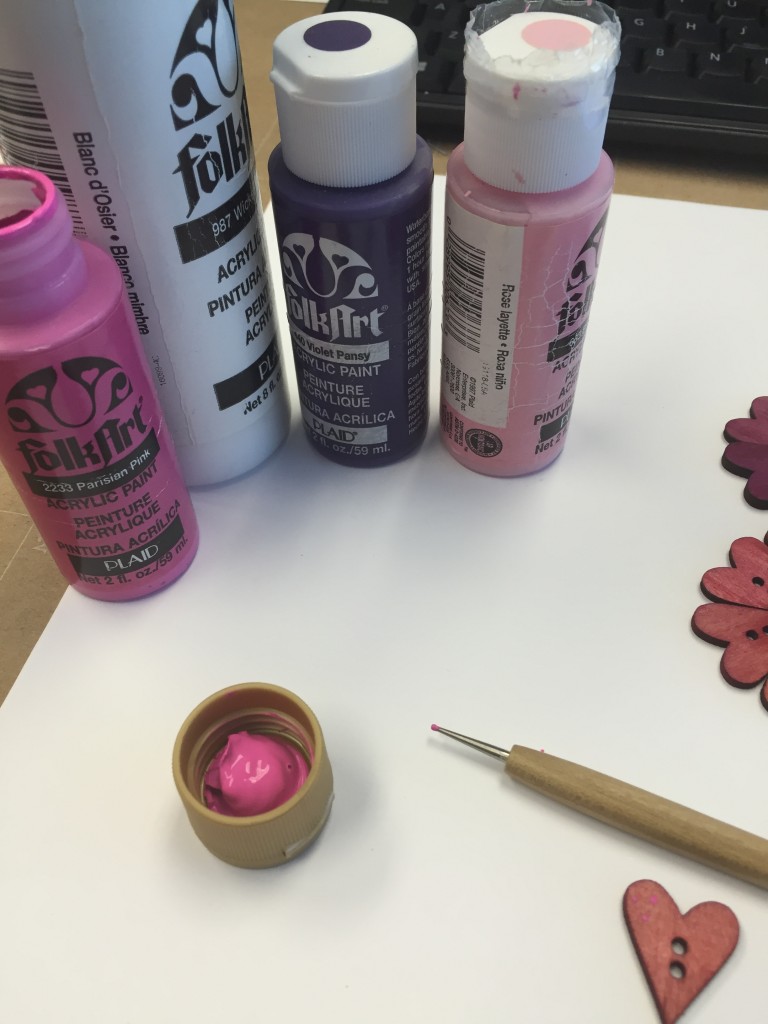
At first I wasn’t sure what colors I was going to use – but I wanted to test all of the colors and finally opted to use white. To create a clean dot/point use a pin head or if you happen to have a stylus with a fine point use it. Gently dab into the color then begin adding your dots to your button.

I wanted to show you how the pink worked with the red. It’s a preference! As you can see I used assorted size dots. Once you’ve determined the color keep going you need to do 21 buttons. Don’t forget to do the sides also – but wait till they’re fully dry to attempt that!
Keep going couple more and your almost done!
The next part is simply determine how you want to layout your buttons. There are several options. Use your phone and snap several different layouts until you find the one that works for you.
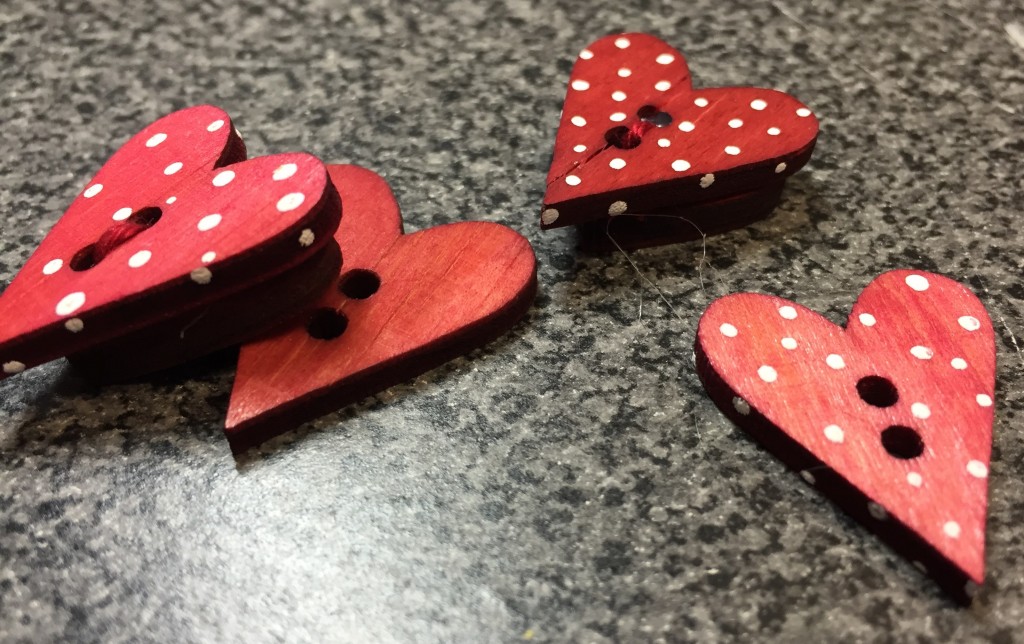
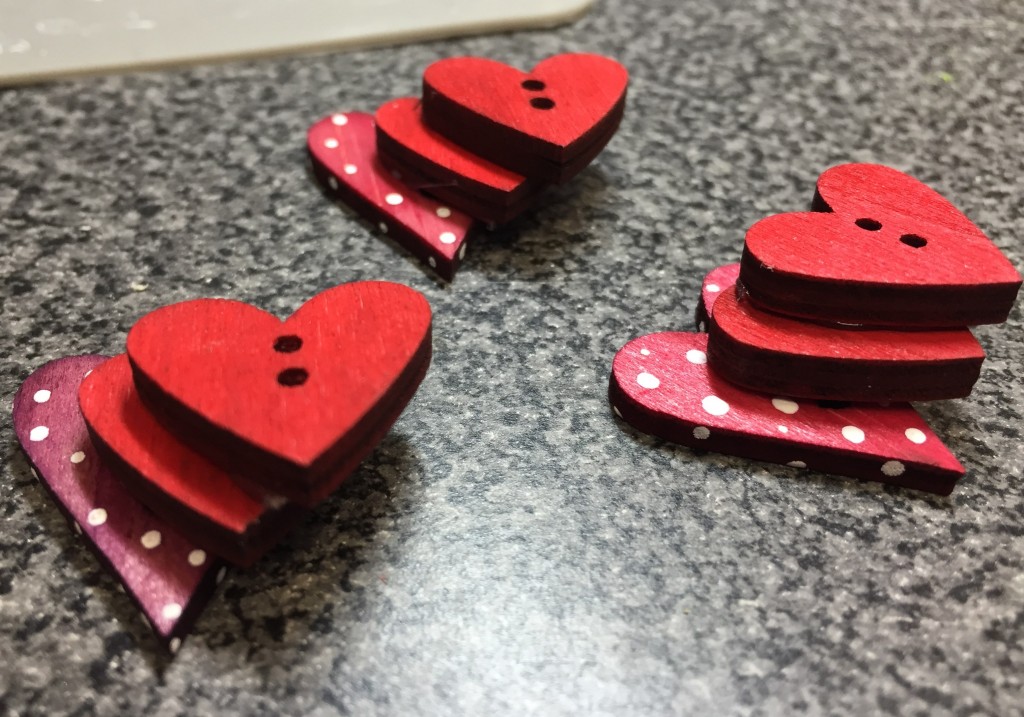
I wanted to give my buttons dimension (hence the reason for so many buttons!) so I began layering…. But I also wanted my butons to have a finished look. I added embroidery floss to give it the “stitched” look.
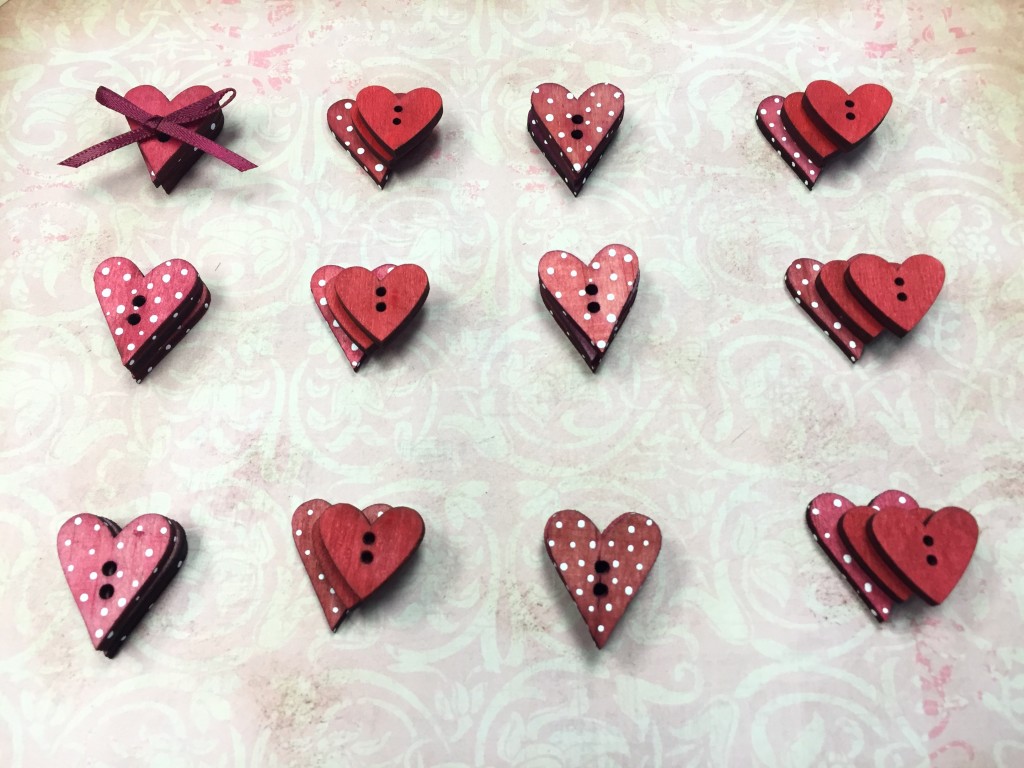
Here is one layout I was considering and opted for another. Next here is where your gluing comes into play. I stacked my buttons giving it a layered look as you can see. Carefully with your glue (I used a hot glue gun for my project.). begin your layering process.
for this I used the small red hearts from the Crafting with buttons. Remember to add that floss to finish the look.
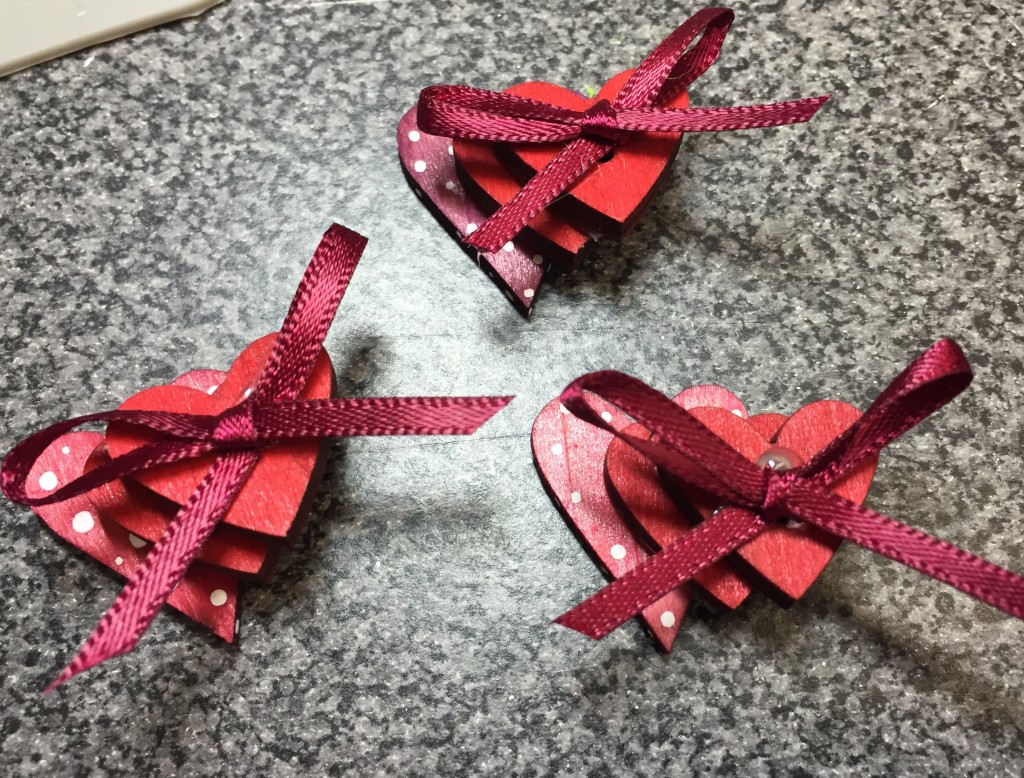
If you refer to my finished project these are the buttons which will have a “bow” on top. These are glued slightly off of each other. (attended look!)
now your ready to place buttons onto your matt. Carefully center the buttons. Glue. Remove any glue strings from your project! I’d hate to see you place it in the frame and have to go back! Use good lighting for this process!

here’s another side shot… Last and final step – place mat back into frame and finish cleaning the front of the glass.
I know they are just going to love your gift that you made with HEART!
HEART YOU!
HAPPY VALENTINE’S DAY!
HAPPY CRAFTING!
HAPPY CREATING!