
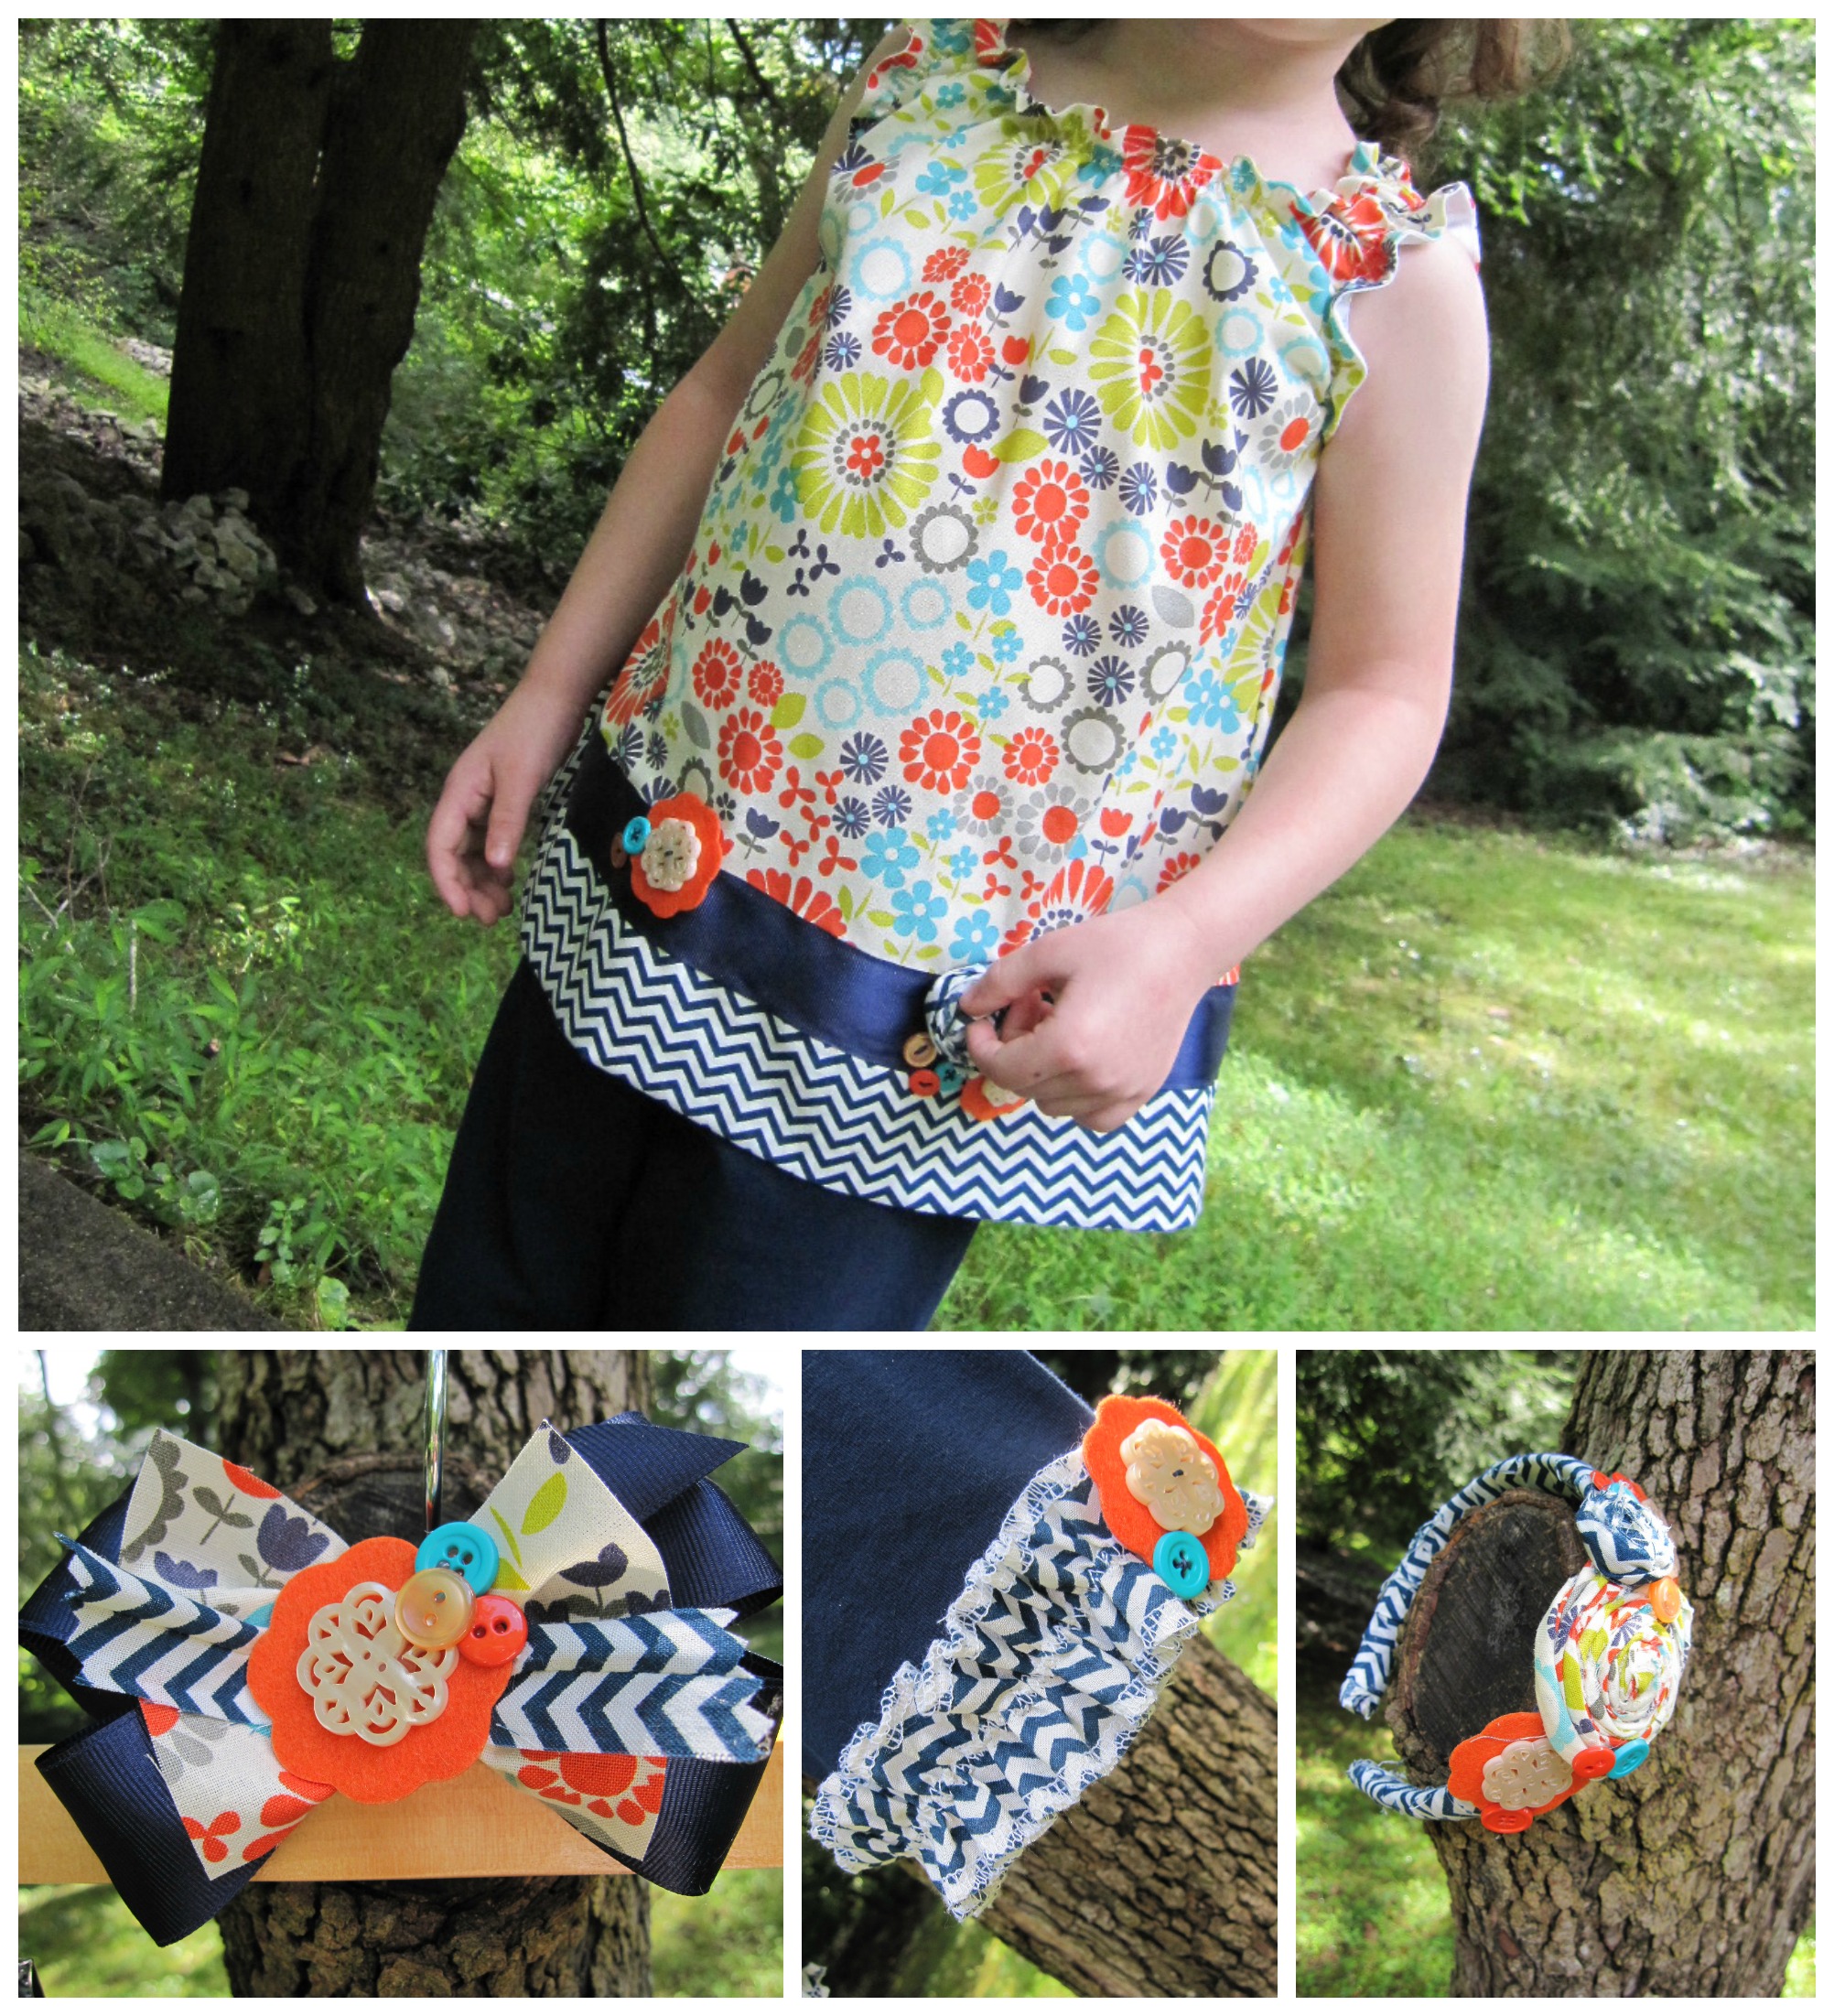
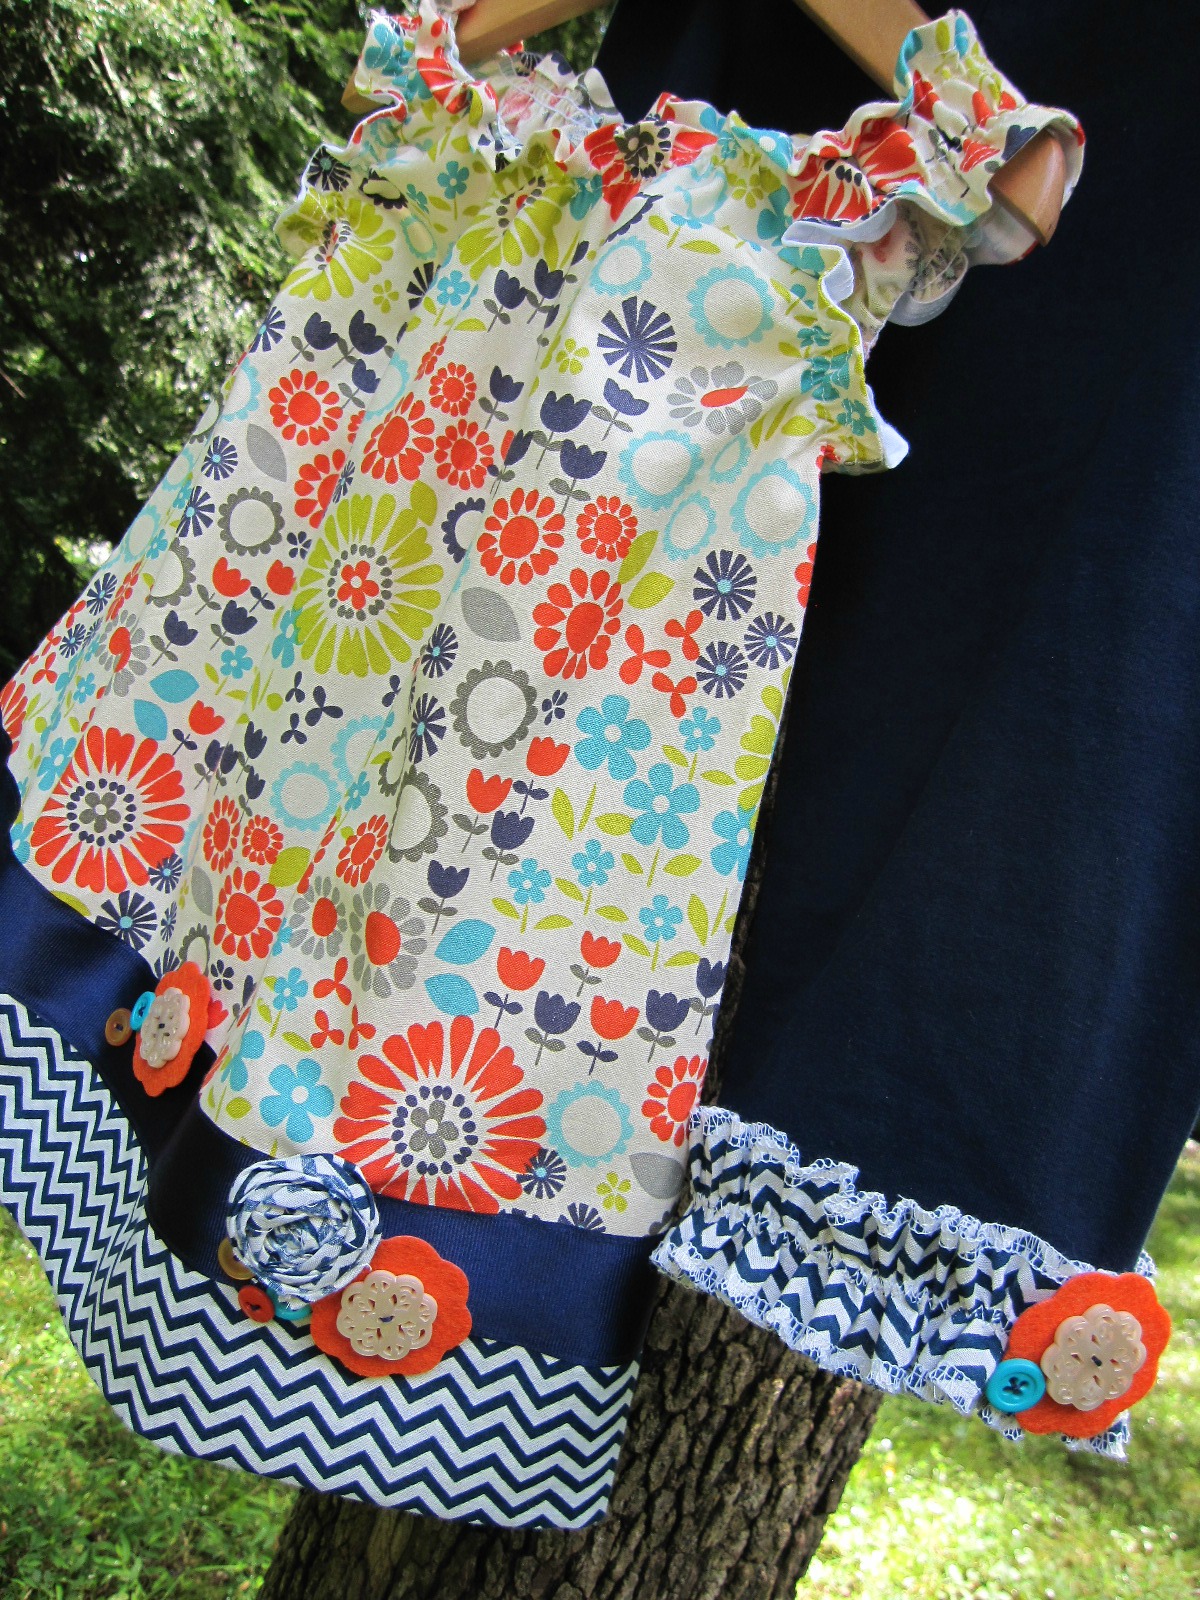
With the end of summer drawing near and the thoughts of fall weather and apparel on the brain, I’ve created this darling Autumn Tunic with leggings and matching hair accessories that can carry your little one through the seasonal transition adorably!
I’ve used the Lucy’s Little Flower Tunic from Create H.O.P.E. Designs.
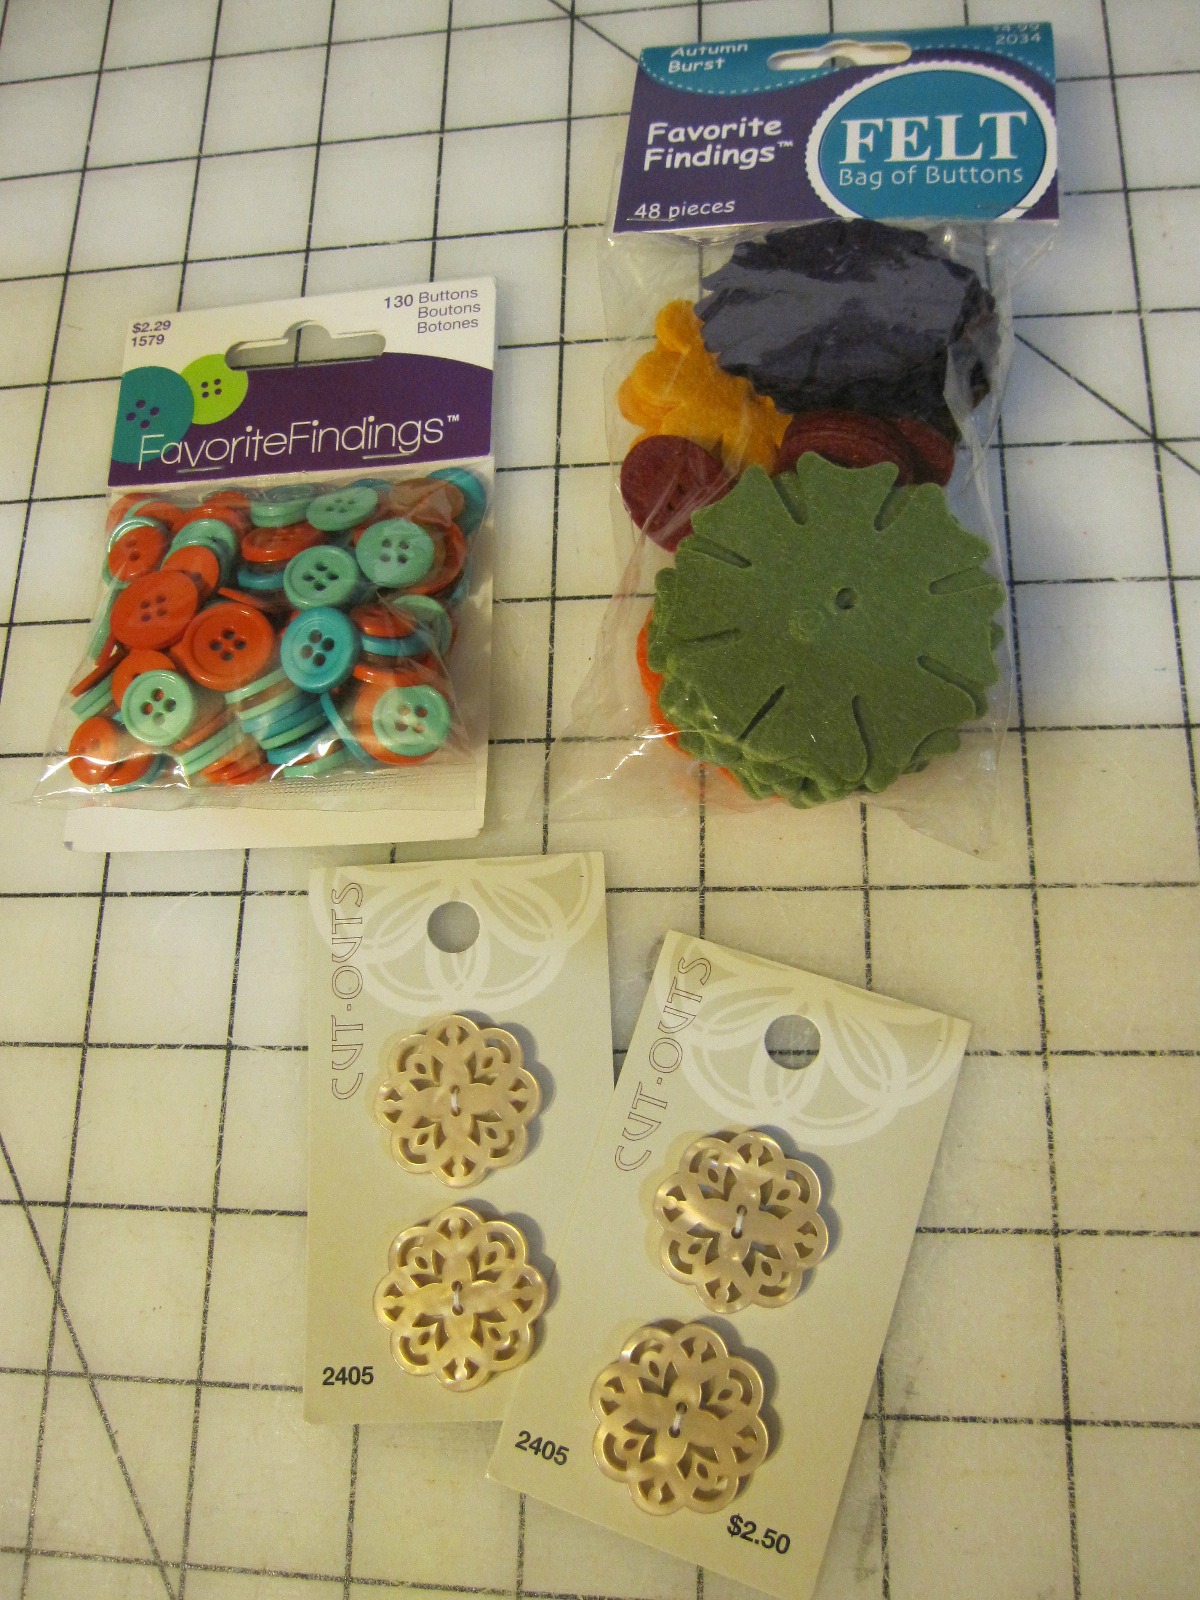
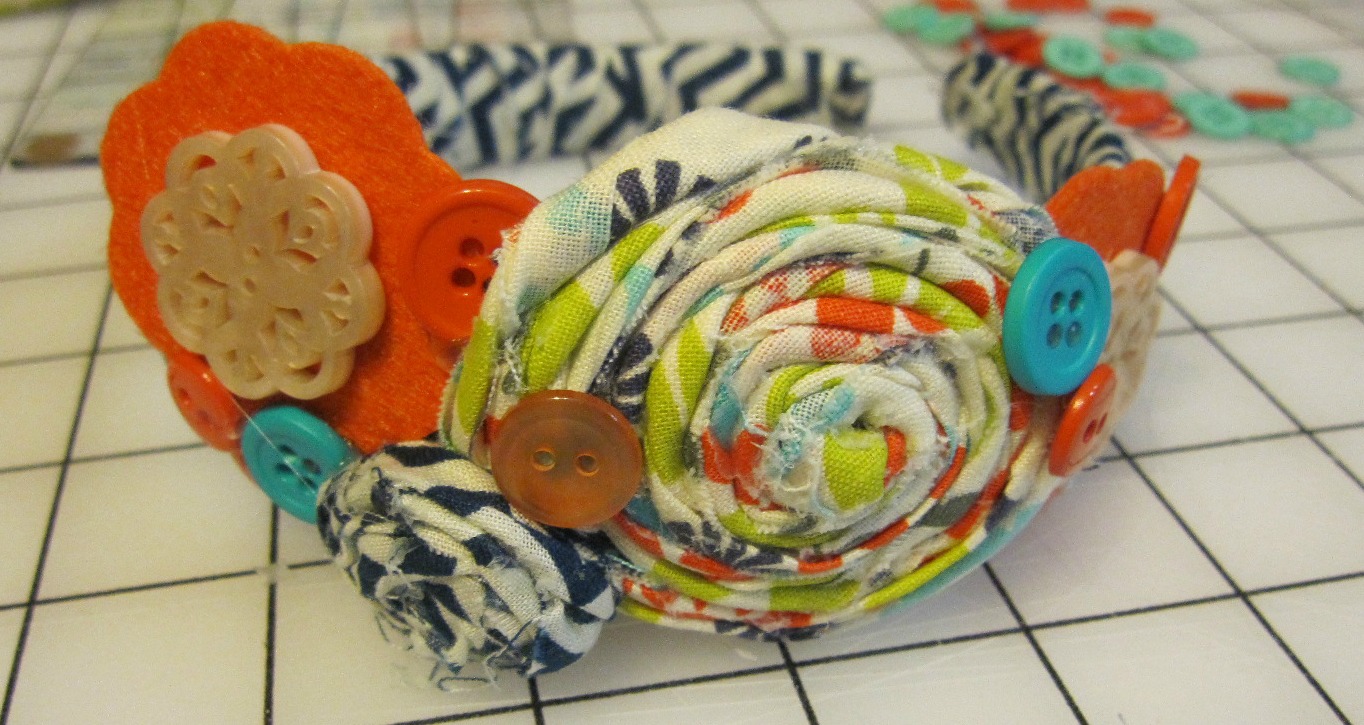
My button choices are, Cut Outs 2405, Favorite Findings 1579 and Felt Buttons Autumn Burst.
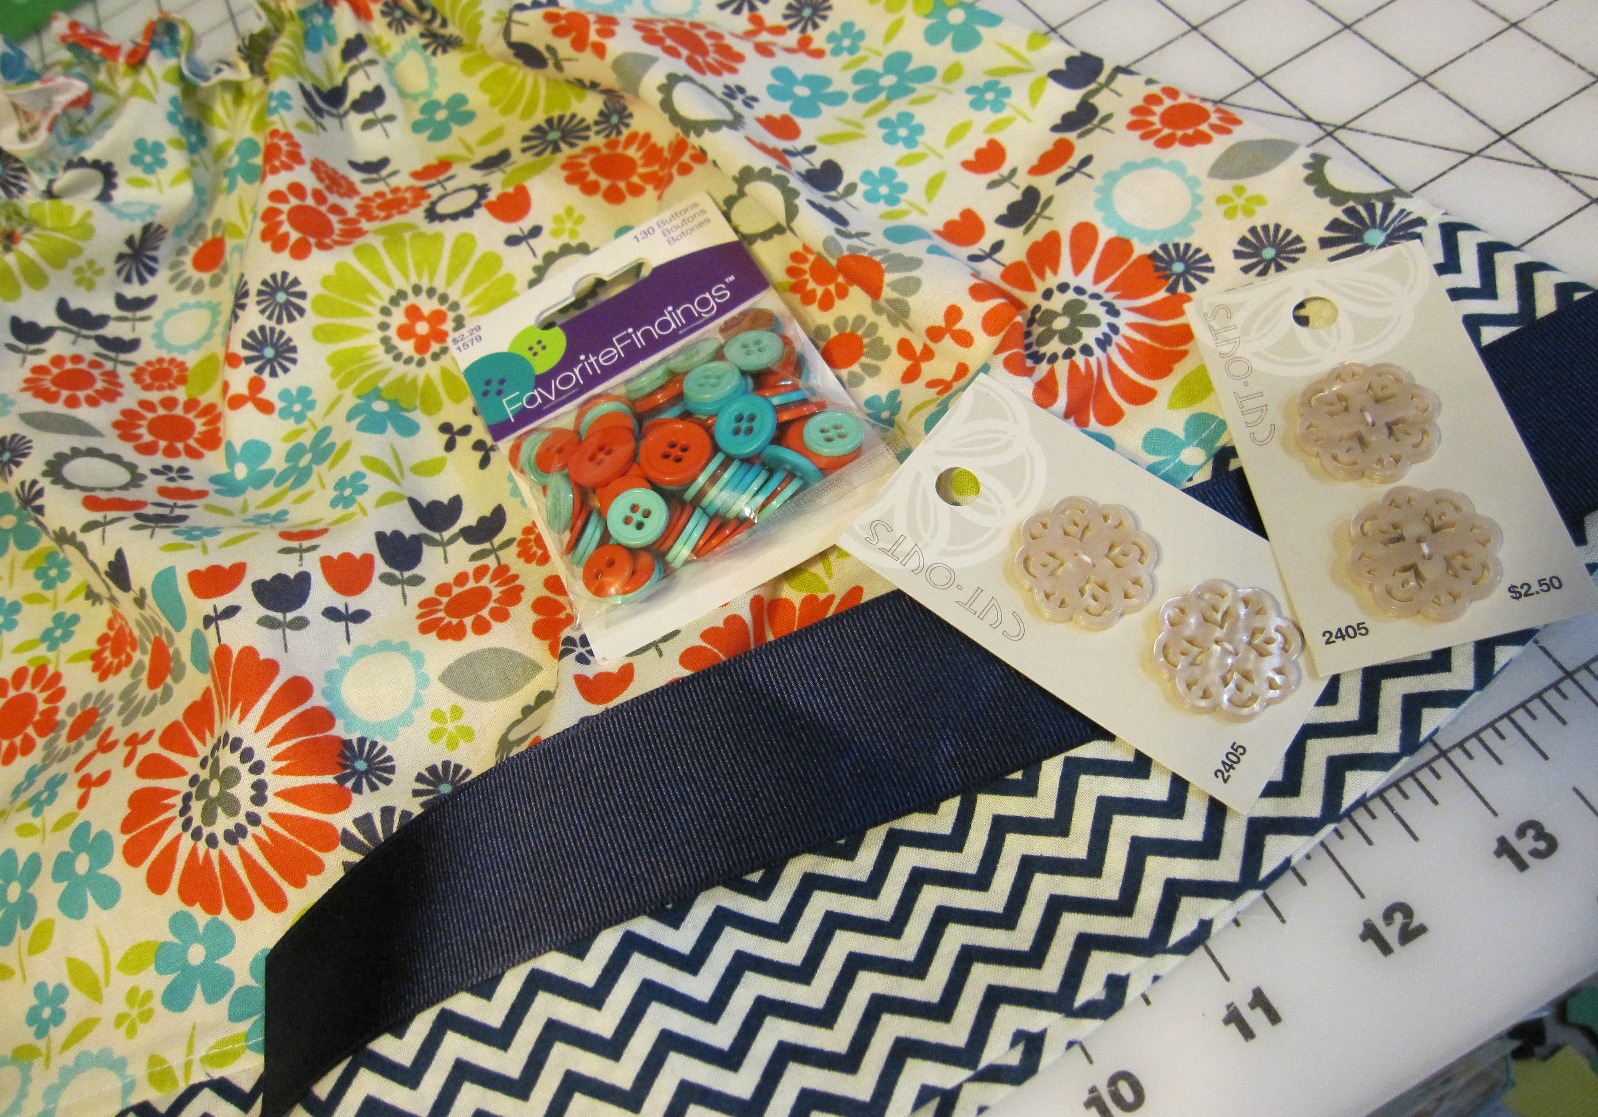
Additional Materials Needed: For Tunic – Fabric requirements according to pattern, 1.5″ Grosgrain Ribbon, Elastic Thread for shirring, thread, pins, scissors and sewing machine. For Leggings – Pair of knit leggings, fabric strips for ruffles. For Headband – Plastic headband, fabric strips, hot glue. For Bow – 1.5″ Grosgrain Ribbon, fabric scraps from project, hot glue.
Ok, so let’s get started!
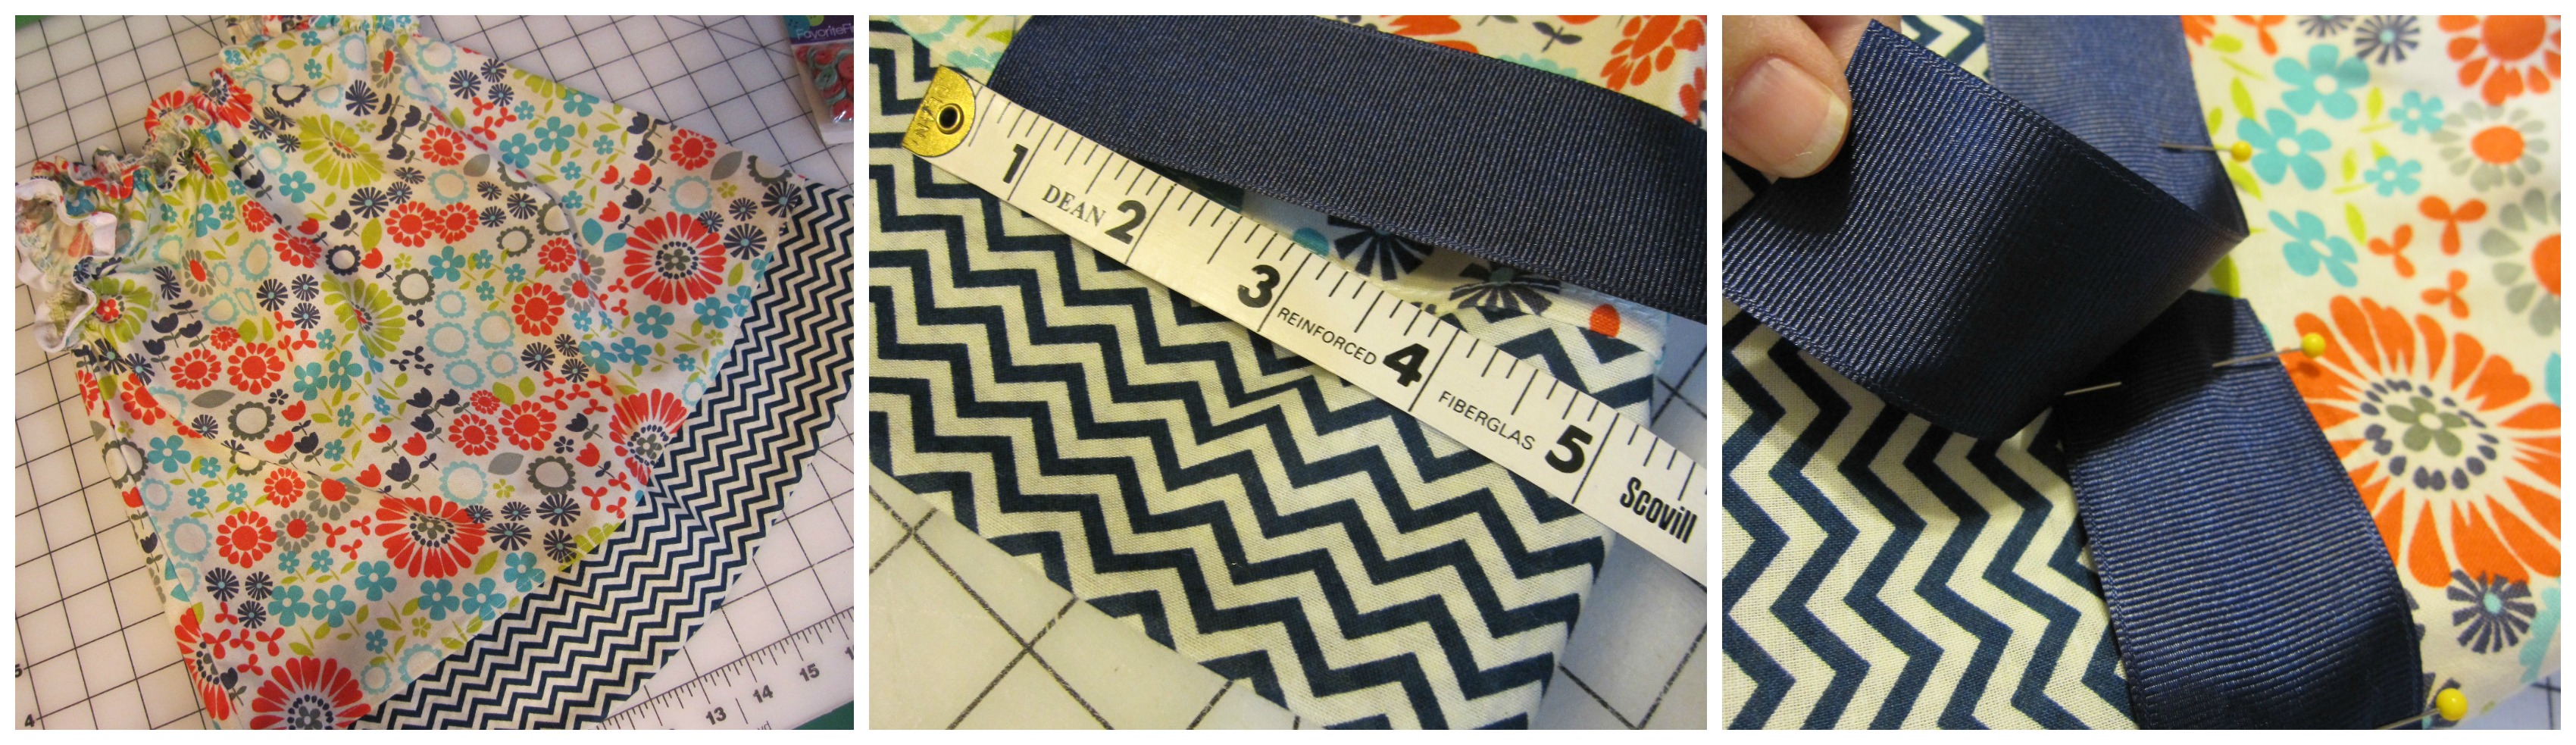
Sew your Lucy Tunic as instructed in the pattern. Where the border attaches to the tunic, begin pinning your grosgrain ribbon starting about 5″ from one of the side seams. Continue all the way around the garment evenly, overlapping a couple of inches at the end, folding under the raw edge of the ribbon. Stitch your ribbon in place.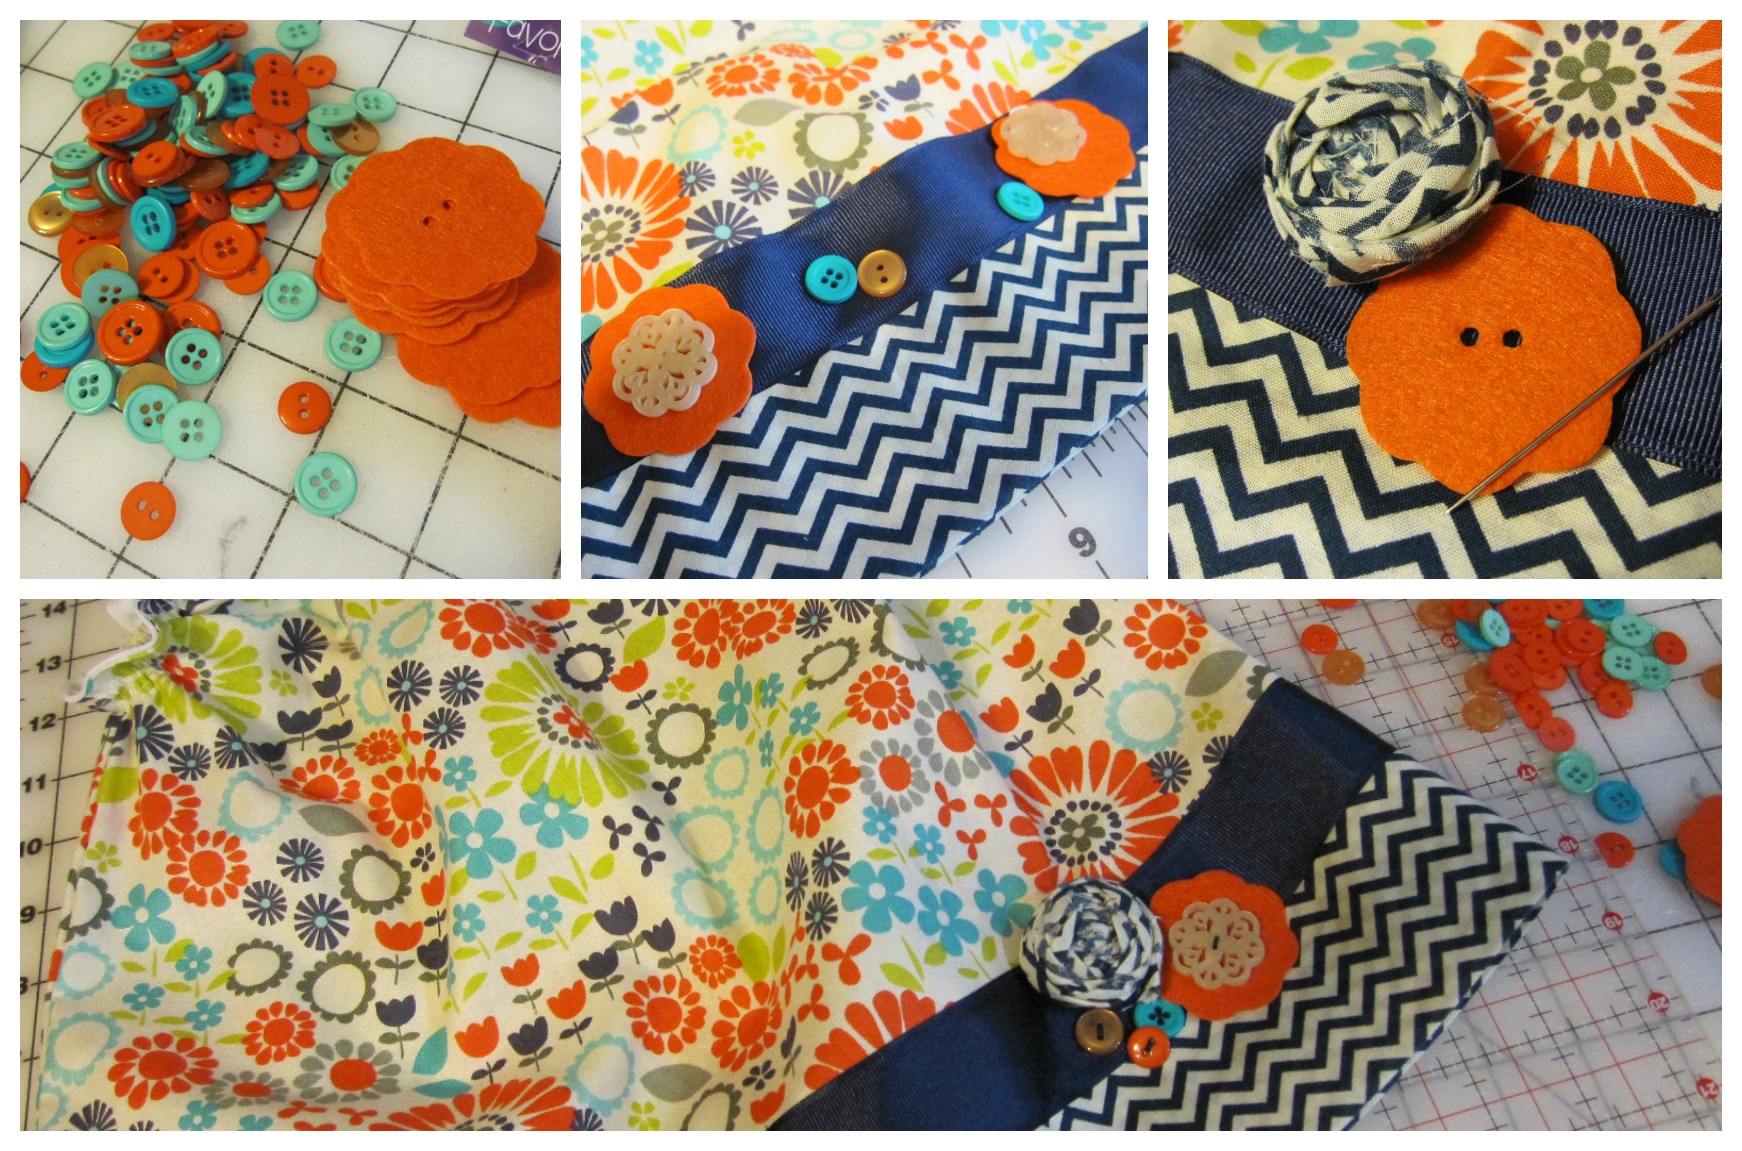
Now, you can arrange your button accents as you like. Play with it for a few minutes trying different button cluster options until you find just the right compliment for your unique piece. If you’d like to create some rolled fabric flowers as I’ve included in mine, this is the tutorial I used for the ones I’ve included. Sew your button accents in place securely.
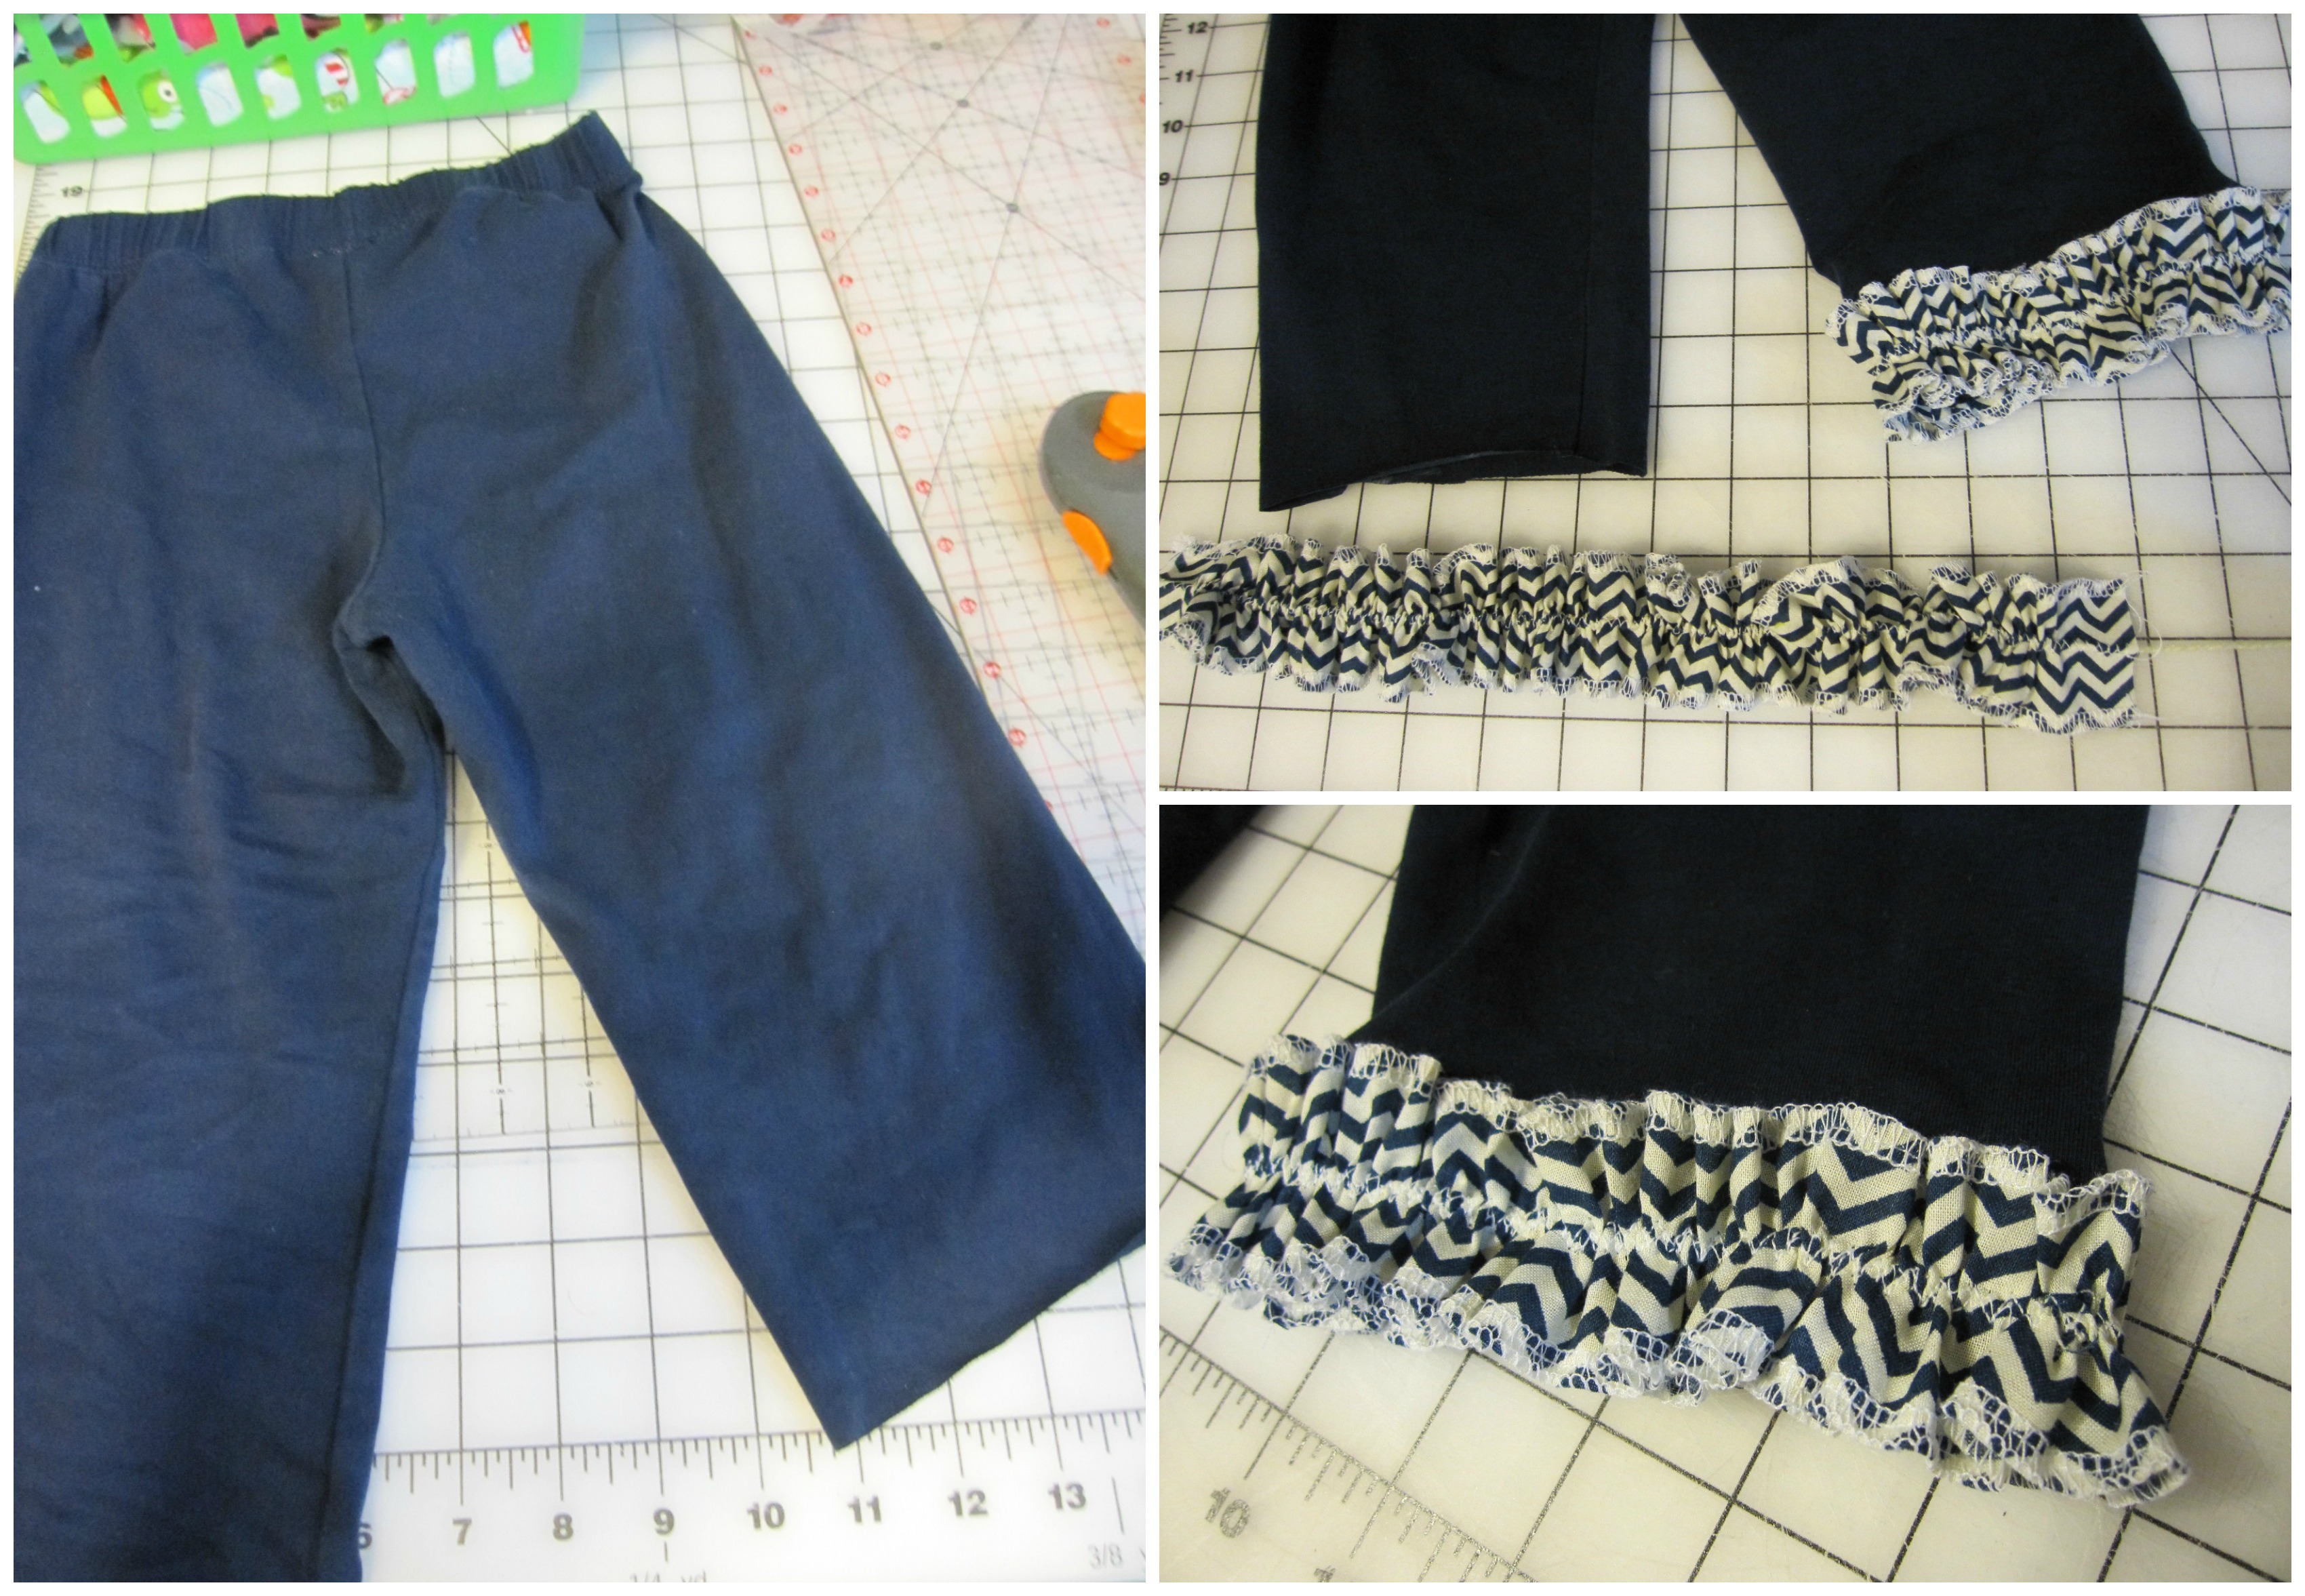
Next are the leggings. This is a very simple upcycle that creates the cutest little one-of-a-kind leggings! I started with a pair of thrift store leggings a few sizes larger than what my daughter currently wears, and cut them to the length I wanted. Then, I cut 2″ strips, the width of the fabric, from the coordinating fabric from the tunic. Finish the edges of the strips either by hemming or serging, mine are serged. Then gather the fabric strips the desired fullness to fit the hem of the legs, pin in place folding under the raw edges at the inner seam. Stitch in place. Now you’re ready to add your button embellishments to coordinate with the tunic. (if you need help with gathering, this tutorial is the one I’ve used for mine.)

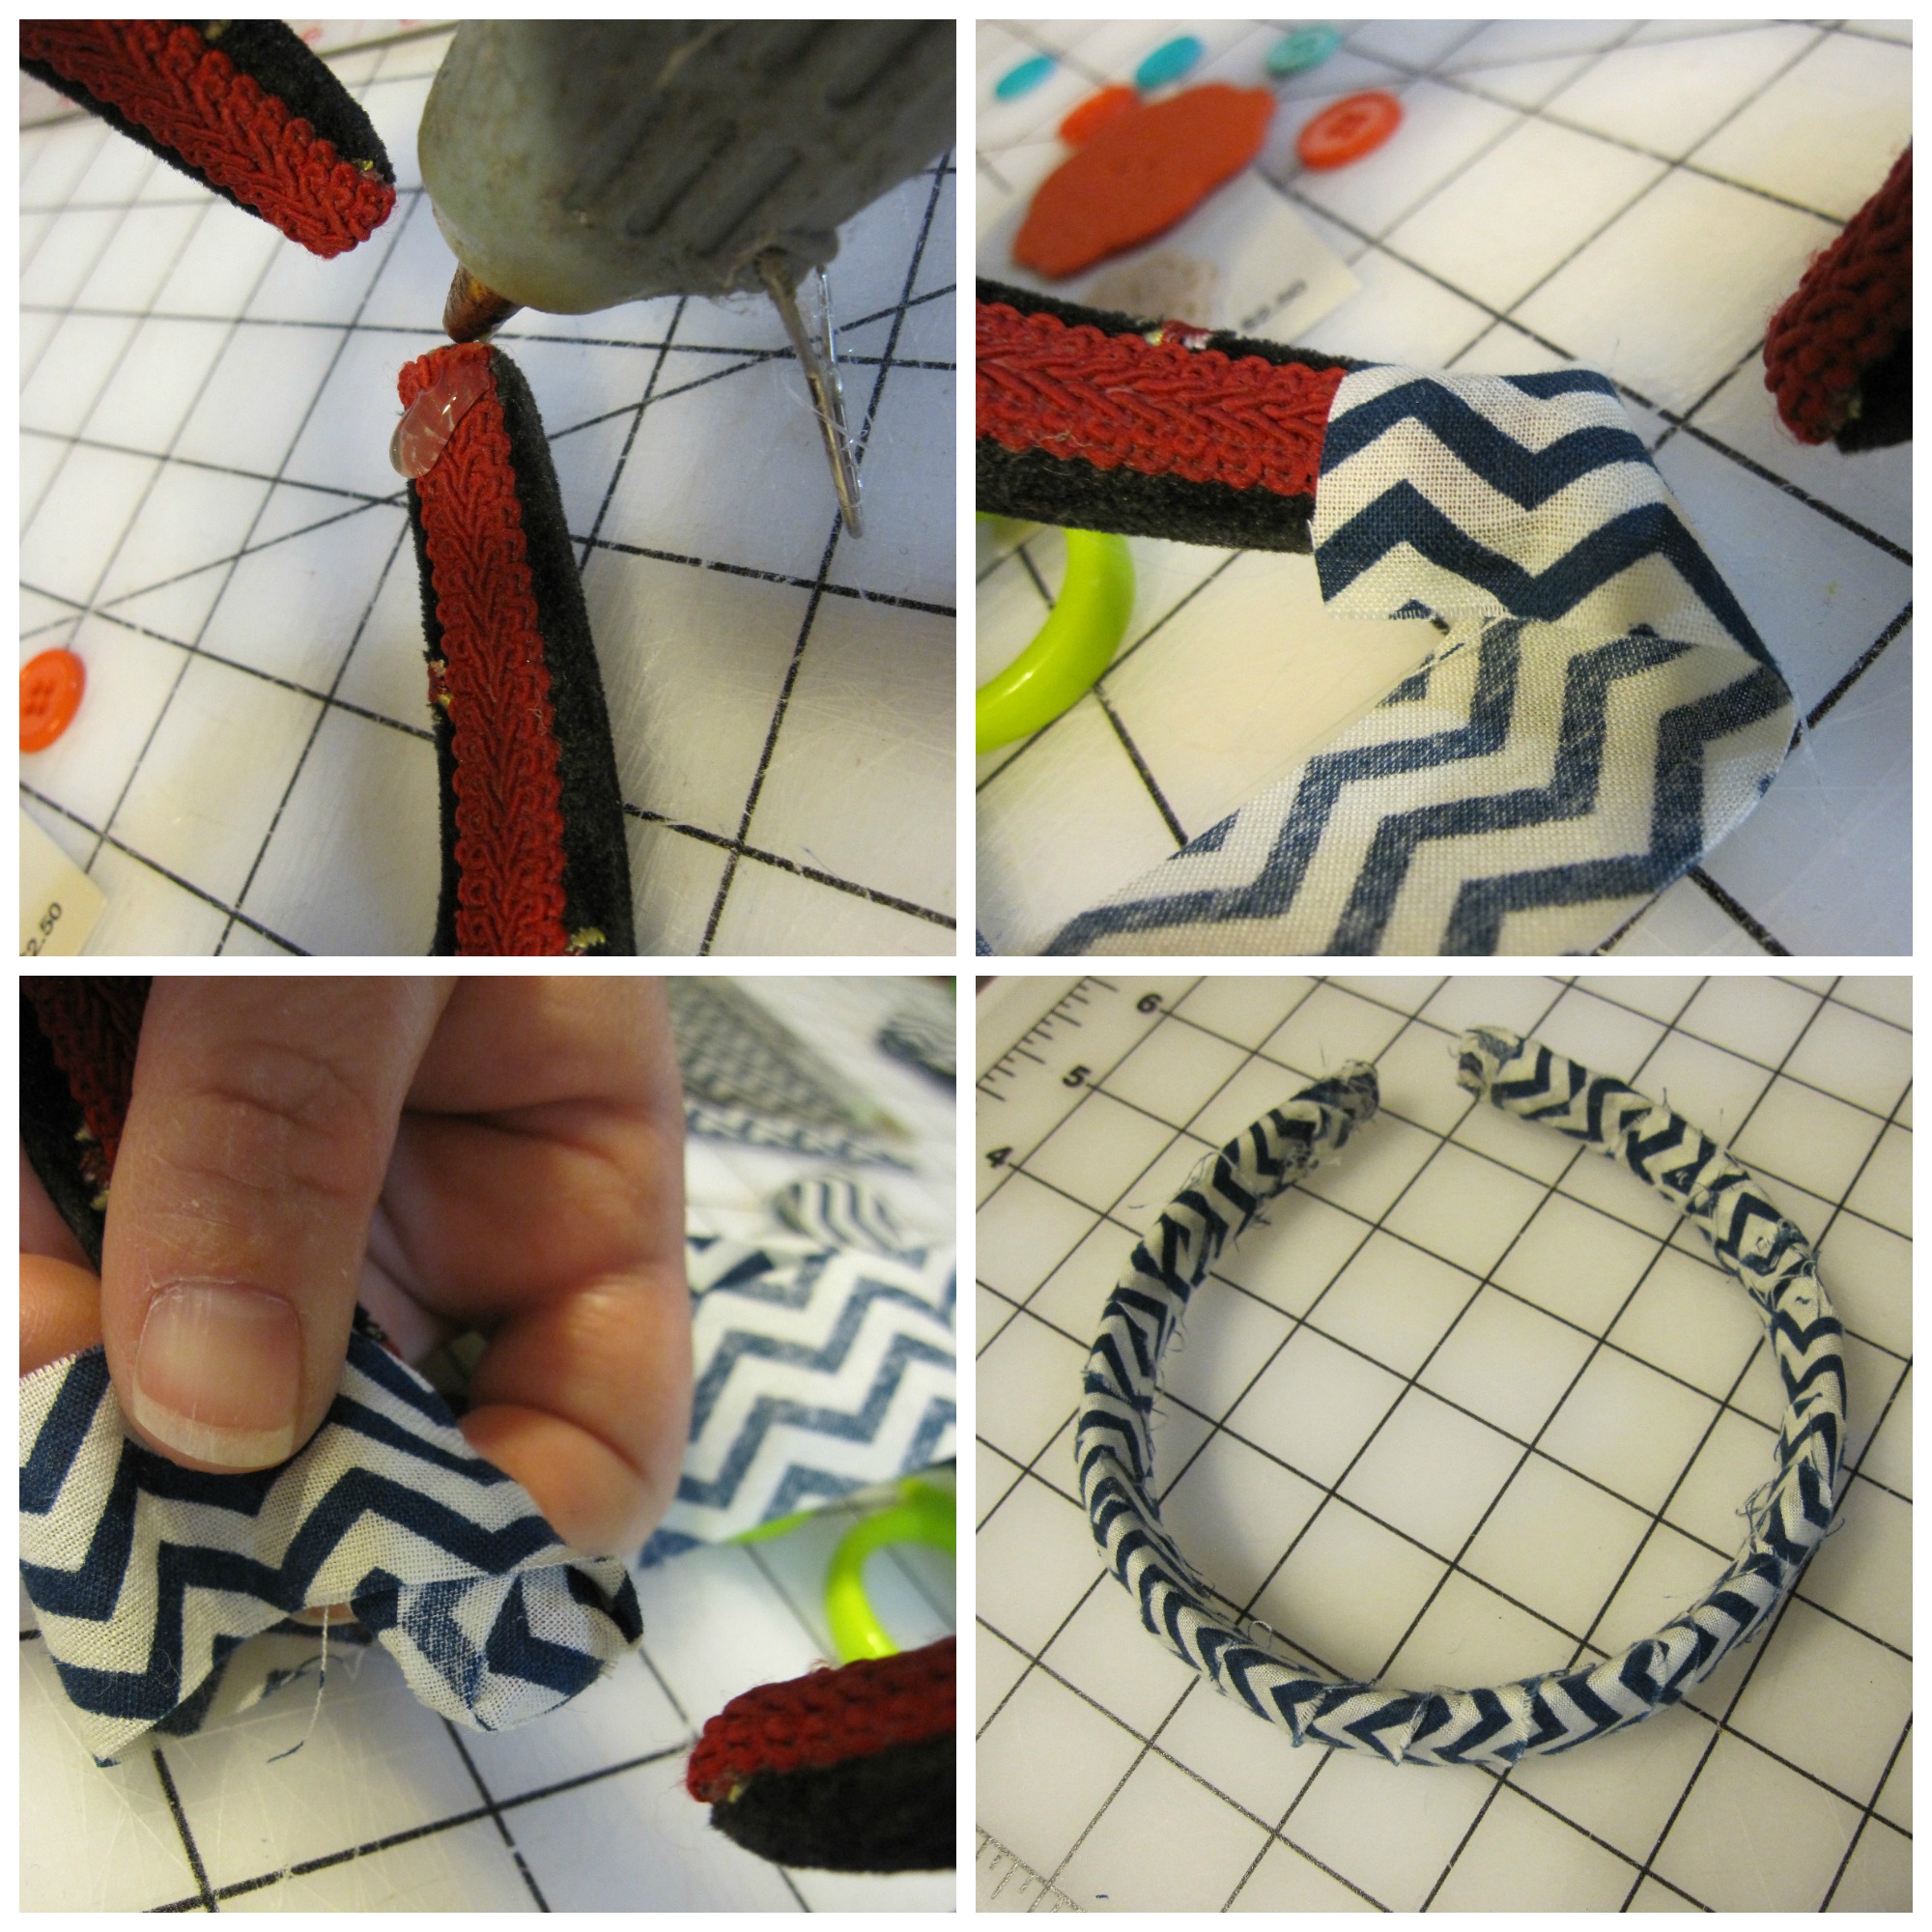
The headband is another upcycle project using a padded headband that had begun to come apart. For this, simply cut 1″ strips of one of your coordinating fabrics. Begin by gluing the end of one of the fabric strips to the inside of one of the ends of your headband as shown. Continue to glue and wrap the fabric around the headband, overlapping the fabric edges, until the entire headband is covered. Add your button embellishments as you wish. This part is a lot of fun since there are so many ways to customize your creation to match your outfit and your child’s personality!
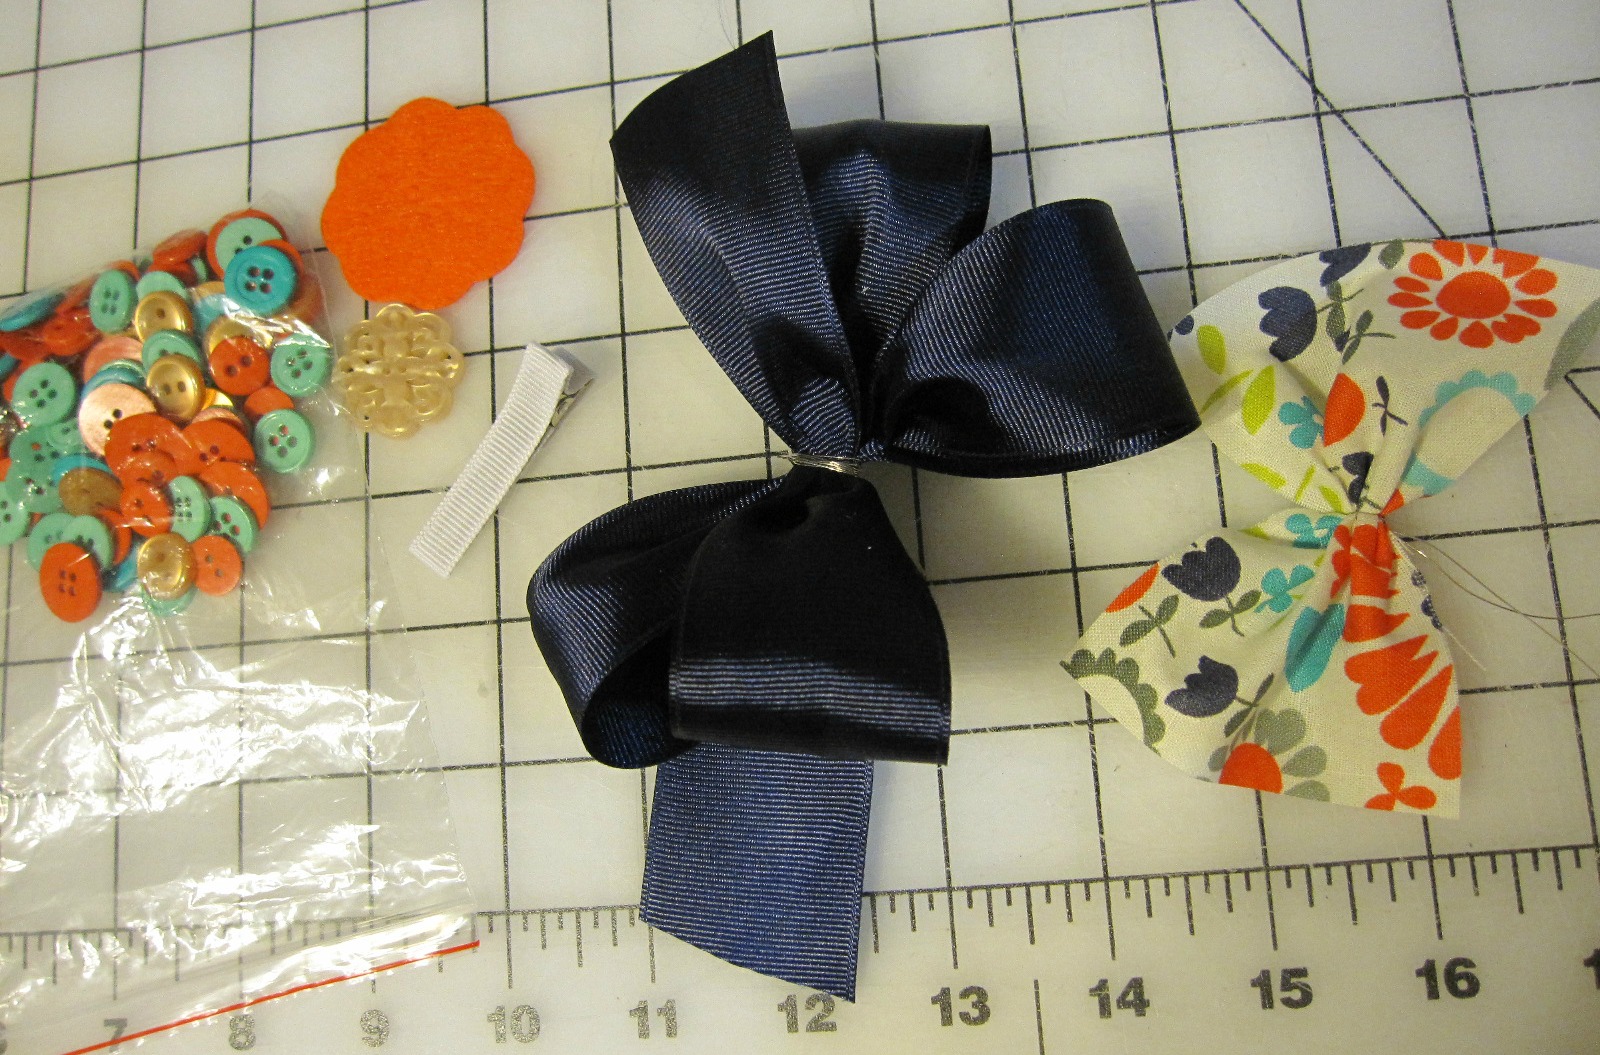
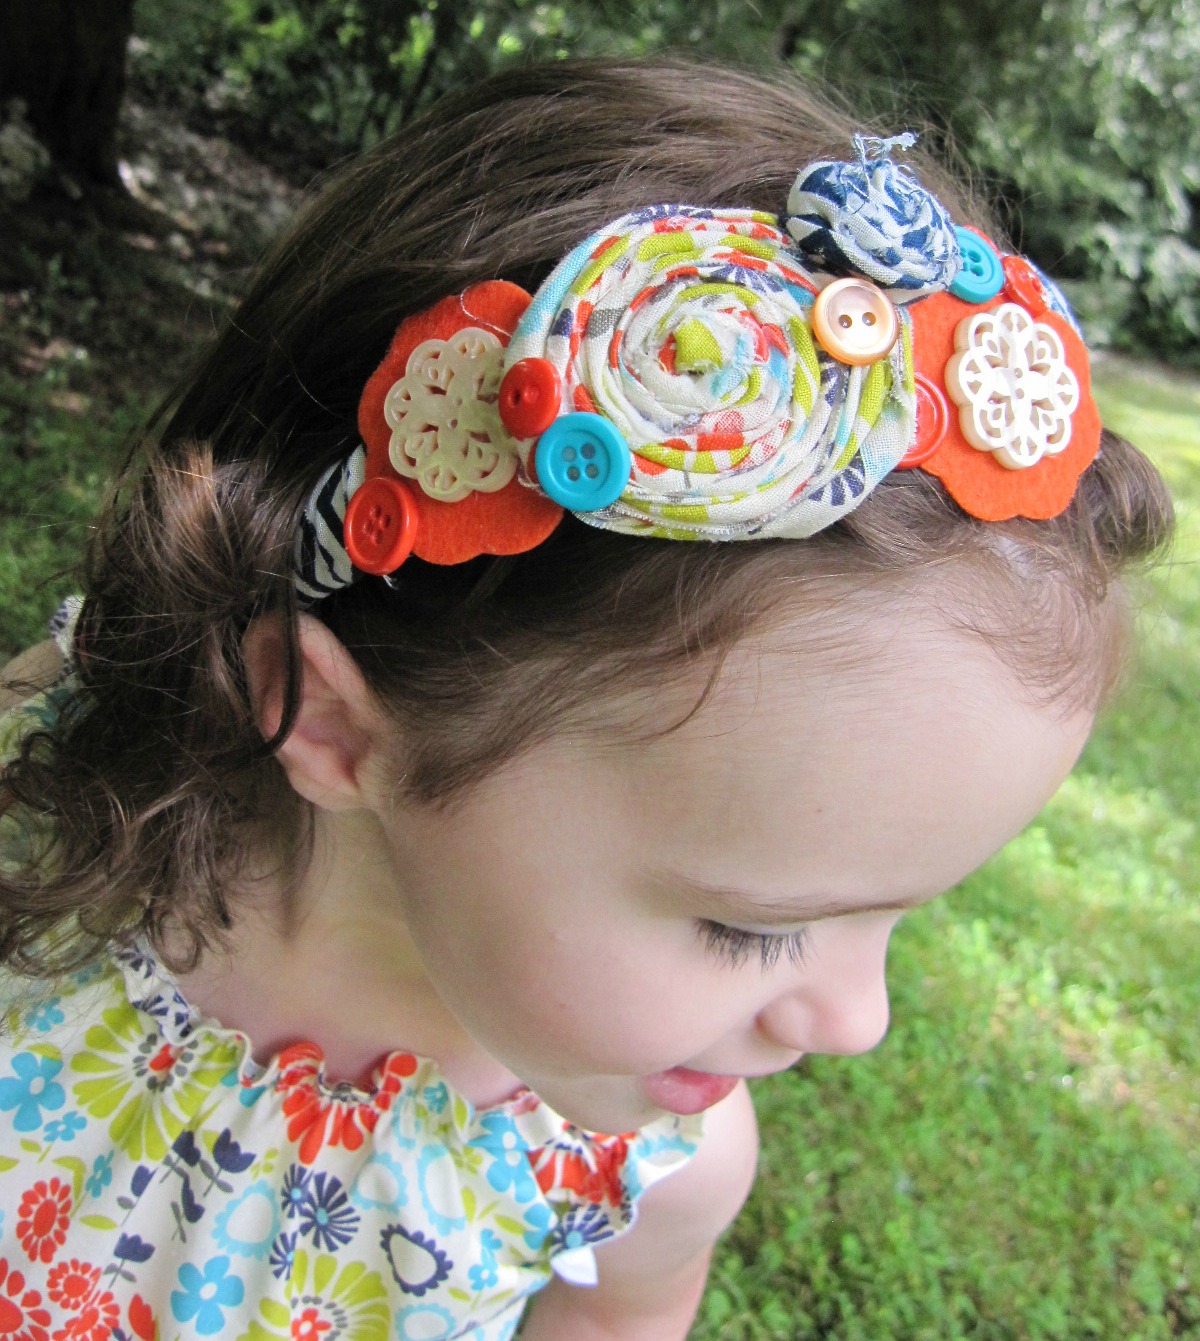
For the bow, I have followed the instructions in this tutorial to make my bow and covered clippie. Once my bow was attached to my clip, I then layered my additional coordinating fabric scraps and once finished, glued the various buttons in place. Quick & super cute!

This sweet ensemble can be worn as is for the last of the warm summer days, top with a sweater as the evenings begin to get cool and then layered with a long sleeve blouse or turtleneck as the autumn days set in. This way, you can enjoy this button enhanced cuteness with your little one right through the next season as well! Hope both you and your child enjoy your Lucy Tunic, Leggings & Hair Accessories as much as we are!
Project Summary: Beginner level sewing project using shirring technique. A fun way to create a one-of-a-kind outfit that everyone will want to know where you got! You can find many excellent shirring tutorials and videos online.