
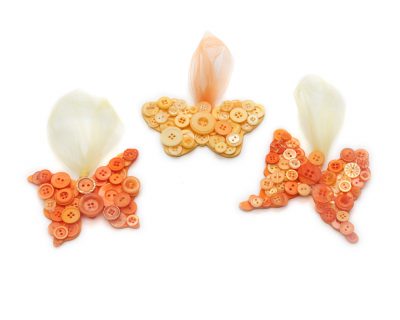
Add some bright pops of color to your home décor with these Button Butterflies. These little decorations are so easy to make. I used simple wood shapes, painted them in a matching color, and glued layers of coordinating buttons on top. Hang them with a matching piece of tulle or ribbon. These would be pretty hanging on a window or mirror. You can also use these as a pretty package decoration. Just tie onto a wrapped gift with some ribbon.
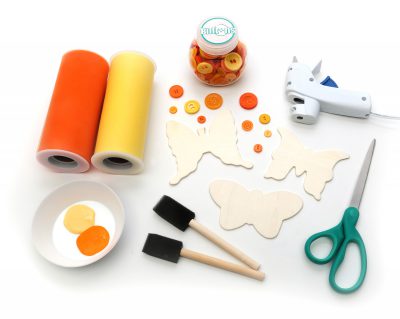
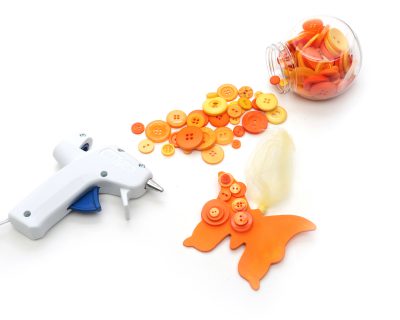
To make these Button Butterflies, you will need the following materials:
Button Jar Marigold 540001010 (you may need more than one jar!)
Glue Gun
Scissors
Yellow and Orange Acrylic Paint
Wood Butterflies in Various Shapes
Foam Brushes
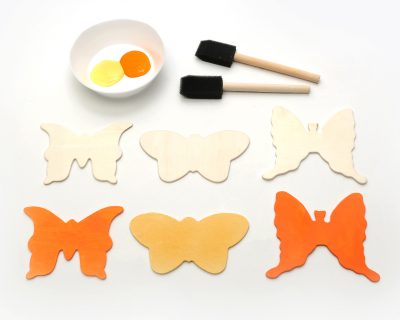
To begin, paint each of the 3 butterflies. Be sure to paint both the front and back of each butterfly. Allow the paint to dry thoroughly.
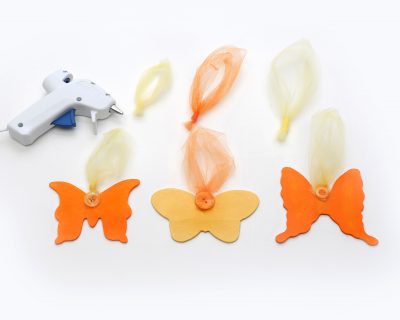
Create a loop of tulle to hang the butterflies. Cut pieces of tulle to desired length and fold in half. Tie the ends of the tulle into a knot. Attach with glue to the back and at the top of each butterfly. Glue a button over the knot and push to flatten.
Select buttons in a variety of sizes to use for each butterfly. Lay out the intended design next to each butterfly. Begin gluing the first layer of buttons onto the wood pieces. Then layer smaller sizes and alternate shades on top of the first layer. Continue adding buttons until you have a design you like.
There are so many fun wood shapes available; you can create decorations for any occasion. Try covering the butterflies or an initial in pink buttons and add to a nursery wall. Use Christmas shapes to create ornaments and package decorations for the holidays.
HAPPY CRAFTING!!