
Wondering why my blog today is about a Blossoming Button Tree? It’s Halloween and I’m blogging about a “Blossoming flower tree”…When a craft project comes around you want to share it with everyone – does it matter what time of the year – No! The way I think/look at it (and many get frustrasted when we craft out of season! it’s like the commercials – Christmas in July!) crafting is an all year event. So if you want to blog about Christmas in the summer I’m okay with that – it’s inspiration…and with the Holidays coming around this would make an adorable gift for someone or maybe you’ll decide to keep it for yourself. If you’re too busy to craft now – well then hold off till the spring! So this is my project for today!
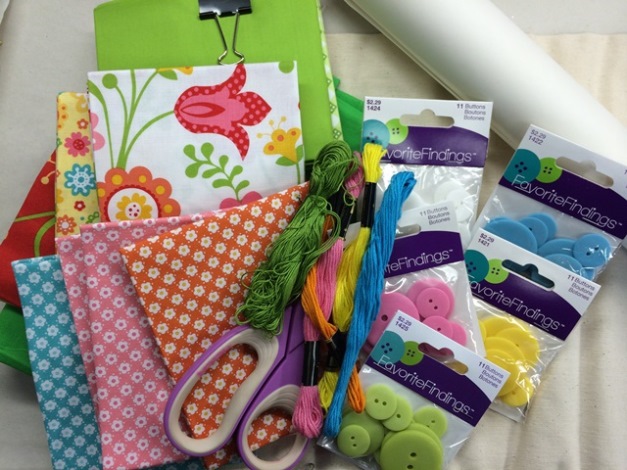
So let’s get started – materials that you will need:
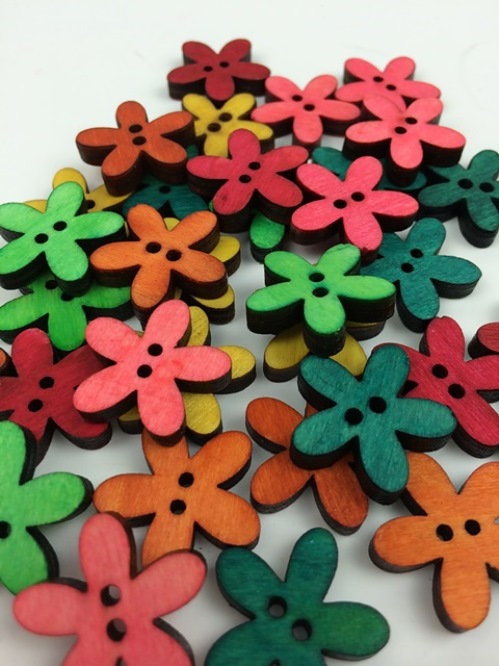
Buttons: Crafting with Buttons – Wood Buttons #470002503 multi colored flowers
Favorite Findings: Matte Buttons – Cloud White #55001424; Rose Bloom #550001428; Lemon #550001421;
Fabric: Canvas; Assorted green; brown; Assorted flower print. Tip: use quilt fabric scraps that you may have lying around your stash.
Embroidery Floss; needle; scissors; Fabric Bond – ultra hold; white paint; paintbrush; frame; adhesive, pencil.
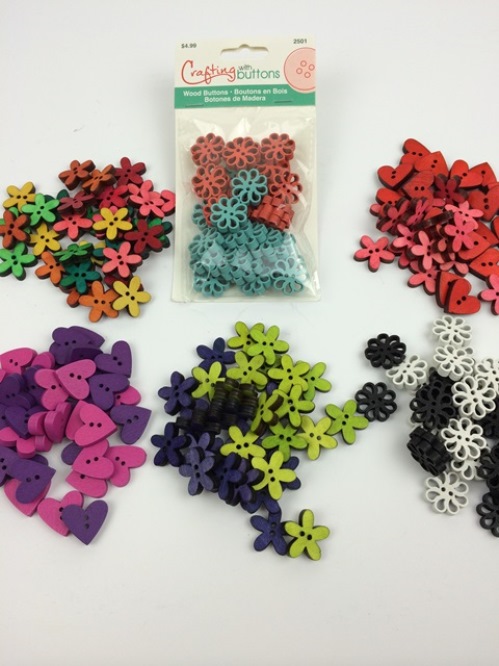
these NEW CRAFTING with BUTTONS are just wonderful – check out these 6 styles we have available!
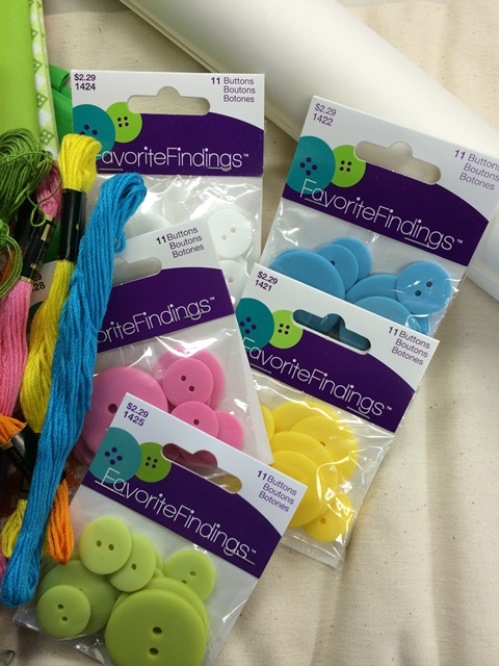
So I added some additional Favorite Finding Matte Buttons – cause I’m never sure what I’ll use – it’s a preference…just to show the variety!
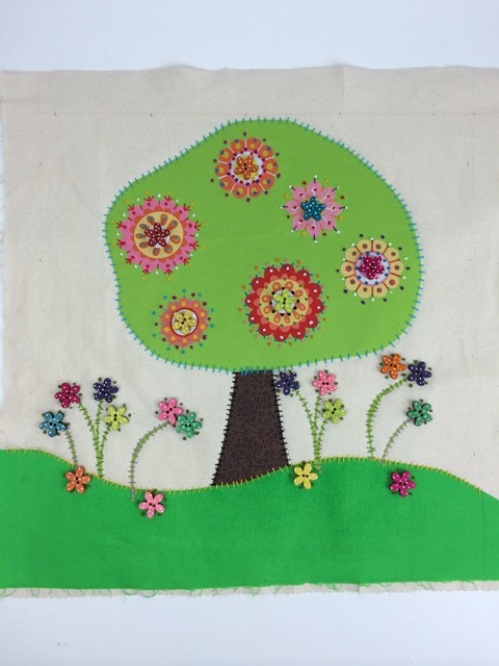
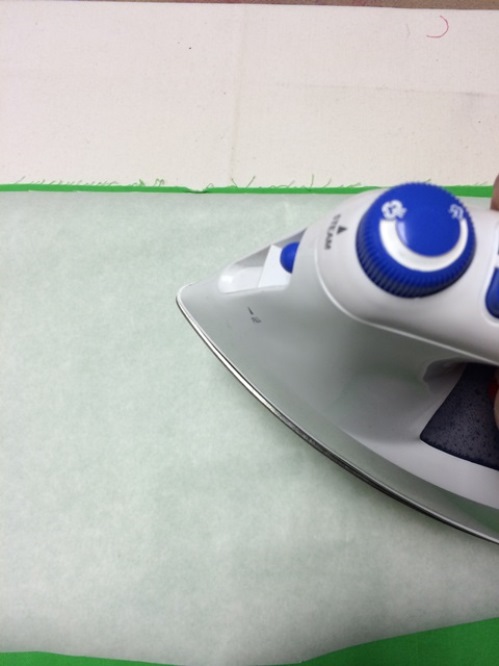
next determine the size you’d like to create – for my project I used a 24 x 24 frame and then I measure the inside to a 20 x 20. Measure and cut your canvas to desired size. At this point you will want to iron on your fabric bond to your fabrics.
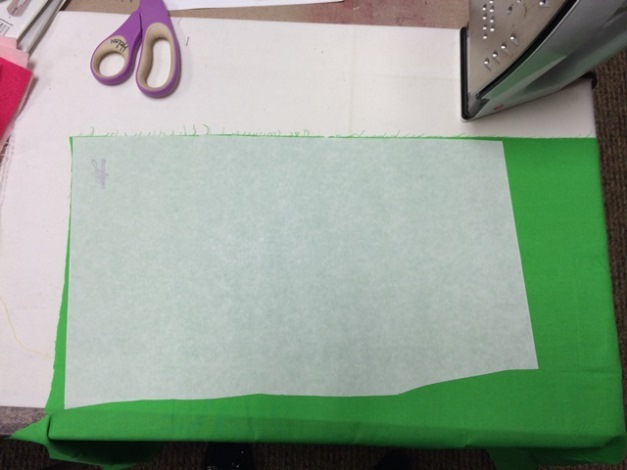
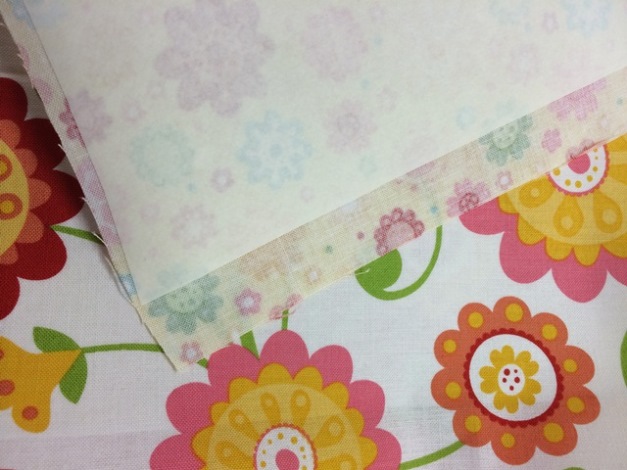
Next – with a pencil lightly sketch out the “grass hill” and “tree stump” and “tree” on the back of the fabric. Cut and set aside until you’ve cut all your fabric. With the paper in tact place your pieces onto the canvas and see if something needs “tweeking”.

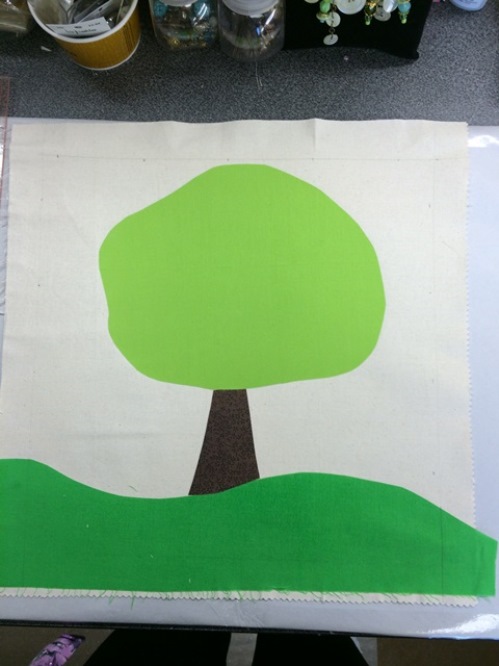
Are you okay with it? as you can see I moved my tree around until I was happy! Remove the back paper lay onto your canvas and with iron adhere (please make sure to read the instructions on the package if you’ve never worked with this adhesive. (it’s actually very simple) Hint: don’t leave the hot iron on the fabric too long! okay onto the next…
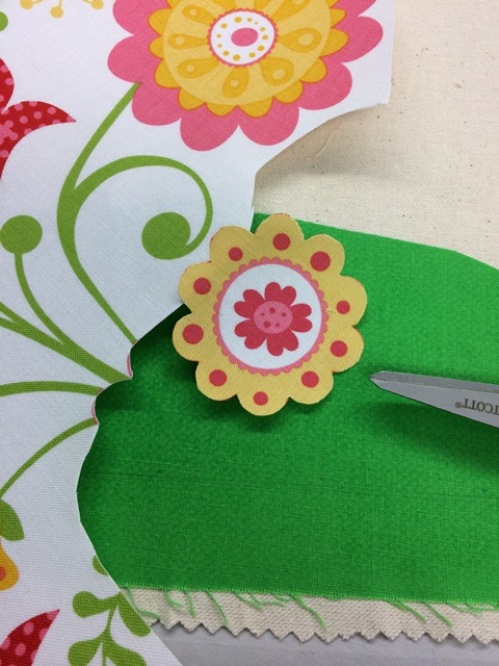
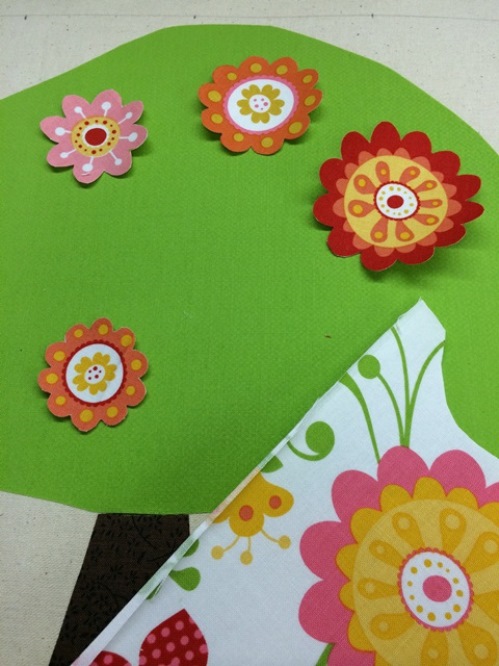
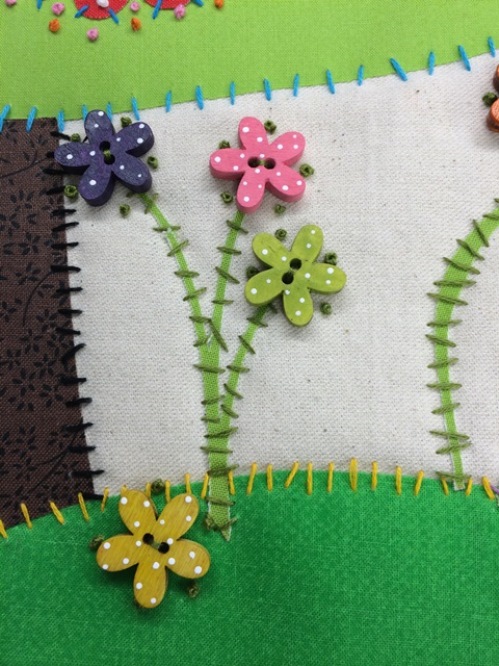
now cut out your flower shapes! lay them out and repeat as above. 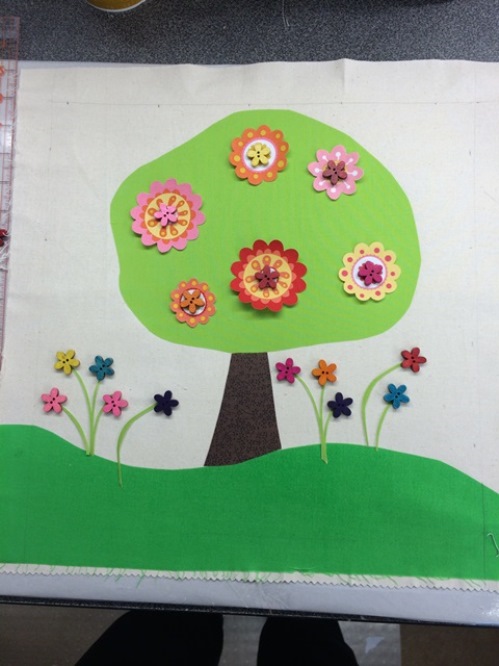
I added the stems from the fabric for the flowers – made sure I was happy before I ironed my pieces onto the fabric…I continue!
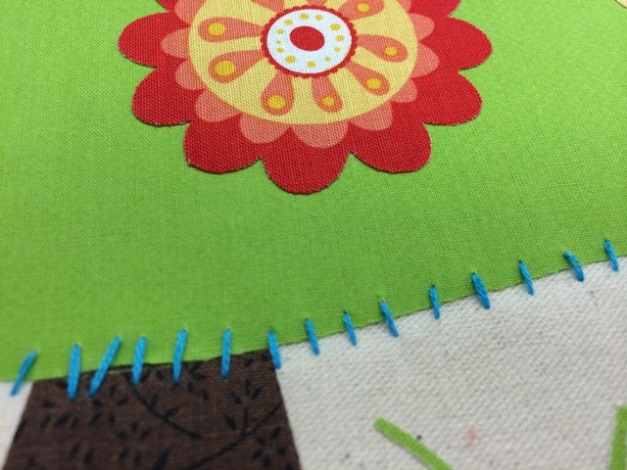
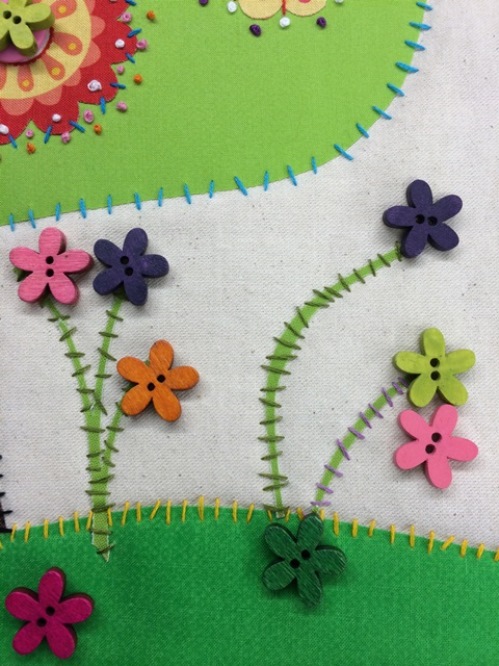
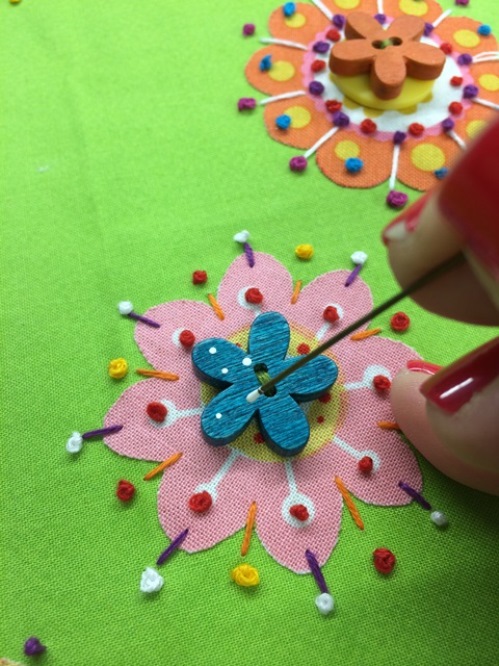
with your embroidery floss begin adding detail – mix the colors have fun with it. Add additional stitches around the flowers – french knots, straight stitch is what I used. In addition layer your buttons – place the matte buttons under the flowers. And yes, I did hand stich the wood flowers on! 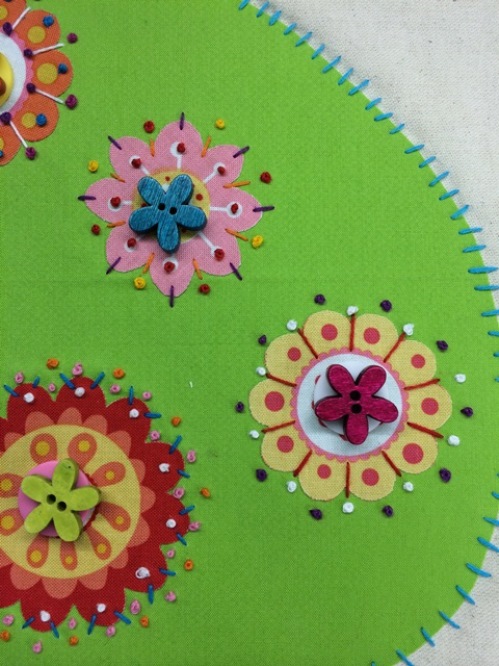
 I could have stopped here and called it a day but it needed more! I decided to add “dots” to my flowers…
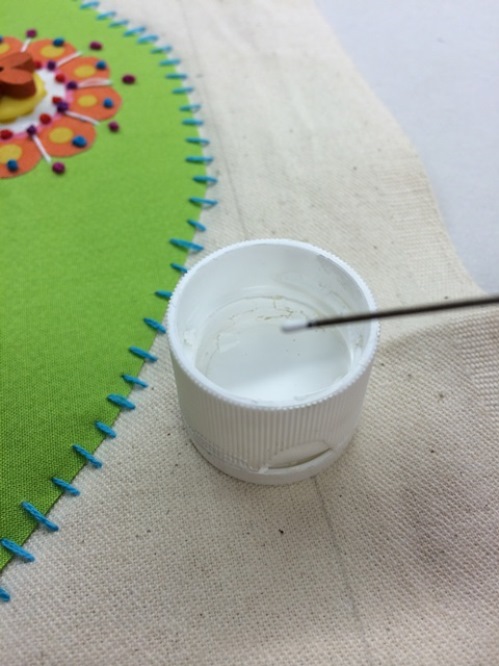
Here’s how…using white paint and the tip of your paint brush dab the tip of the paintbrush into the paint and gently add to the button…
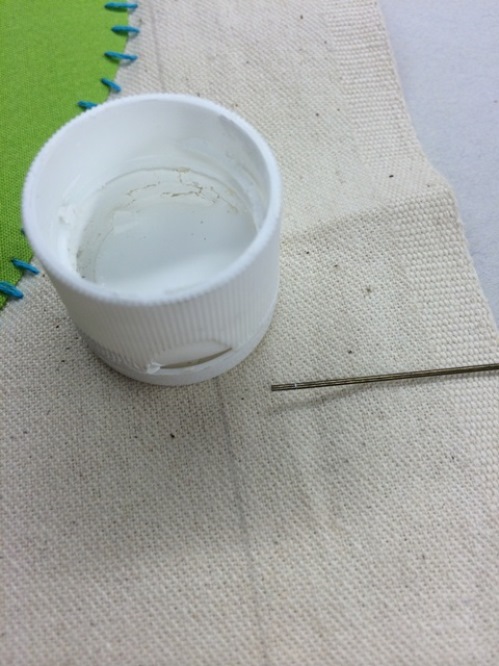

now I’m ready to call it a day…well almost until I get it into the frame that is. So I added some adhesive to the back of my canvas – but I wanted to make sure that this was going to stay on the board – using four (4) buttons, one (1) in each corner – yes I stitched them on. I then finally put it behind glass.

Now you can if you want turn this into a pillow instead. Add a colorful backing to your pillow stitch all three sides add your pillow form and stich and your done!
So now the choice is yours – start your project now and give as a gift – or wait till Spring!
HAPPY CRAFTING!
We are a team of craft-obsessed, button loving people! You probably use buttons almost every day without giving it much thought – they keep our shirts closed and our pants up (hopefully!) - but buttons can be so much more! We created this blog to share all the fun, creative ways we’ve found to use buttons. Our product development team is always coming up with great new button shapes and colors, in addition to new products, so we will always have something new to share with you!