
Rummaging through my old broken jewelry box I found a kilt pin that use to have charms dangling from it – but for some strange reason I can’t seem to part with items that may one day be brought back to life! I keep thinking to myself: Try it — it may work.
So here we go…
 I originally thought a simple Kilt Pin would work – but if the metal loops are soldered then it will not work – unless you have tools that can pry them apart!
For my pin I was able to pry the loops apart to slide my beds and charms onto the pin. I simply cut off the loops from my charms where once dangled the charms. I prepared my work space with all my materials that I will need.
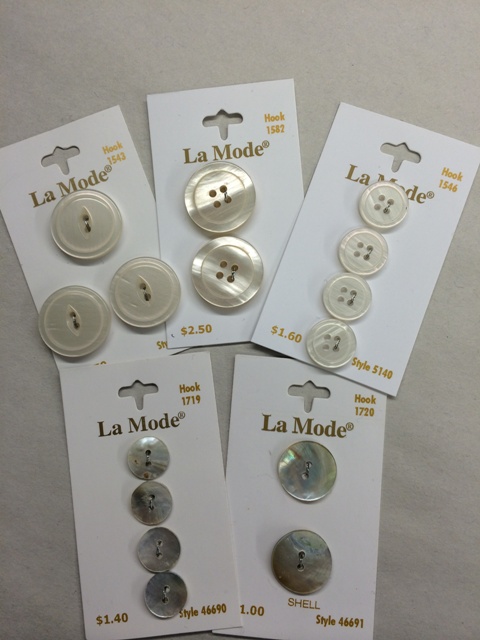
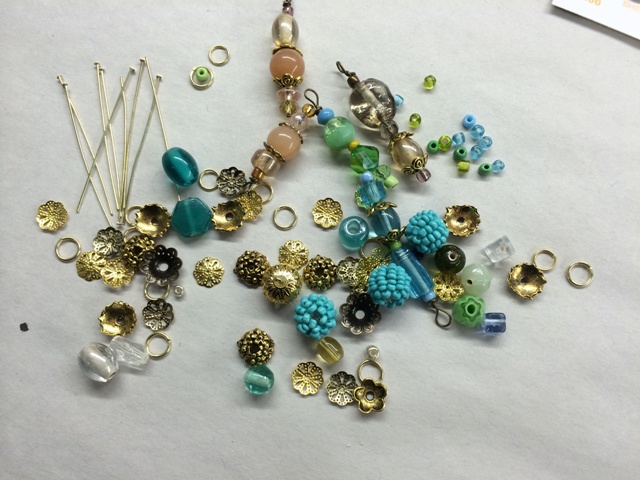
Buttons of assorted sizes and finish (La Mode); glass beads; gold filler beads; jewelry findings; head pins; wire cutter; round nose pliers.
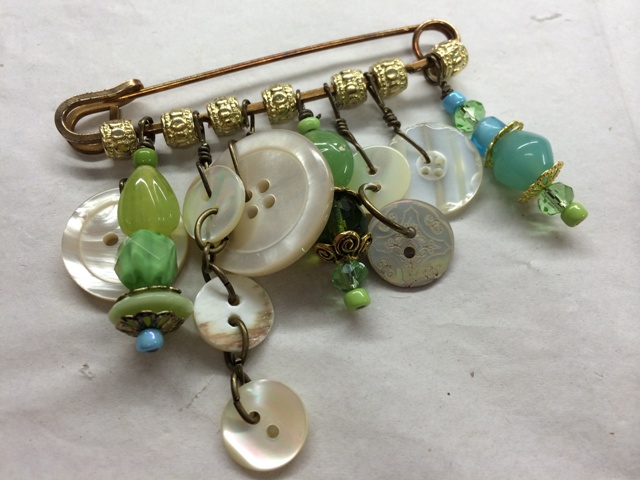
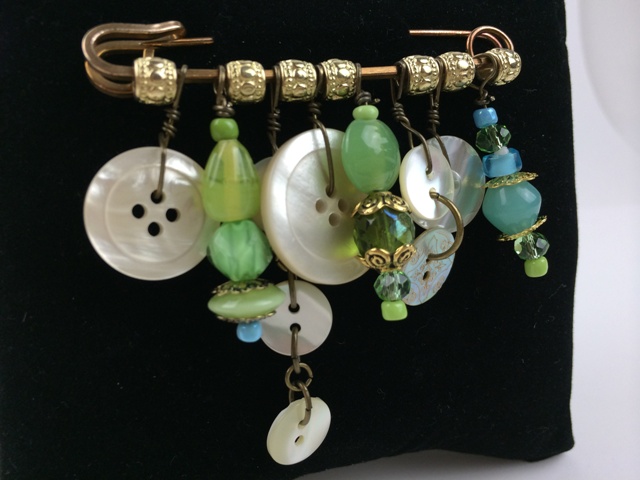
As you can see when I created this project i wasn’t sure what color scheme I wanted to work with – so, I made my Button Kilt Pin interchangeable!
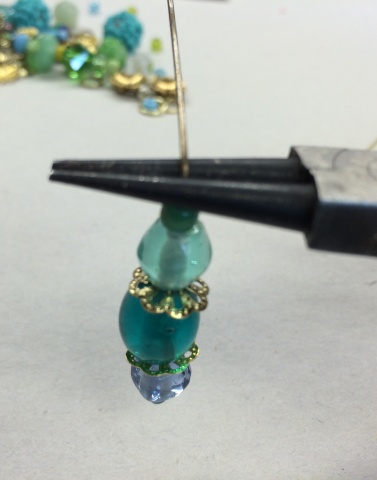
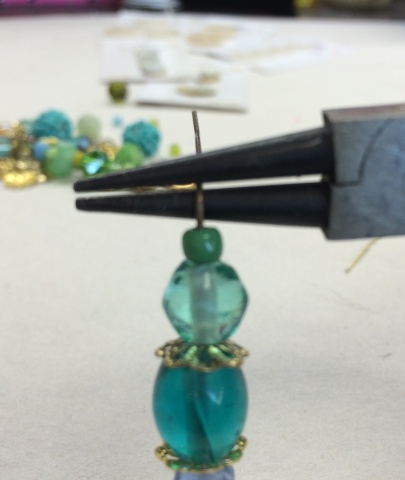
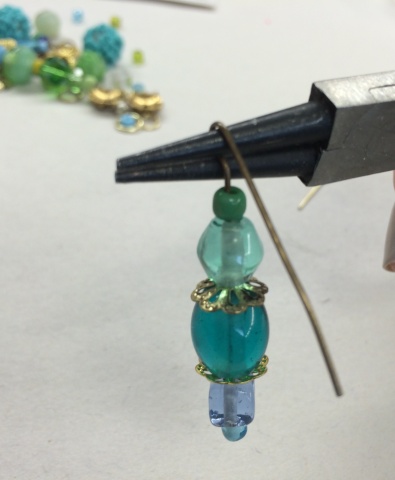
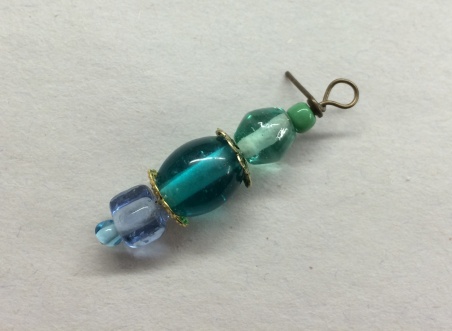
to create, begin with creating your bead dangler – refer to the photo for placement. Once you’ve created your stack – slide it onto the head pin. To create your loop I created a step by step photo…
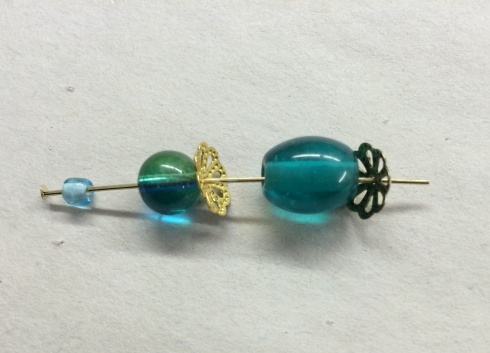
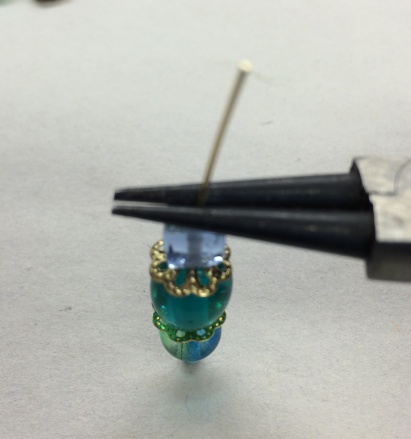
slide your beads onto headpin. Place your head pin stack in between your round nose plier (as shown above).
bend wire away from you. Re-position your tool so it sits on top of the bent portion of your wire.

fold over your wire (towards you) and again re-position your tool. You can also check out many tutorials on You Tube which shows you how to create this.
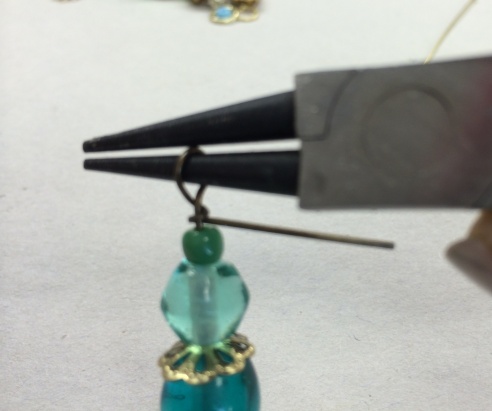
with your hand/fingers grab onto wire (or if you wish you can use a flat nose tool) and begin wrapping wire around neck of the loop. Cut off excess wire.
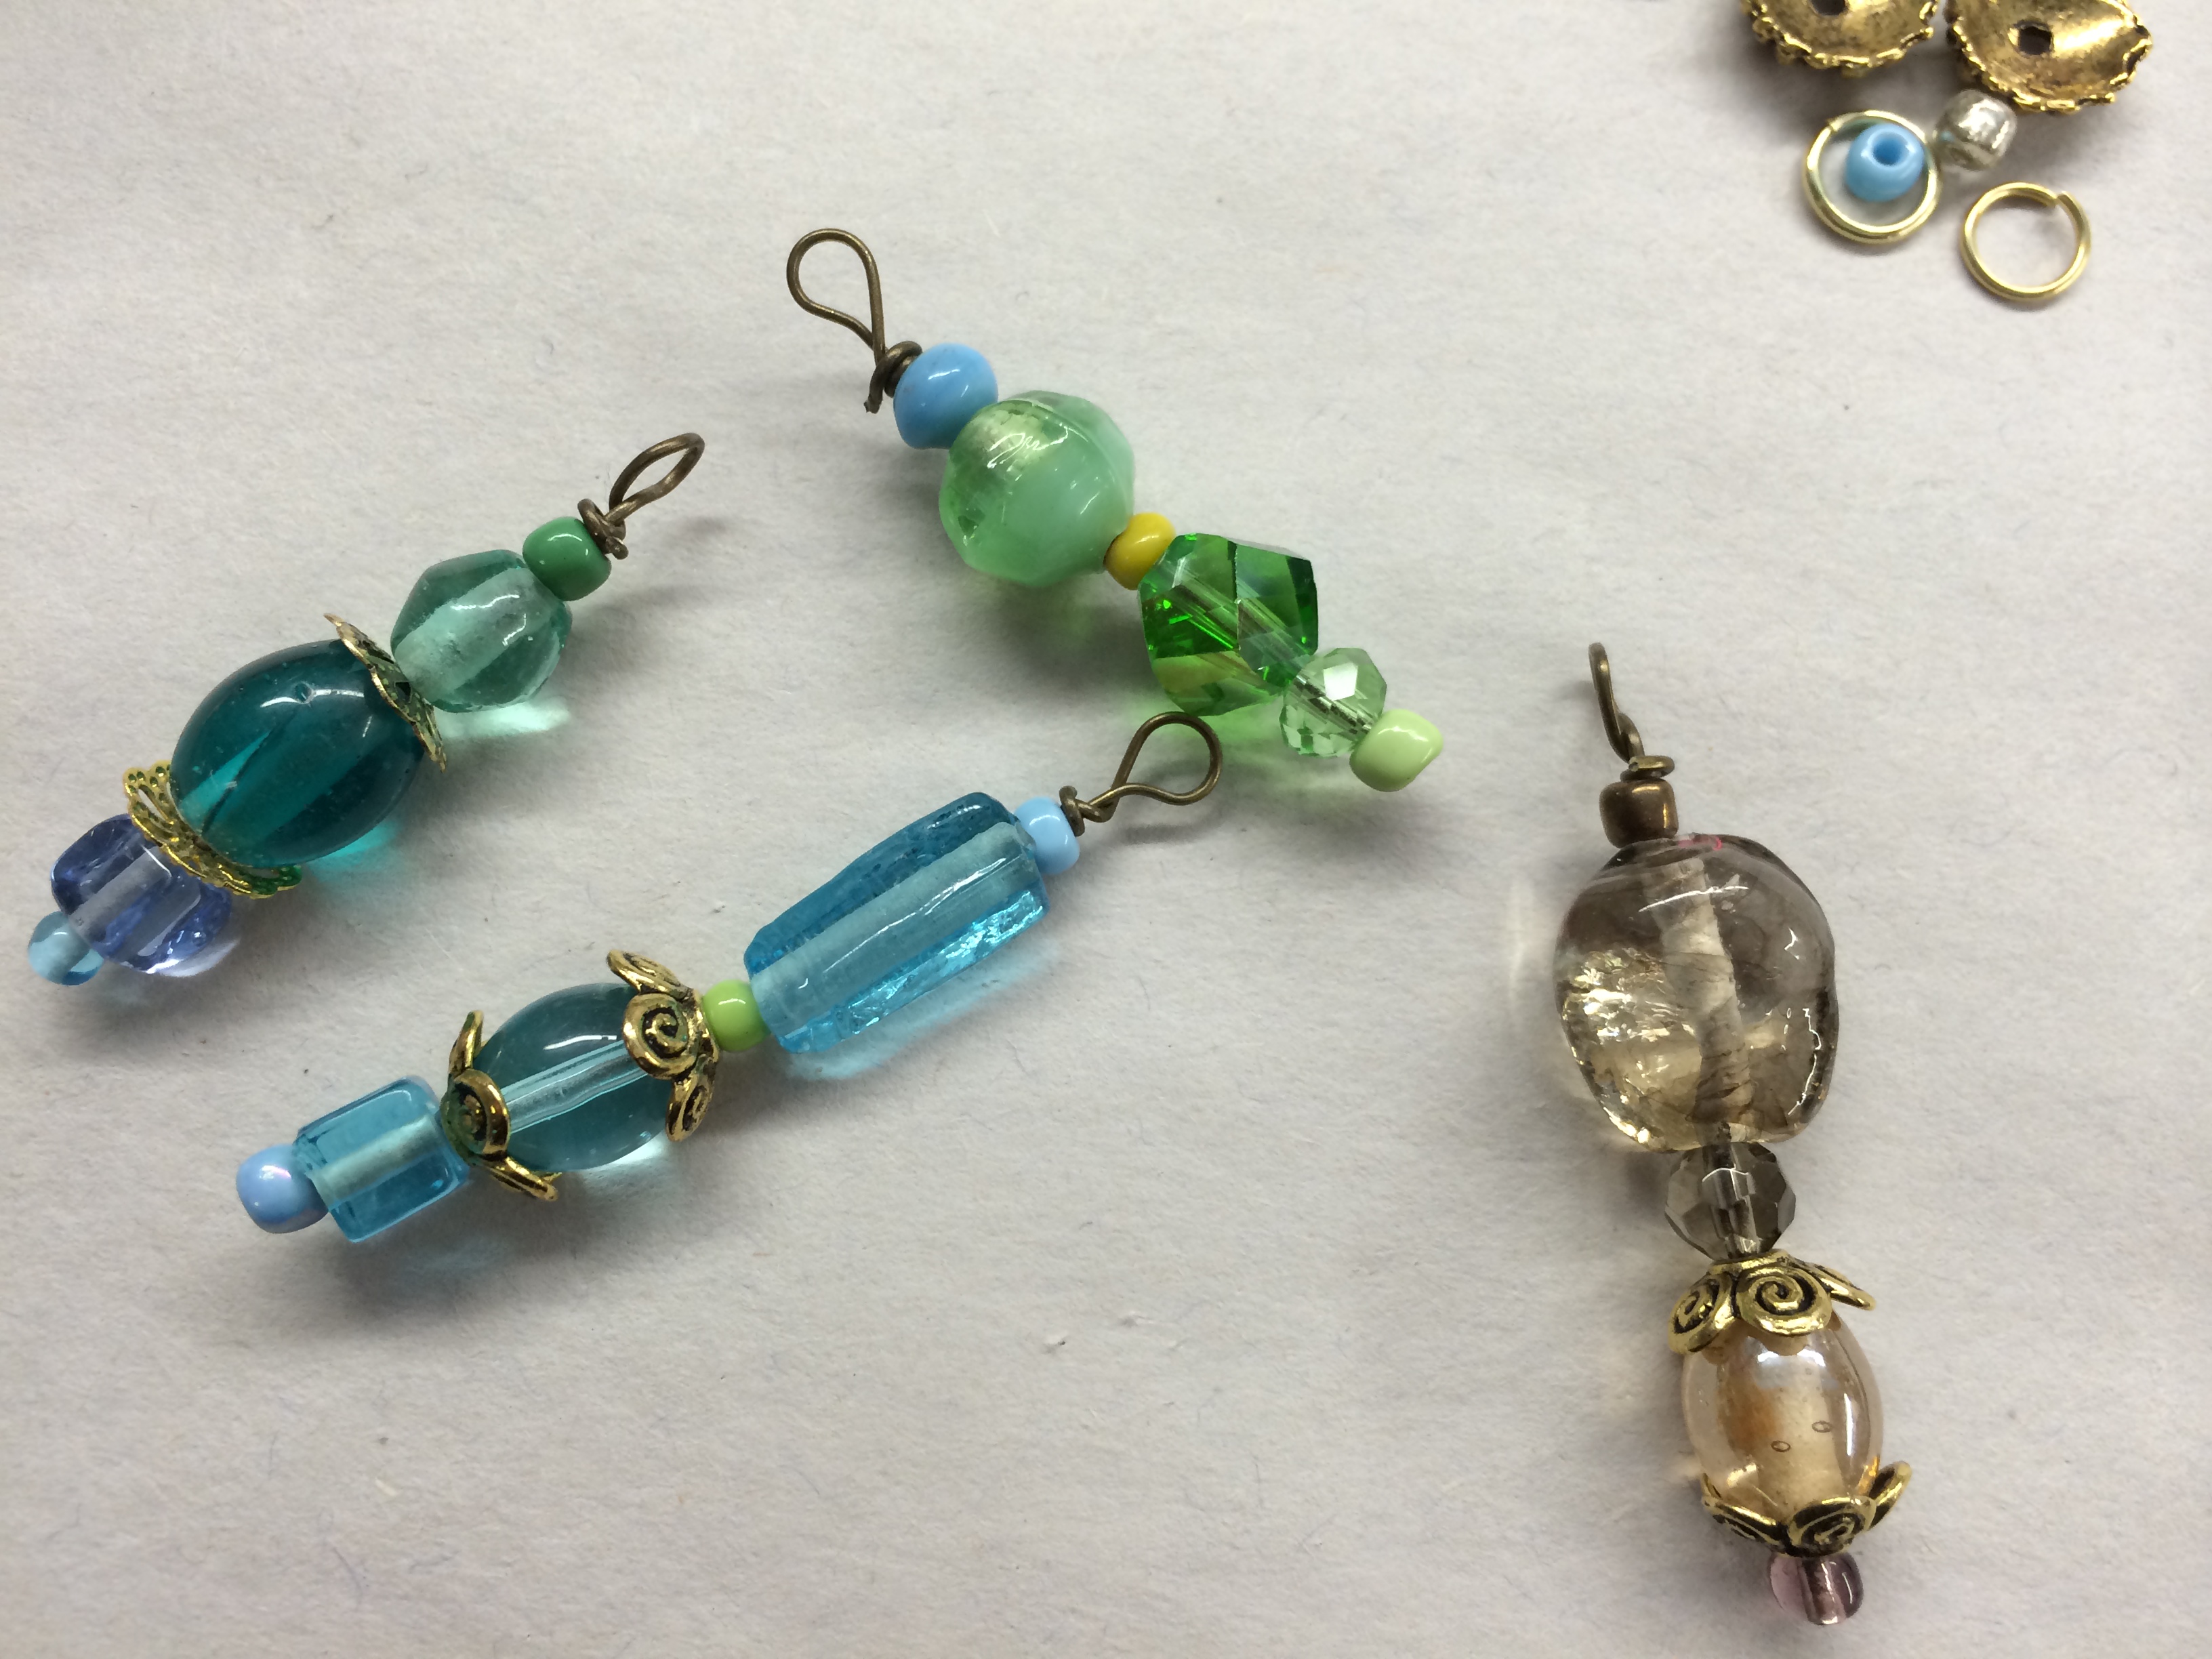
here’s a sampling of my combos…
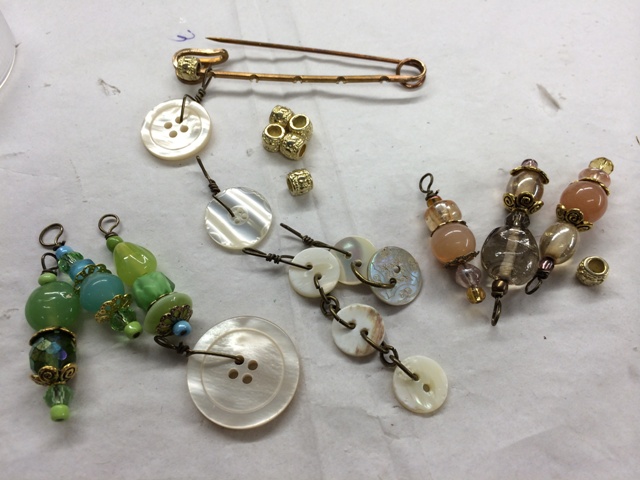
Here’s a better shot of my pin that I de-constructed…although it has some faults I knew I would be able to cover these with the button charms and beads.
To create a button charm – slide the wire through the button hole and follow the same procedure as I did with the beads. To create the Button “dangler” use jump rings to connect.
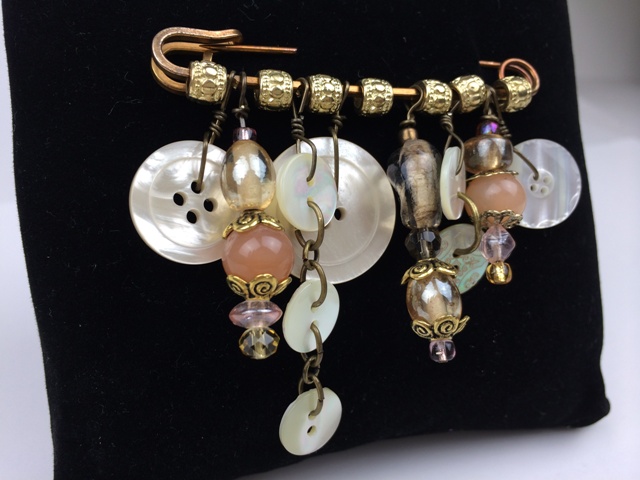
Remember I mentioned that my Button Kilt Pin was interchangeable. Same Button Charms just created new bead charms…
So get creative – RECYCLE your old jewelry that’s just sitting in that box – you never know what you can create!
HAPPY CRAFTING!
We are a team of craft-obsessed, button loving people! You probably use buttons almost every day without giving it much thought – they keep our shirts closed and our pants up (hopefully!) - but buttons can be so much more! We created this blog to share all the fun, creative ways we’ve found to use buttons. Our product development team is always coming up with great new button shapes and colors, in addition to new products, so we will always have something new to share with you!