
If April showers are keeping everyone inside this spring, give this easy Polka Dot Button Bracelet project a try. No glue, no paint, no mess! The kids just need some steady fingers to thread the buttons onto elastic cord (and maybe some help with the scissors!). Layer different size buttons to create a polka dot effect.
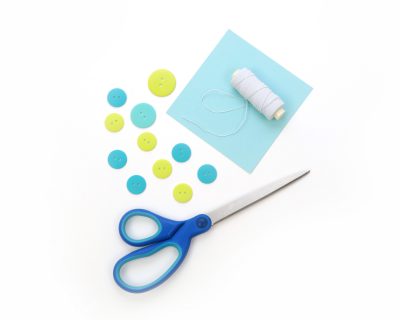
 To make this Polka Dot Button Bracelet, you will need the following materials:
Elastic cord
Favorite Findings Matte Limeade 550001425A
Favorite Findings Matte Ocean Water 550001422
Measuring tape
Scissors
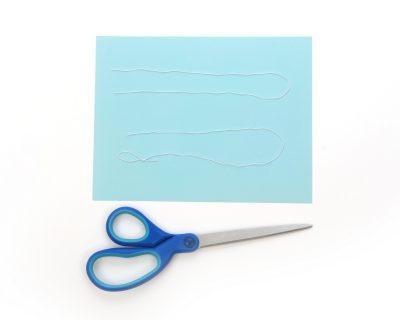
Once you have everything ready, start by measuring your wrist. Add a few inches and cut the elastic cord to this length. Make a loop at least 1 inch wide by tying a knot as shown. You will loop this over the last button to secure the bracelet on your wrist so adjust the size of the loop as necessary.
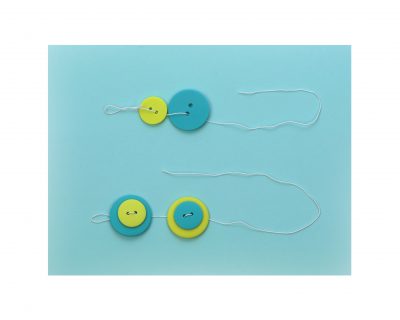
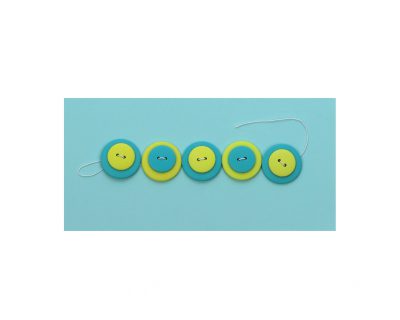
Next, lay out the buttons in your desired pattern. For this bracelet, I used contrasting buttons in two sizes. Then thread the elastic cord through a layer of large buttons under small buttons. Continue weaving through in desired pattern of buttons
When you have the correct length to fit your wrist, make a knot under the last button. Trim both elastic ends of bracelet so they don’t show. Tip: Make sure the knots are large enough so they don’t slip through button holes.
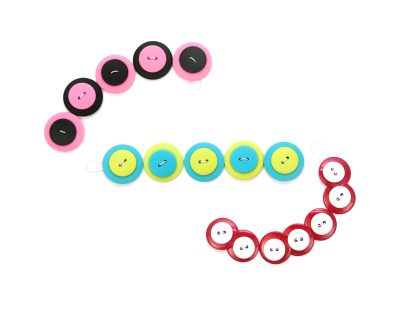
Here are some color variations to give you some ideas. With so many button sizes and colors to choose from the options are endless! You can add these cute bracelets to a goody bag.
Use this same project to create fun napkin rings for a party. With all the button colors available, you can create a set for every holiday! That will definitely keep the kids busy on a rainy day!
HAPPY CRAFTING!!