
I’ve been waiting since the fall to do this blog – dying button hearts! To dye or not to dye – and well I did. I wanted to see the “shades” I would get and overall I was pleasantly happy! The results were fun and each button brings on a new life! Today’s blog is really about the “button” and no so much of the project – but that of course comes later…so let’s get our ready for some shades of red!
Materials: Favorite Findings #550000809 Simple Hearts
Rit Dye – Scarlet Red; Fuchsia; Cherry and Violet – however check out the assorted colors that Rit carries I’m sure they’ll have a color you’ll want to try
Paper towels; plastic/metal containers; spoons; newspaper
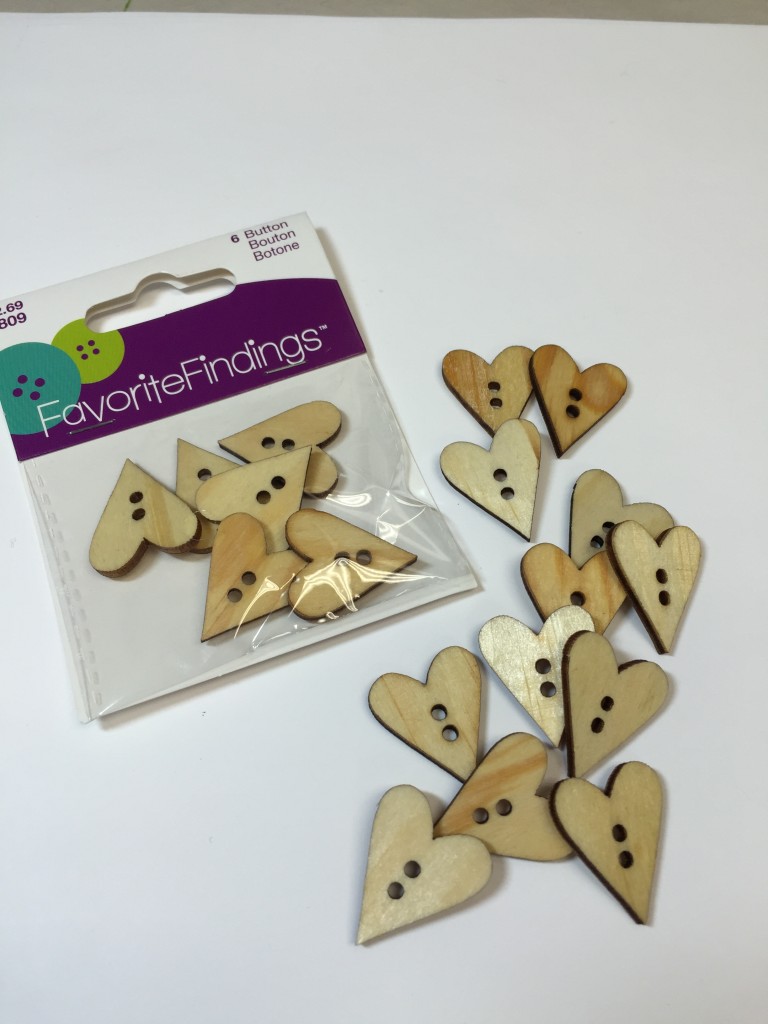
Favorite Findings 550000809 Simple Hearts
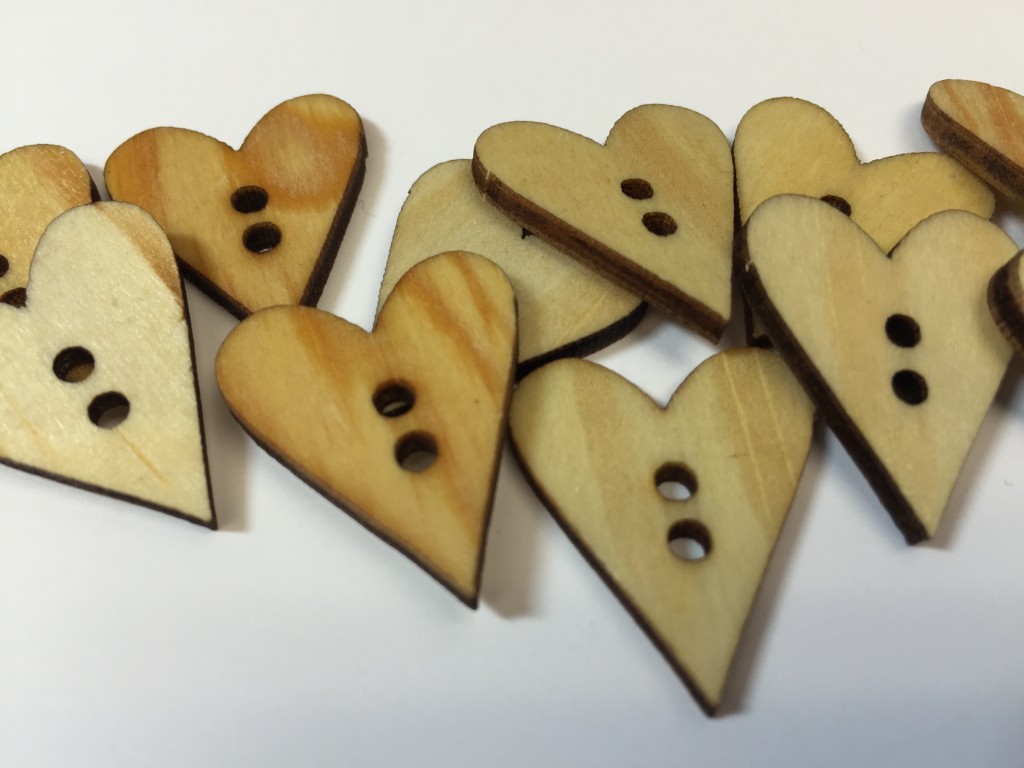
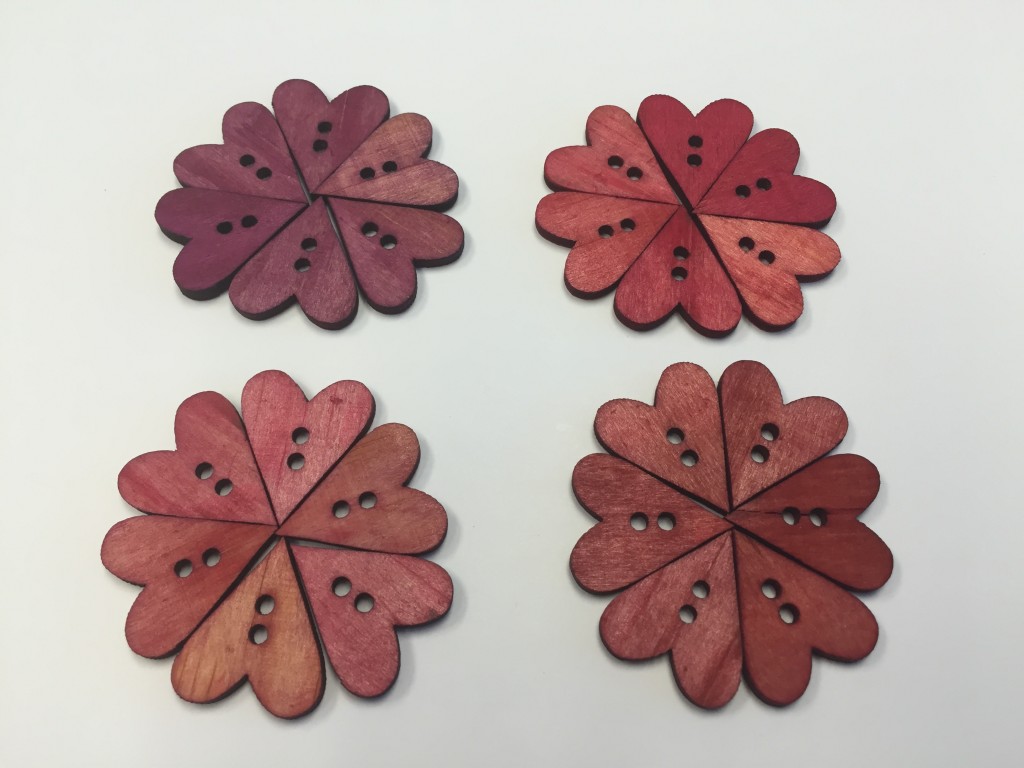
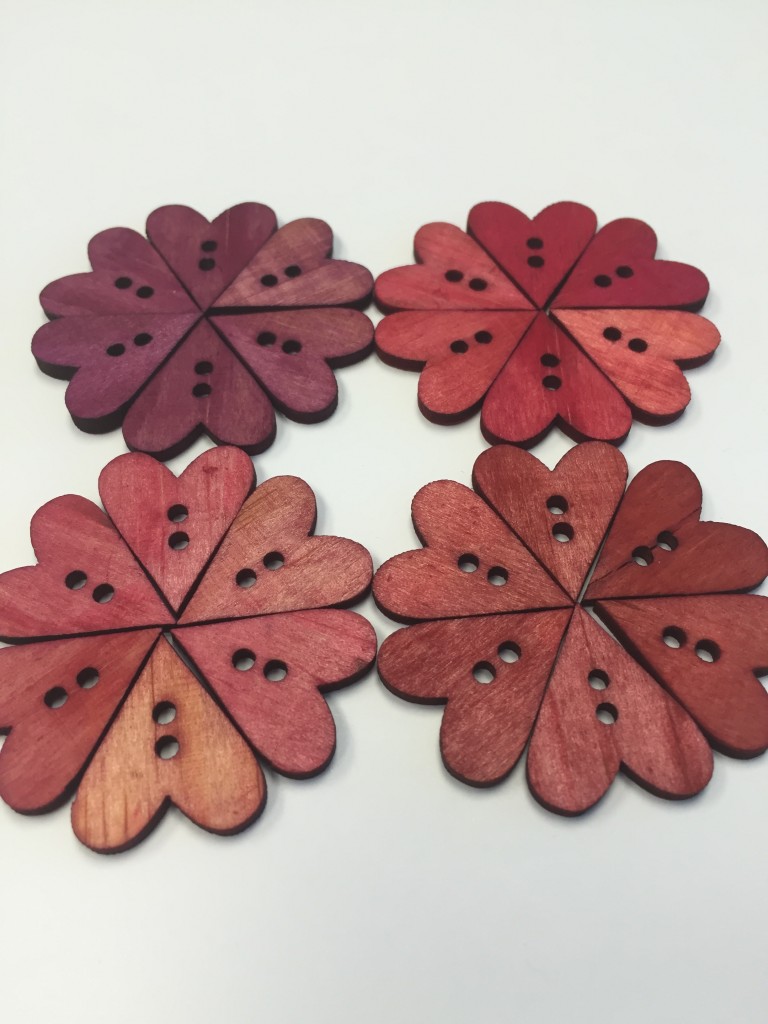
as you can see in the above photo each button has it’s own texture – which will appear as different shades within the button.
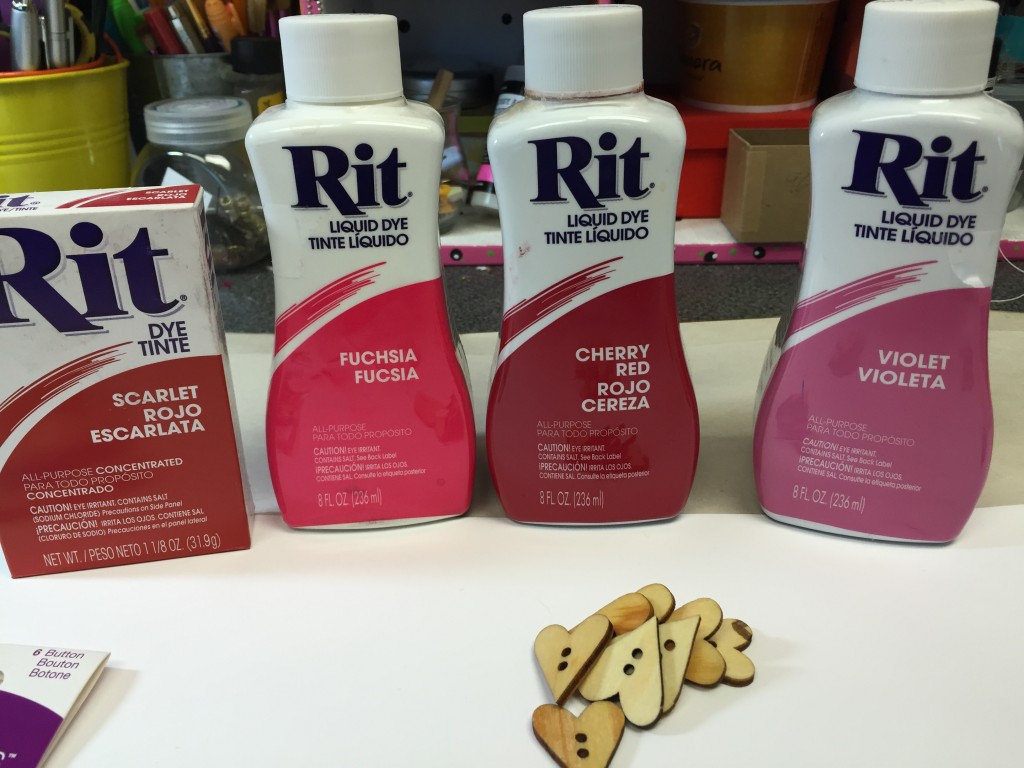
To begin – if you’ve never used Rit Dye before carefully read the instructions (depending on what you’re dying – visit either their website or check them out on You Tube for some helpful tutorials.
Lay down newspaper – paper towels you your work surface. For this project I need 4 plastic/metal containers. Follow instructions on container. For this project since it’s a small project – I simply filled my containers half (1/2) way with HOT water and carefully poured my dye. Make sure to stir your liquid or dry Rit Dye. Before placing buttons into your dye – I suggest that you run your buttons under cold water to “dampen” the button – I found that the color adheres better.
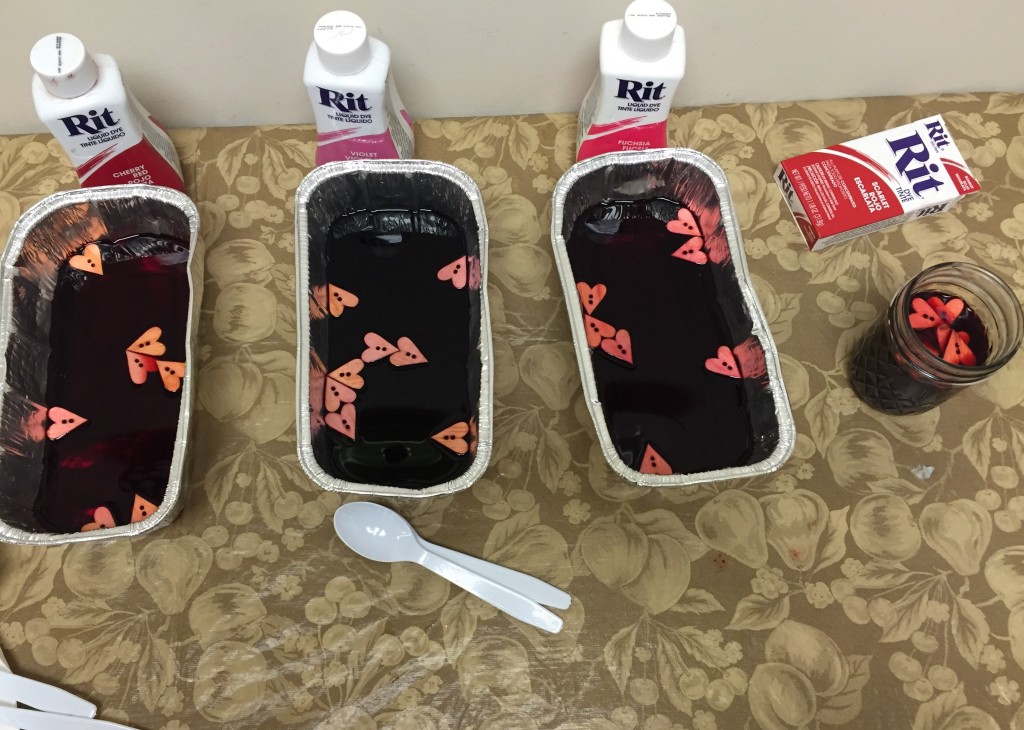
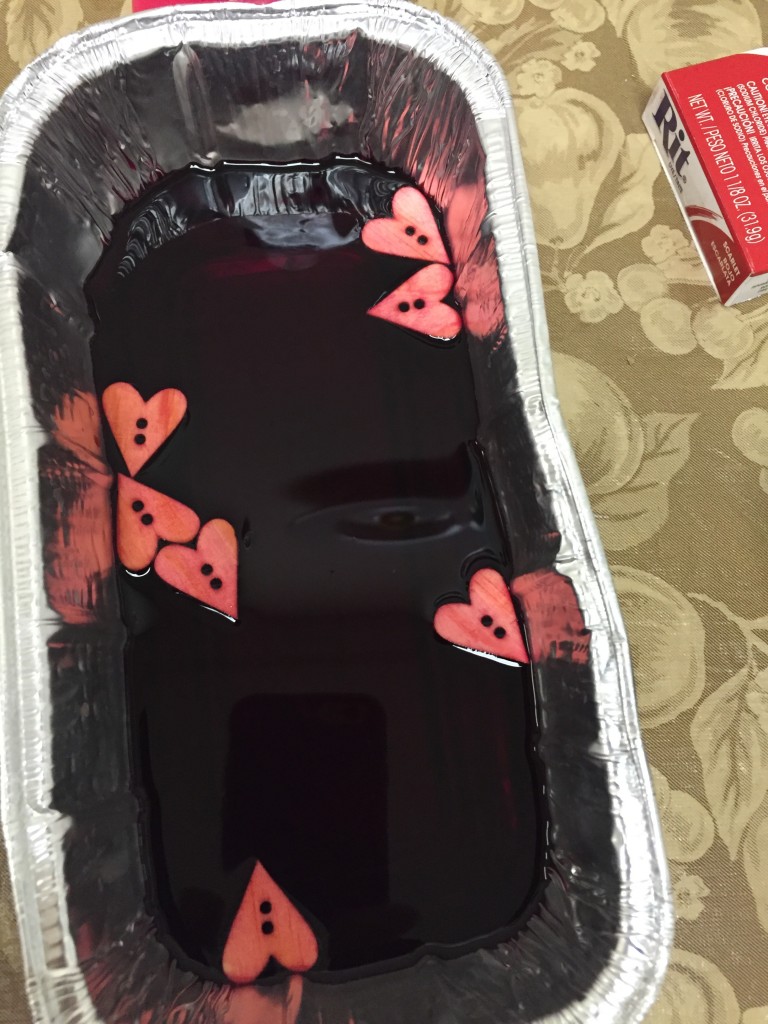
As you can see when your working with wood buttons and they are almost “weightless” I suggest that you flip them every 10-15 minutes until you’ve achieved the color you want.
Once you’ve gotten the color you want remove buttons and rinse under cold water. Set aside and let dry overnight (remember you’re working with wood buttons the color has been absorbed into the wood – this is why your running them under cold water to remove excess dye and it will hopefully prevent it from bleeding onto your project).
So, now you’ve returned and so well how do they look? Remember I did tell you that each button will have a unique look because of the grains of the wood.
These are my buttons and the shades that I achieved. Now onto creating my project…
Now the FUN begins – creating your own special Valentine Button – add glitter, paint, how about some varnish to seal that color?
Stop by next time and see what I ended up creating with my Shades of Buttons!
Make sure to share/post your creations – we’d love to see what you’ve created!
HAPPY CRAFTING!
HAPPY CREATING!
HAPPY VALENTINE’S DAY!
We are a team of craft-obsessed, button loving people! You probably use buttons almost every day without giving it much thought – they keep our shirts closed and our pants up (hopefully!) - but buttons can be so much more! We created this blog to share all the fun, creative ways we’ve found to use buttons. Our product development team is always coming up with great new button shapes and colors, in addition to new products, so we will always have something new to share with you!