
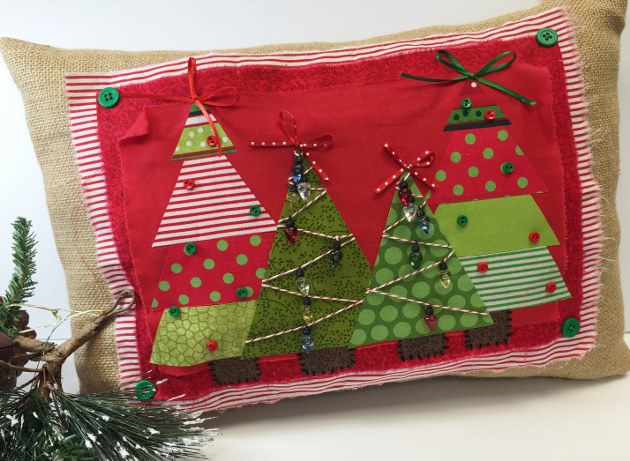
Time to spruce up the couch for the Holiday – and this Button pillow is just the start. The possibilities are endless but I’m creating one that you can even make. So get off the couch and let’s get started…
Materials Needed:
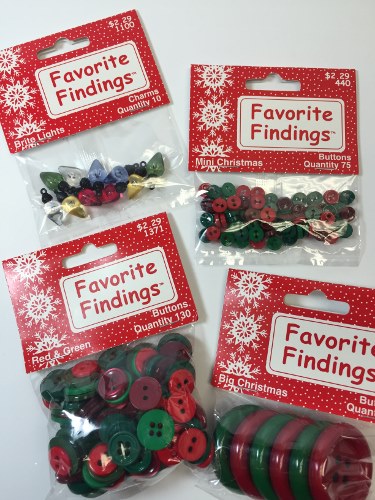
Favorite Findings
#1100 – Brite Lights;
#440 – Mini Christmas;
#1371 – Red & Green;
#501 – Big Christmas
Burlap
12 x 16 Pillow form (or desired size)
Fat quarters: assorted red and green, brown
Ribbon/bakers twine; needle/ thread
Christmas tree template
Computer/printer
Scissors/pencil
Heat n’ Bond = iron on adhesive
Ruler
- Sew your burlap to fit pillow form – leave one short side open and once the sewing is complete , turn the pillow case inside out and lay flat on workspace. Measure 2″ from the open edge, and fold flap underneath the burlap pillowcase. the remaining area is for the completed design.
- Measure and cut all fabric needed: Fabric background: 12 ½” x 9 ½” red and white stripe; 12” x 8” red print; 10 ½” x 8 ¼” solid.
- Adhere iron-on adhesive onto your cut fabric (follow directions on package). Iron first layer onto burlap fabric (we suggest you place craft paper inside the burlap pillow form so that it does not adhere the burlap together) repeat for each layer center as you go along.
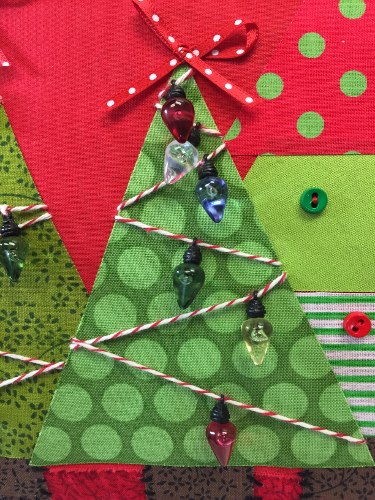
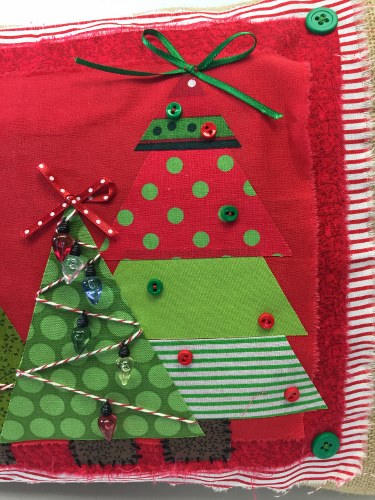
- Using a computer locate a template for your Christmas trees. Print. Prior to tracing onto fabric – iron on adhesive to each fabric you will be using for your trees. Trace tree pattern and cut fabric. Once all cut layout your design onto the fabric. Once satisfied – adhere to fabric (follow layout concept as shown) Add the stump to the trees. Now you’re ready to embellish
- Using embroidery floss attach your fabric to pillow with buttons to each corner as shown in diagram
- Fold over excess fabric and stitch closed by adding your buttons as decorative closures as shown.


insert pillow inside the burlap pillow cover. Turn the pillow with the design side down. Fold the flap toward the back of the pillow cover. Sew three Big Christmas buttons to secure the back flap closed as shown in the photo below…Add some fun – use bakers twine to stitch close.

We’d love to see your Holiday Button Pillow you created – so make sure to share with us on our Facebook page!
Happy Holidays!
Happy Crafting!