
Hoot Hoot? That’s right as in our Christmas Button Owls from our Favorite Findings Holiday collection at JoAnn Fabric & Craft Stores. These “whimsically” wrapped packages embellished with our buttons will surely put a smile on their faces.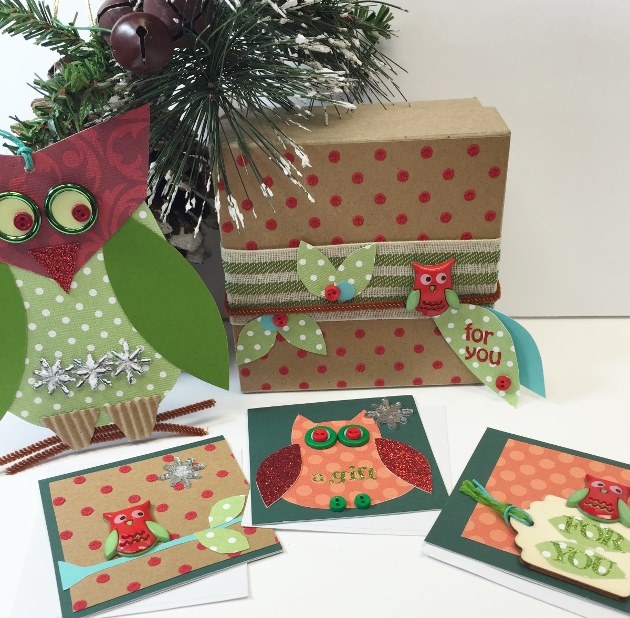
Materials Needed
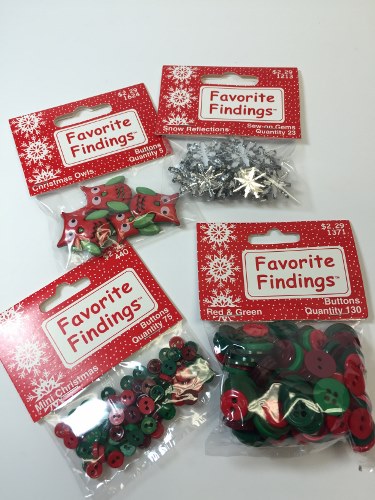
Buttons: Favorite Findings Christmas Owls #1624 (these are available at Joann’s stores)
Mini Christmas #440
Snow Reflections #1213
Red & Green #1371
Coordinated printed and solid cardstock; flocked kraft, green, turquoise, glitter, red, corrugated
Small green gift cards and envelopes 3″ square
Kraft paper box
green striped ribbon
Green & turquoise twine
Wood Tag
Brown chenille stems
Patterns for leaf shapes; owl shapes
Glitter letter stickers
Scissors; pencil; ruler; craft glue/hot glue and sticks; small hole punch
All materials above are combined to make all three projects.

Owl Wrapped Gift Box
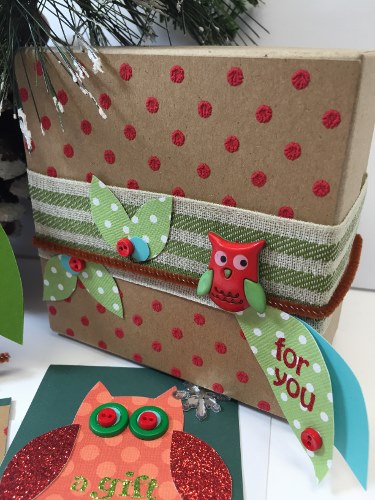
Cover top of box with flocked kraft paper. Wrap box with green striped ribbon. Wrap ribbon with chenille stem.
Print out pattern for leave and dots. Cut leaves out of the green printed and turquoise cardstock. Glue in place.
Add “For You” in glitter letters on large leaf.
Glue buttons in place on box
Owl Gift Card Set of 3
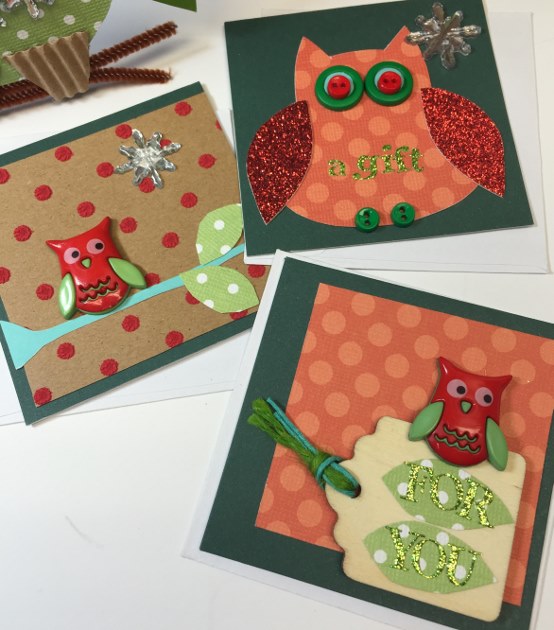
Card 1: print out pattern pieces for owl body and wings. Cut body shape out of printed cardstock. Cut wings out of glitter paper glue in place on card. Glue buttons on for eyes, feet and snowflake in corner. Add “a gift” with glitter letters.
Card 2: print out pattern pieces for leaves and twig. Cut kraft paper square and glue on card. Glue turquoise twig and leaf shapes in place. Glue buttons in place.
Card 3: print our pattern pieces for leaves. Cut printed paper square and glue on card. Thread twine through wood tag. Glue tag on card. Glue leaves on tag, add “For You” with flitter letters on the leaves. Add button.
Owl Gift Card Tag/Ornament
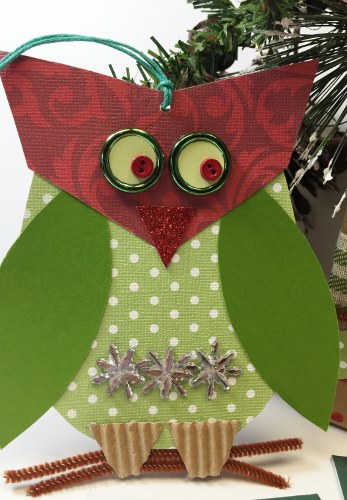
- Print out pattern pieces. Cut body shape out of solid green cardstock for base of card. Cut lower body shape out of green print paper. Glue print piece on solid piece.
- Cut 2 wings out of green cardstock, glue in place.
- Cut head shape out of red print paper, glue in place. Cut 2 feet shapes out of corrugated kraft paper, glue in place.
- Cut 2 pieces of chenille stem and glue to feet.
- Cut 2 circles out of green paper to fit inside green metallic buttons. Glue in place on head. Add 2 mini red buttons on eyes. Cut small beak shape out of glitter and glue in place
- Glue 3 snowflake buttons on front.
- Cut “pocket” shape and glue on back to create holder for card.
- Punch hole at top and thread with twine for hanging.
Remember these project doesn’t just have to be for the holiday – you can change out the snowflakes for some round buttons!
The above projects were created by designer Janet Pensiero.
HAPPY HOLIDAYS!
HAPPY CRAFTING!